This post may contain affiliate links. Please see my full disclosure for details.
Hi Bold Bakers!
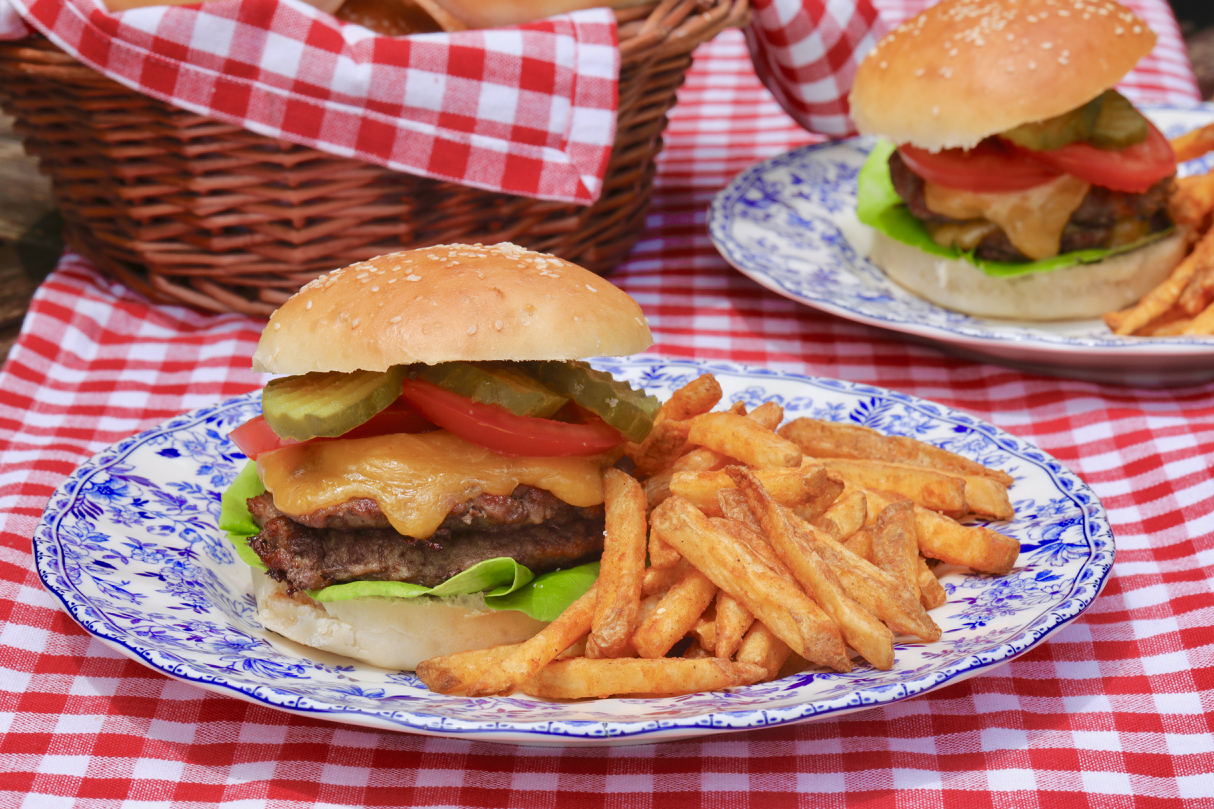
Since no BBQ, picnic, beach day, or camping trip is complete without an incredible burger I decided this summer was the time to show you how to make my 1-Hour Homemade Hamburger Buns!
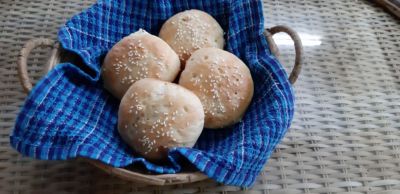
Since a burger is only really as good as its bun, you DO NOT want to go for those flavorless, store-bought buns! My Homemade Hamburger Buns are made with real yeast, milk, flour, a bit of butter, some sugar — and that’s it! Topped just like the real deal with sesame seeds, these look like the quintessential Hamburger Buns, but the flavor is tenfold! This bun recipe is right on time for 4th of July and you’re going to LOVE them!
How Do You Shape Hamburger Buns?
One of my talents is working with dough. There is a little bit of a trick to shaping the dough into a nice clean bun.
The trick is not to use both hands, rolling the dough around between your palms, but rather to use one hand to push the dough against the palm of your other hand, smoothing it out and tucking in the seams. Once you have one side nice and smooth place it seam-side down on your tray, revealing a smooth rounded bun! If it’s not perfect or you don’t get it nice and smooth on the first try, no worries, this takes practice!

How Do These Hamburger Buns Only Take an Hour?
The dough will rise 1 time for 20 minutes, then after being shaped, they rise for another 20 minutes. Lastly, they are baked for 18-20 minutes. You don’t have to be an expert bread baker to make the most incredible bakery style Hamburger Buns at home.
How Long Do Hamburger Buns Last?
These buns can be made 2-3 days in advance depending on if you’re going to toast your buns or not. If you’re going to serve them un-toasted they are nice and fluffy for up to 2 days. If you still have them after 2 days, I suggest toasting them.
How to Store Hamburger Buns
To store your Hamburger Buns, cover them in an airtight container at room temperature. Also, they can be frozen for up to 4 weeks.

Tips and tricks to making Burger Buns
- Use instant OR active yeast in this recipe
- Careful not to overheat the milk, it only needs to be lukewarm
- Don’t add all the milk in at once in case you don’t need it all
- Freeze the baked rolls in an airtight container in the freezer for up to 4 weeks
- You can replace the sugar with runny honey in the same quantity
- Top the buns with un-toasted sesame seeds
Try These Other Recipes!
And don’t forget to follow Bigger Bolder Baking on Pinterest!
Try These Recipes!

Ingredients
- 4 cups (20oz/566g) all-purpose flour
- 2 tablespoons sugar
- 1 tablespoon instant yeast* (if using active yeast see notes)
- 1 teaspoon salt
- 2 tablespoons (1oz/28g) butter, softened
- 1 1/2 cups (12floz/340ml) milk, warmed
Egg wash:
- 1 egg yolk
- 2 tablespoons milk
Topping:
- 3 tablespoons sesame seeds
Instructions
- In the bowl of a stand mixer fitted with a dough hook, add in the flour and sugar. To one side of the bowl, mix in the dry yeast. On the other side, mix in the salt, being sure they do not make direct contact as this can deactivate the yeast.
- In a separate jug, combine the butter and milk then gently heat in the microwave just until the butter is melted and the milk is lukewarm.
- Turn the mixer on low-speed and stream in the wet ingredients, holding some back to ensure the dough does not get overly wet. Once the dough forms a ball and cleans the bottom of the bowl, knead for about 6-8 minutes. The dough should be smooth and elastic.
- Transfer the dough into a lightly greased large bowl and cover tightly with cling wrap and a tea towel. Let the dough rise in a warm place to proof, about 20 minutes.
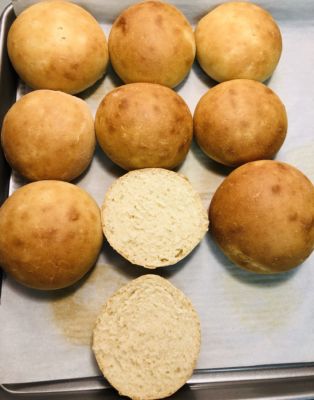
- After 20 minutes, turn the dough out onto a lightly floured surface. Using a dough cutter or knife, cut the dough into 9 (3 1/2oz/99g) balls.
- Roll each ball against your work surface with your hand to shape into a smooth bun. The pressure against the table will help you get a round, smooth roll. This takes some practice.
- Line a baking tray with parchment paper then place each bun (seam side down) about 2 inches apart on the baking tray.
- Using a pastry brush, apply a thin even layer of egg wash to the buns, ensuring there is no excess dripping down the side of the bun (this can keep them from rising up evenly when baking).
- Sprinkle each bun with sesame seeds then cover the tray with cling wrap, making sure the buns are sealed nice and tight. Place in a warm spot to proof for a second time for 20 minutes.
- While the buns are proofing for a second time preheat your oven to 400°F (200°C).
- After 20 minutes, GENTLY peel back the cling wrap.
- Bake the buns for 18-20 minutes, until golden brown and risen.
- Transfer the buns to a rack to cool, before slicing in half and serving.
- Cover and store the buns in an airtight container at room temperature for up to 3 days. Freeze the buns for up to 4 weeks.
- * This means activating the yeast, usually in the liquids to be used in the recipe. Normally you would bring the sponging liquids to blood temperature, that is when you put your finger into the liquid it should feel neither hot nor cold. A touch of sugar or honey will speed up the activation. This is really ‘proving’ to you that the yeast is good and active. A foam will form/sponge on top of the liquids after 5 mins or so, you stir this through before adding to the flour. Add ¾ in one go, then the remainder until the dough comes together in a clean ball.


Do you have a video on shaping the buns? I am a very visual learner. Having said that I have made these two times now and they are the BEST! Definitely a keeper.
I loved it all the way from Zimbabwe, didn’t disappoint thanks
Can I skip the egg and do a milk wash ?
Buns came out great, first time I made them!
Hi Gemma, wondering if you have the video for this Burger bun recipe. Sorry I can’t find it in your youtube channel. Thanks for sharing.
This recipe is ah-mazing! I make bread all the time, among other things, I love baking. Yesterday, broke and out of bread, or buns, AND on a time constraint, I was curious to see if I could find a recipe for homemade burger buns that was quick and delicious. I found it! Thank you so much for sharing. This is the best! They came out perfect. I wrote this down in my recipe book because I will definitely make these again.
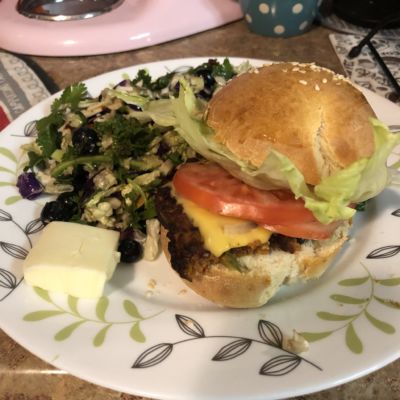
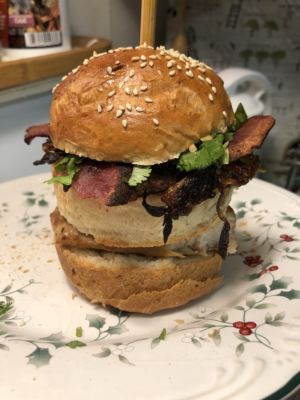
Just wanted to tell RF74, in photos, that burger looks amazing!
Quick and easy, tasted great. The only thing I did differently was warming up the milk and butter, putting it in the bowl of my stand mixer with the sugar and yeast first to prove it. I know it’s unnecessary but I just always do it this way. Then after 5 min I put the bowl thing on my scale for the flour and salt.
I have used this recipe a number of times, such nice soft delicious buns. This last time I had sour milk and when I warmed it up with the butter in the microwave, it curdled and separated! I used it anyway and they turned out better than ever. The previous batch I hadn’t paid enough attention and they were over proofed so flat and dry. This one I watched carefully to check when doubled and also raised up enough just before baking…perfection! Thank for wonderful recipes, Gemma!
I made these by hand as we just moved overseas and do not have a 220v. mixer with dough hook. After realizing breads have been made for thousands of years without machines, I went for it. They turned out amazing and 2 were eaten as they came out of the oven! The tops are golden, insides are a fluffy cloud and the bottom has a light crunch – it will be hard to keep the rest safe until dinner! Thank you so much for the recipe and the tips. Delicious! 🙂