This post may contain affiliate links. Please see my full disclosure for details.
Hi Bold Bakers!
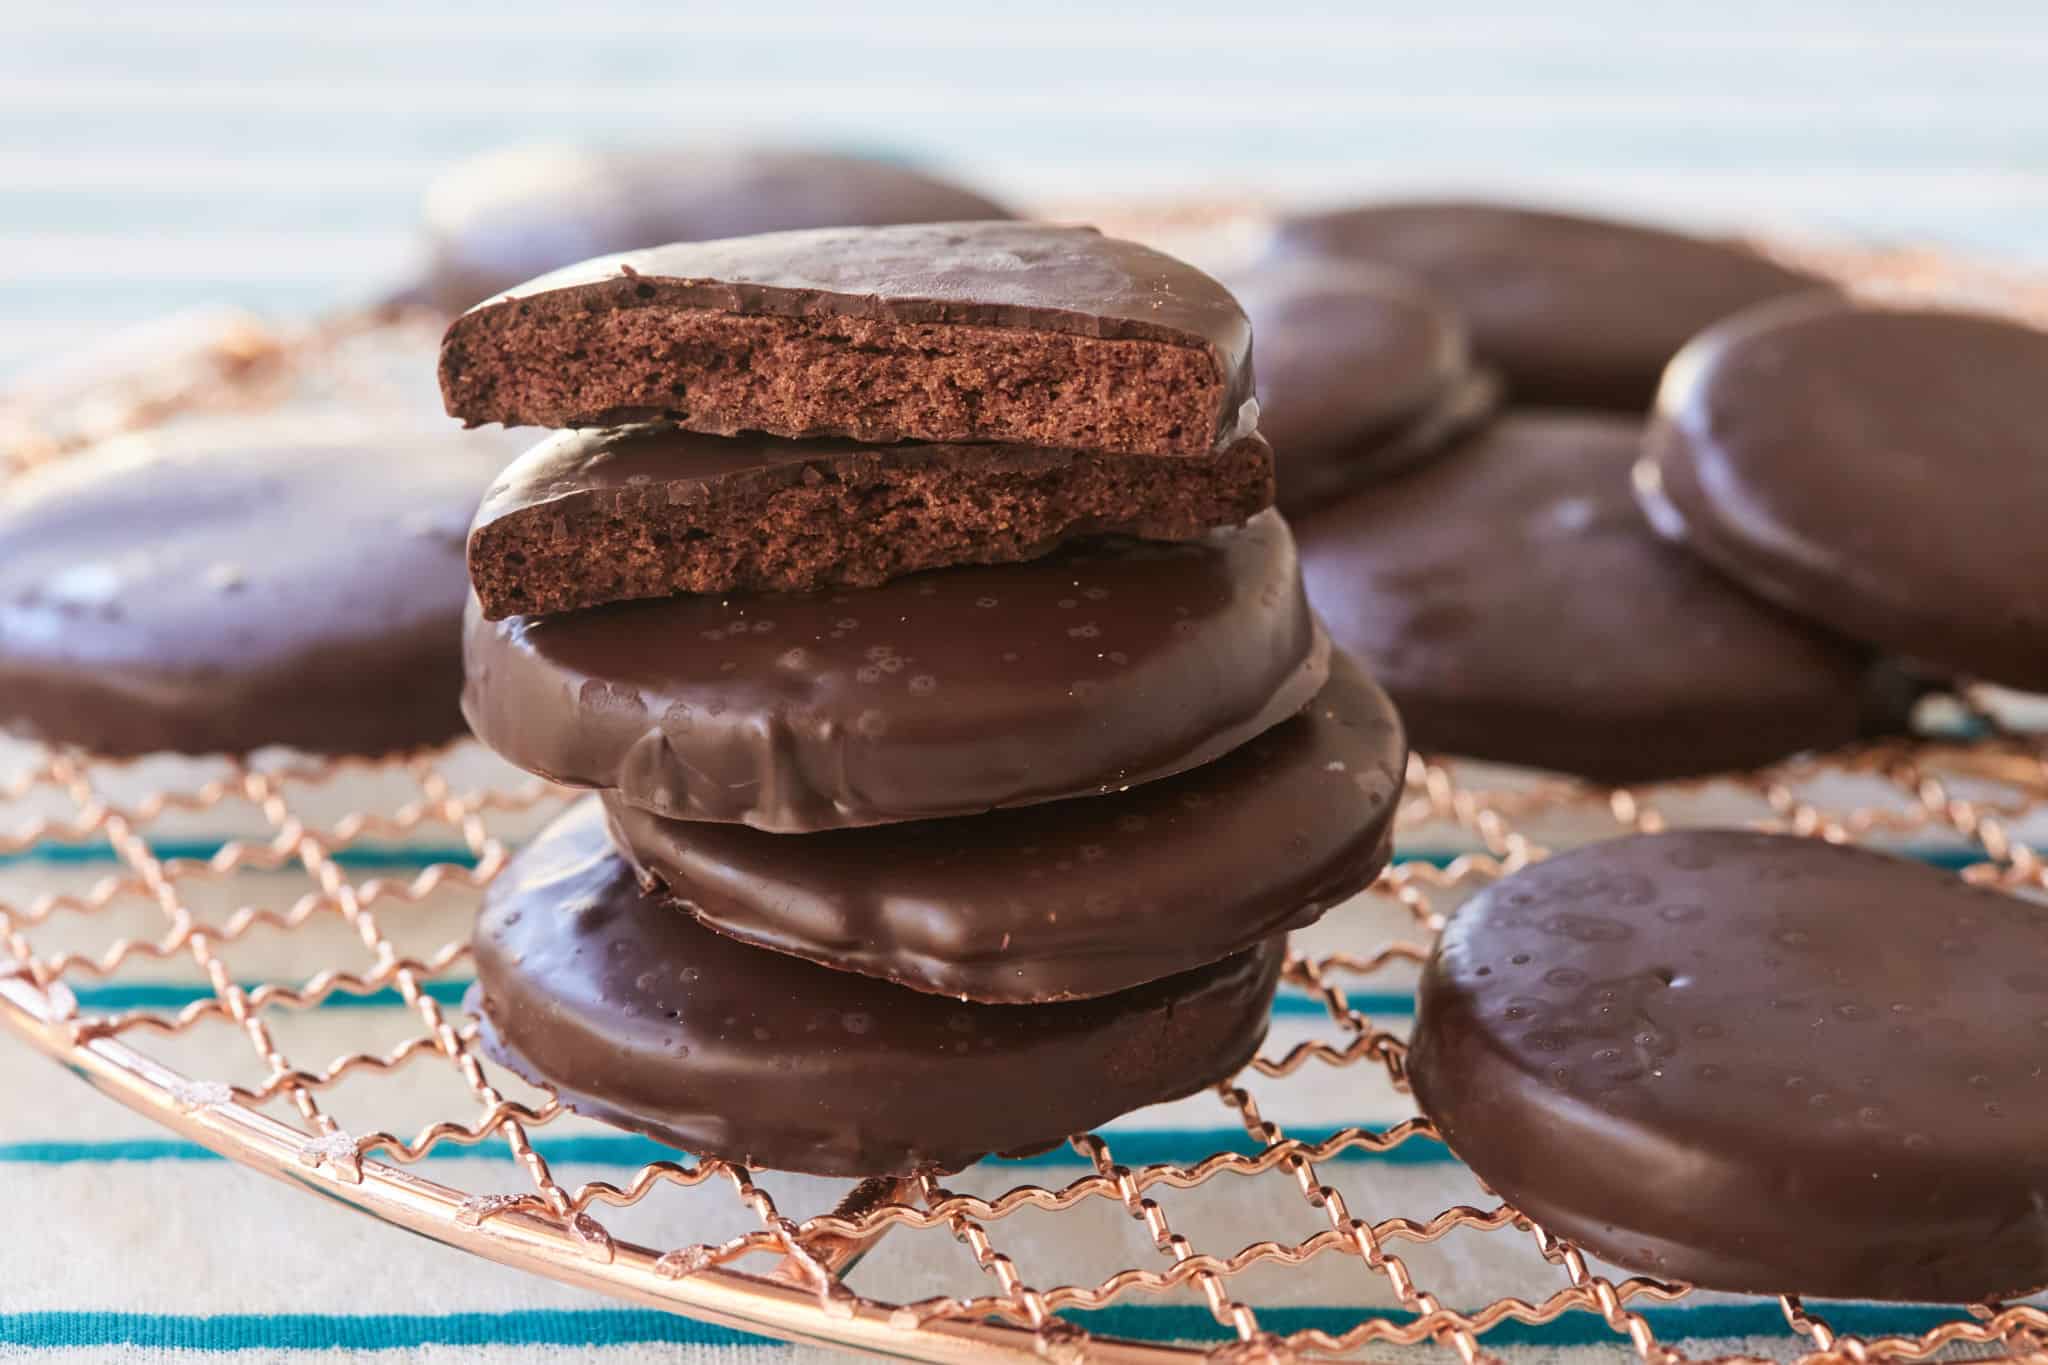
WHAT YOU GET: A homemade version of the beloved Girl Scout Thin Mints, with the irresistible combination of chocolate and peppermint. Perfect crunch.
After sharing my Homemade Samoas Cookies, I knew I had to perfect a homemade version of another Girl Scout favorite: the famous Thin Mint! When Girl Scout cookie season rolls around, I know people who buy boxes of Thin Mints in bulk to store in their freezer — but sometimes that stash can get dangerously low. Hopefully, this recipe can ease those worries!
Some copycat recipes swear by the method of dipping Ritz crackers into Andes Mints — and no shame in that game — and while it might taste something like Thin Mints, to me, it just isn’t the real deal unless it has that mint chocolate cookie covered in a shell of chocolate coating. My copycat Thin Mint recipe is everything you love about the original. It, of course, has that beautiful combination of deep chocolate and peppermint flavors, but it also has that ideal texture: crunchy and crispy.
Keep supporting your local scouts — but definitely use this recipe to get in between cookie seasons!

What Are Thin Mints Made Of?
Thin mints start with the cookie. The wafer is flavored with peppermint extract and cocoa powder, which gives you the iconic taste (and look) of Girl Scout Thin Mint cookies. Then, that wafer is covered with a chocolate coating. In this recipe, I use semi-sweet chocolate, peppermint extract, vanilla extract, and neutral-flavored vegetable oil to get the perfect texture and flavor.
What Chocolate To Use For Homemade Thin Mints
For the coating of my Thin Mints, I used semi-sweet chocolate as I believe it rounds out the unsweetened cocoa powder in the cookie itself nicely. Feel free to use dark chocolate if you prefer! If you want to learn more, check out my Complete Guide To Chocolate.
Tools You Need To Make Copycat Thin Mints
- Measuring cups and spoons
- Stand mixer or electric hand mixer
- Mixing bowls
- Two baking sheets
- Parchment paper
- 2-inch (5-cm) round cutter (optional, see my tips)
- Microwave-safe bowl

Gemma’s Pro Chef Tips For Making Homemade Thin Mints
- This dough needs to be cold before rolling out, or it will be too difficult to handle. Be sure to let it chill in the refrigerator for at least 2 hours.
- If you don’t have a round biscuit cutter, you can use a pizza cutter to cut the dough into squares.
- The dough for these cookies is dark, so the only way to tell if the cookies are done baking is when the surface looks a bit dry. Don’t wait until the edges darken, or they might taste burnt.
- The small amount of vegetable oil in the chocolate coating will keep the chocolate smooth for dipping.
- These Thin Mints are delicious straight out of the freezer, just like the real thing!
Want To Go Deeper?
Level up your baking skills even further and subscribe to the Bold Baking Academy today! You’ll get access to all the in-depth baking courses both past and present, access to the Bold Baking Academy Community, and the one-of-a-kind Baking Concierge — which is a fast & direct connection to me and my team of culinary experts to answer any baking question you might have.
That’s right, inside or out of the Academy! So subscribe now!

Try These Recipes!


Homemade Thin Mints Recipe

Ingredients
Dough
- 1 cup (8 oz/225 g) butter (softened)
- ⅔ cup (5 oz/142 g) granulated sugar
- 1 large egg white (at room temperature)
- 1 teaspoon vanilla extract
- ½ teaspoon peppermint extract
- 2 cups (10 oz/284 g) all-purpose flour
- ½ cup (2 oz/57 g) cocoa powder
- ½ teaspoon salt
Chocolate Coating
- 2 ⅔ cups (16 oz/450 g) semisweet chocolate (finely chopped)
- 1 ½ teaspoons peppermint extract
- ½ teaspoon vanilla extract
- ¼ teaspoon neutral-flavored vegetable oil
Instructions
Making The Dough
- In the bowl of a stand mixer or in a medium bowl with an electric mixer, beat the butter and sugar together on medium speed until fluffy, about 3 minutes. Add in the egg white, vanilla extract, and peppermint extract and beat until combined.
- In a small bowl, whisk the flour, cocoa powder, and salt together.
- With the mixer on low, mix the flour mixture into the butter mixture until a dough is formed. Shape the dough into a flattened disc, then wrap well and refrigerate until firm, about 2 hours.
- When ready to bake, preheat the oven to 350°F (180°C) and line two baking sheets with parchment paper.
- On a floured surface, roll the dough out to ⅛-inch-thick (3 mm) and with a 2-inch (5-cm) round cutter, cut out as many circles of dough as you can. You can gather and reroll any scraps. Place the cookies 1½ inches (3 cm) apart on the prepared baking sheets.
- Bake for 15 to 18 minutes, until the cookies look dry and baked. Transfer to a wire rack to cool completely and set the parchment-lined baking sheets aside.
Making The Coating
- in a double boiler or in a microwave-safe bowl, combine the chocolate, peppermint extract, vanilla extract, and vegetable oil and heat gently, stirring frequently, until melted.
- Using a fork, immerse each cookie in the chocolate, then lift out and return to the baking sheets to set completely before serving and storing. (you can also pop them into the fridge).
- Store in an airtight container at room temperature for up to 3 days.


Could the mint be replaced with orange? (For the kids that dont like mint)
I found a quick and easy way to make thin mints. Ritz crackers coated in melted Andes thin mints. They taste just like the Girl Scout ones.
I made these and they were really good! But there was an issue with the chocolate coating. I used real chocolate in a chocolate melter. I waited for it to melt to add the rest for the coating, but as soon as I put in the oil and extract it became very very chunky and not liquidy. How can I fix that?
Hi Gemma can I use fresh mint in this recipe as I have loads in my garden. If yes how much? Thks
These homemade Thin Mints are absolutely amazing—crispy, chocolatey, and perfectly minty 🍫🌿 I loved making them, and they taste even better than store-bought.
Do you have a gluten free recommendation for these cookies? I love Thin Mints but since diagnosed with gluten intolerance I can’t eat them. Would love to make a gluten free version!
I have just made them but the dough is very soft, is this normal? . The dough is in the fridge, hopefully it will come out ok.
Hi Gemma, do you short video for this recipe?
Thanks for the recipe. Can i substitute oil for the butter? if so, how much?
What can be substituted for the egg white? I’m allergic to eggs.