This post may contain affiliate links. Please see my full disclosure for details.
Hi Bold Bakers!
Hawaiian Butter Mochi is a favorite in Hawaii — it’s a dessert you can find everywhere on the islands! You’ll find it in a lot of bakeries there, but you’ll also see many home chefs making their own version because not only is it so delicious — it’s also super easy! This recipe is also part of my Bold Baking Worldwide initiative to bring you amazing recipes from around the globe! Make sure you check out the lovely Malva Pudding from South Africa. Want more great recipes like this one? Check out my new cookbook, Bigger Bolder Baking Every Day!
Looking for mochi ice cream?
[Get my recipes for Japanese Mochi Ice Cream and Chocolate Mochi Ice Cream here!]
Butter mochi is soft and chewy thanks to Mochiko Flour (also called glutinous rice flour or sweet rice flour). This is a super important ingredient, and no other flour will do! Since we’re using this type of flour, butter mochi is also a gluten-free snack!
The flavor of butter mochi is perfect too: it’s so rich, isn’t too sweet, and has subtle flavors of vanilla, butter, and coconut — it tastes like you just went on a tropical holiday. But it’s really the texture that makes this dessert so lovely! And I have more flavors that you also will love: Chewy Mochi Brownies and Matcha Butter Mochi !

What Is Butter Mochi? What’s The Difference Between Hawaiian Butter Mochi And Japanese Mochi?
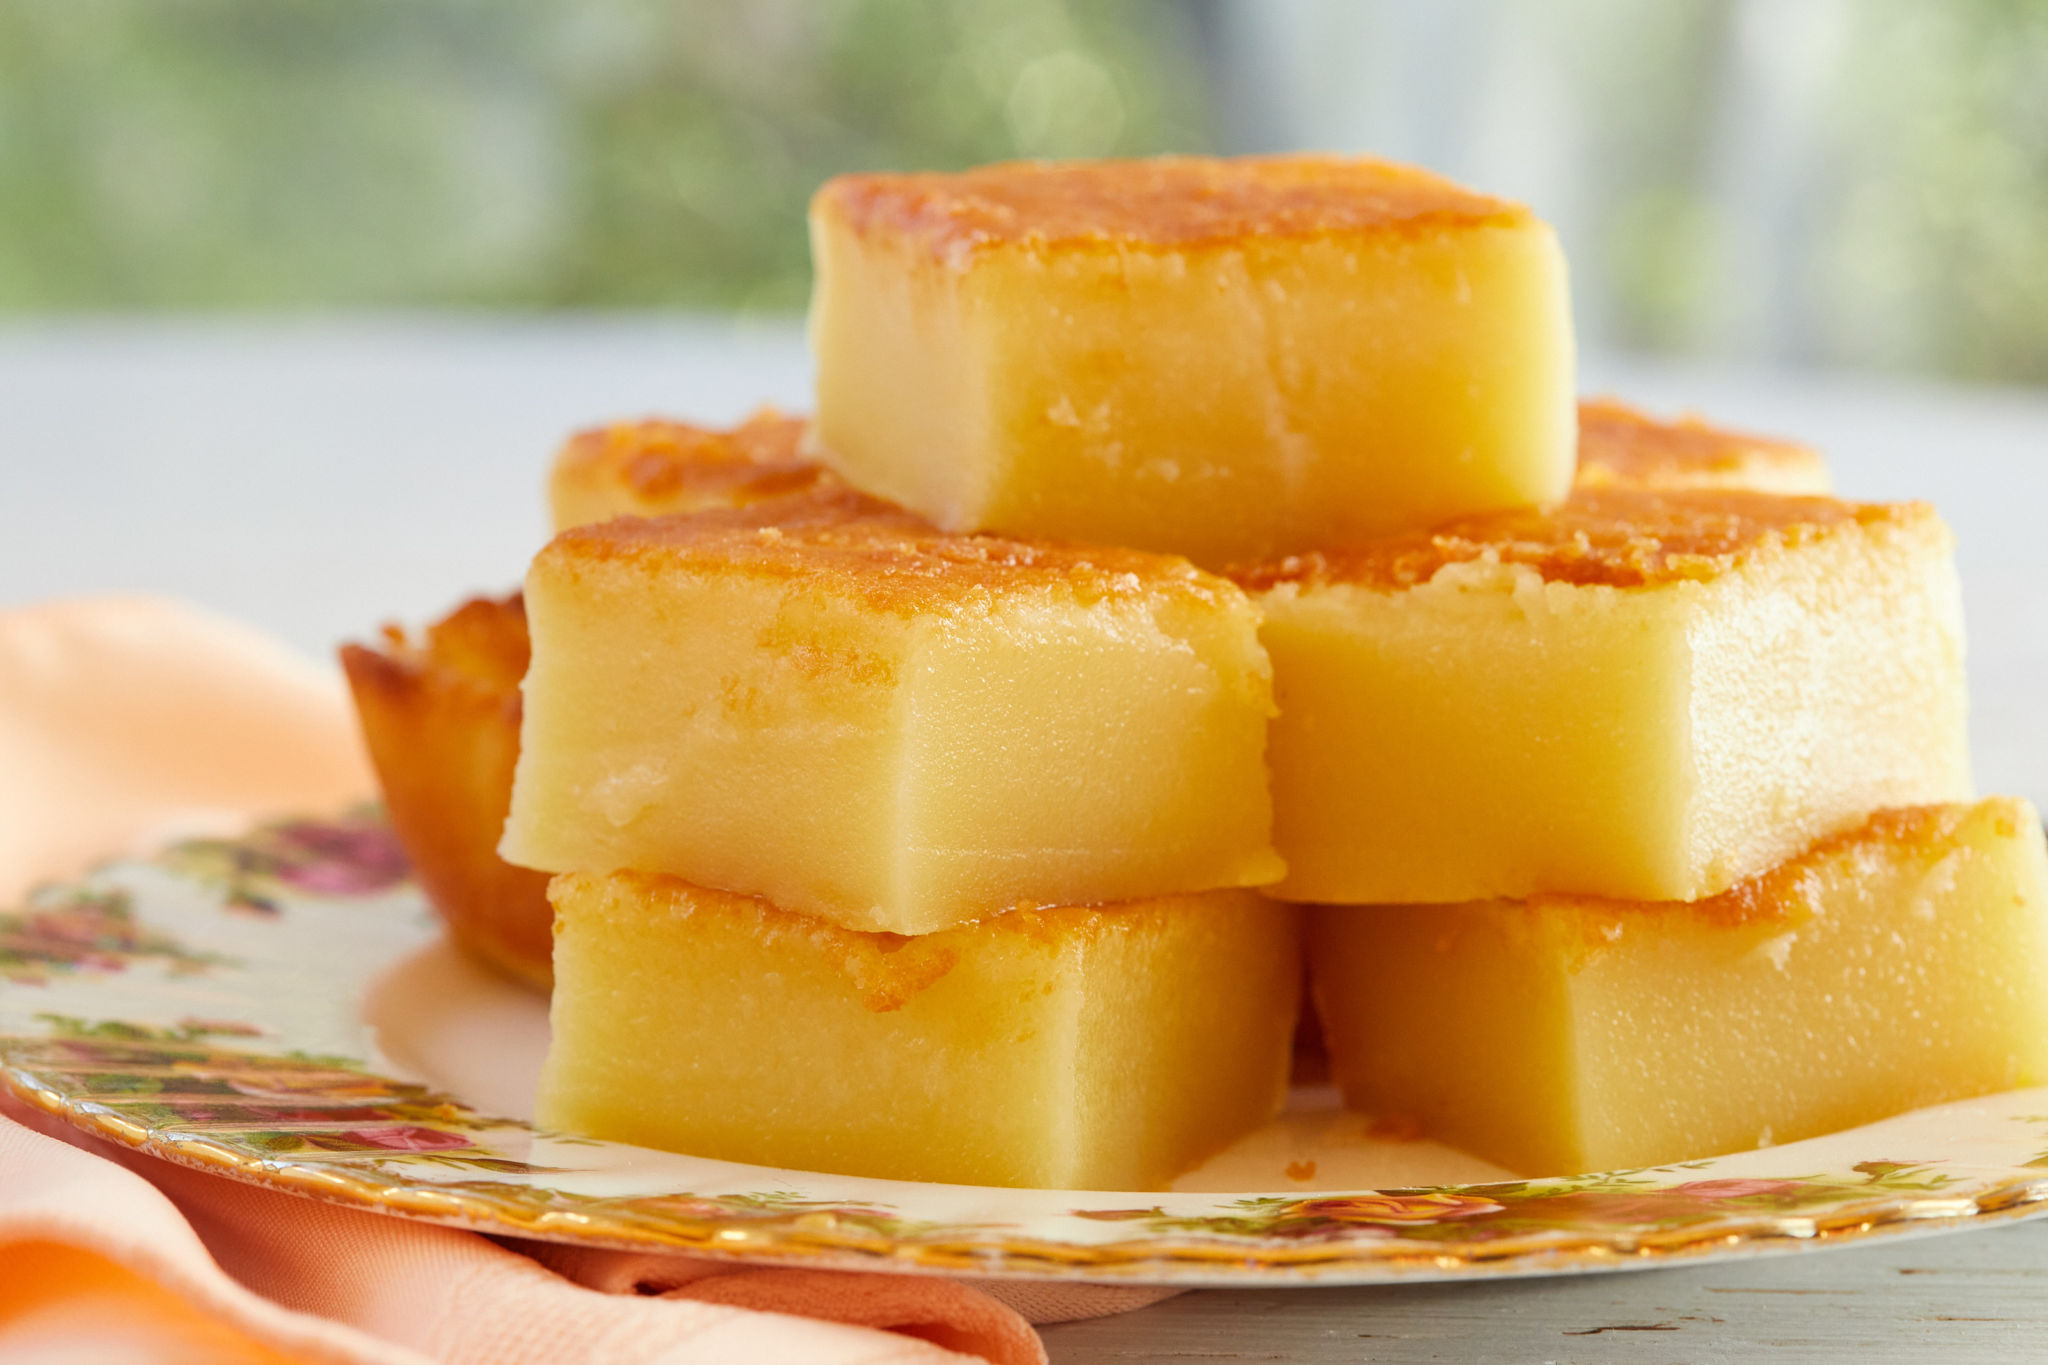
Hawaiian butter mochi is kind of like a cross between cake and mochi. Unlike Japanese mochi, which I like to fill with ice cream, Hawaiian Butter Mochi is baked. The result is a chewy but not gummy, slightly coconutty, and delicious dessert.
Butter mochi is a no-frills dessert. You take it out of the oven, and that’s it! It doesn’t need decoration or added flavoring. It’s perfect in its simplicity.
The Flour To Use For Hawaiian Butter Mochi
You have to use Mochiko rice flour. It’s also known as sweet rice flour or glutinous rice flour. This is what makes the mochi so chewy. You can typically find it at Asian markets, but if you can’t, you can always order it online. I prefer to use Koda Farms brand, which is typically used in Hawaii for butter mochi!
What You Need To Make Hawaiian Butter Mochi
- Measuring cups and spoons
- 9×13 inch (23x33cm) baking pan
- Parchment paper
- Electric mixer (optional)
How To Make Hawaiian Butter Mochi
Making butter mochi really can’t be easier, and it whips up in no time! Here is how you make it (and don’t forget to get the full recipe with measurements, on the page down below):
- Preheat your oven to 350°F (180°C). Prepare your 9×13 inch (23x33cm) baking pan by buttering it and lining it with parchment paper.
- Beat the whole milk, sugar, rice flour, coconut milk, eggs, butter, baking powder, and vanilla extract (either with an electric mixer or by hand) until it is thoroughly combined. Then, pour it into your prepped pan.
- Bake the butter mochi for 1 hour and let it cool completely. Then cut it into 24 squares and serve!
Gemma’s Pro Chef Tips For Making Hawaiian Butter Mochi
- You want to be sure your butter mochi is completely cooled before you cut it. If it is sticking a lot to the knife, run the knife under a little water between cuts.
- If you’d like a lighter, cakier version of this recipe, reduce the butter to a 1/2 cup.
- You can add 1 cup of unsweetened shredded coconut to the batter before baking for more coconut flavor.
- Be sure to use glutinous sweet rice flour, NOT regular rice flour; otherwise, you won’t get the chewy results!

How Do I Store Hawaiian Butter Mochi?
You can store any leftover Hawaiian butter mochi in an airtight container at room temperature for up to 2 days.
Make More Recipes!
- Matcha Butter Mochi Recipe (Green Tea Rice Cake)
- Chewy Mochi Brownies
- Japanese Mochi Ice Cream
- Mochi Donuts
- White Chocolate Macadamia Nut Cookies
- Easy Lemon Bars Recipe
Full (and printable) recipe below!
Try These Recipes!


Watch The Recipe Video!
Hawaiian Butter Mochi Recipe

Ingredients
- 1 box (16 oz/450 g) Mochiko Flour (sweet glutinous rice flour)
- 2 cups (16 oz/454 g) granulated sugar
- 1 ½ teaspoons baking powder
- ½ teaspoon salt
- 4 large eggs, at room temperature
- 2 cups (16 fl oz/450 ml) whole milk, at room temperature
- 1 can (13 fl oz/400 ml) coconut milk
- ½ cup (4 oz/115 g) butter, melted
- 2 teaspoons vanilla extract
Instructions
- Preheat the oven to 350°F (180°C). Butter a 9x13-inch (23x33 cm) baking pan and line with parchment paper. Set aside.
- In a large bowl mix together the sweet rice flour, sugar, baking powder and salt.
- Whisk in the eggs, milk, coconut milk, butter and vanilla extract until the batter is smooth. To ensure that there are no lumps, pour the mixture through a sieve and directly into your prepared pan.
- Bake for 50-60 minutes or until golden on top. Set aside to cool down completely.
- Cut into 24 squares with a sharp knife. Store in an airtight container at room temperature for up to 2 days. Serve warm with whipped cream or vanilla ice-cream if desired.


Some feedback: the recipe is a bit oversimplified. This is not a dump and mix recipe – really need to add the ingredients in stages to avoid a batter with butter lumps. Best to either melt the butter or cream it into the sugar first. I wasted a lot of time trying to incorporate the butter by following the recipe as described.
I don’t see any nutrition information…. Not sure I want to either ???? LOL
I used to live in Hawaii and my mom used to make butter mochi sometimes. I recommend adding 1/2 cup of butter instead of 3/4, otherwise it is a little too buttery. And maybe sifting the flour. But other than that, this was really good, especially with shredded coconut flakes!
Hello! I came across this recipe and thought, self, will this vegan? And it did! I used the Country Crock plant based avocado sticks, Chobani Extra Creamy plain oat milk, and JUST liquid eggs and made as directed. I didn’t use the toasted coconut this time, but man will I next time! This was so good! Thank you! My teens love them.
Wowzers, this was delicious! I love mochi so I knew I’d love this cake. Next time I think I will add ingredients in steps (cream butter and sugar, then add eggs, milk etc.) as the butter didn’t incorporate properly when mixing it all at once. Come to think of it, I may not make it again as I could easily eat the whole thing myself, it’s so good. Buttery, chewy, crunchy top and sides. It’s TOO GOOD!
I made this today but used almond milk. I also cut back on the sugar, 1 1/3 cup and less butter, a little more than 1/3 cup (I’m nearing senior citizenship). It still turned out pretty good and chewy. My husband the critic loved it.
This is soooo good! I am asian so we love mochi! I really reccomend this recipe to anyone!. This is a REAL MOCHI! Its super chewy and good. It has a really nice coconut taste and when you eat it the next day its soooo good because all the coconut has absorbed to the top. One thing you should to is sift the flour. The first time I made this is was all clumpy and weird so i had to strain it. The second time I sifted it and it was good. One more thing is when you pour in… Read more »
How did you made yours brown and crusty looking on the top? Mine didn’t look brown on the top but still tasted good. Maybe I should bake it a little longer?
made this and it was swimming pooled in butter — i recommend cutting the butter in half. otherwise thx for the recipe!
I often eat mochi since my childhood here in Indonesia, but the mochi is similar to japanese mochi ice cream, only difference is the filling, usually we have nuts, strawberry, durian, chocolate, or other variants. Oh, and usually we steam the skin. When I saw this recipe, I said to myself that I have to try it, and indeed, the steps are pretty straightforward and the result is just WOW. Baked mochi ???? it’s sweet and salty. I baked it in the afternoon, hopefully it will still taste magnificent tomorrow. Breakfast treat ???? Thanks for the wonderful recipe, Gemma! More… Read more »