This post may contain affiliate links. Please see my full disclosure for details.
Hi Bold Bakers!
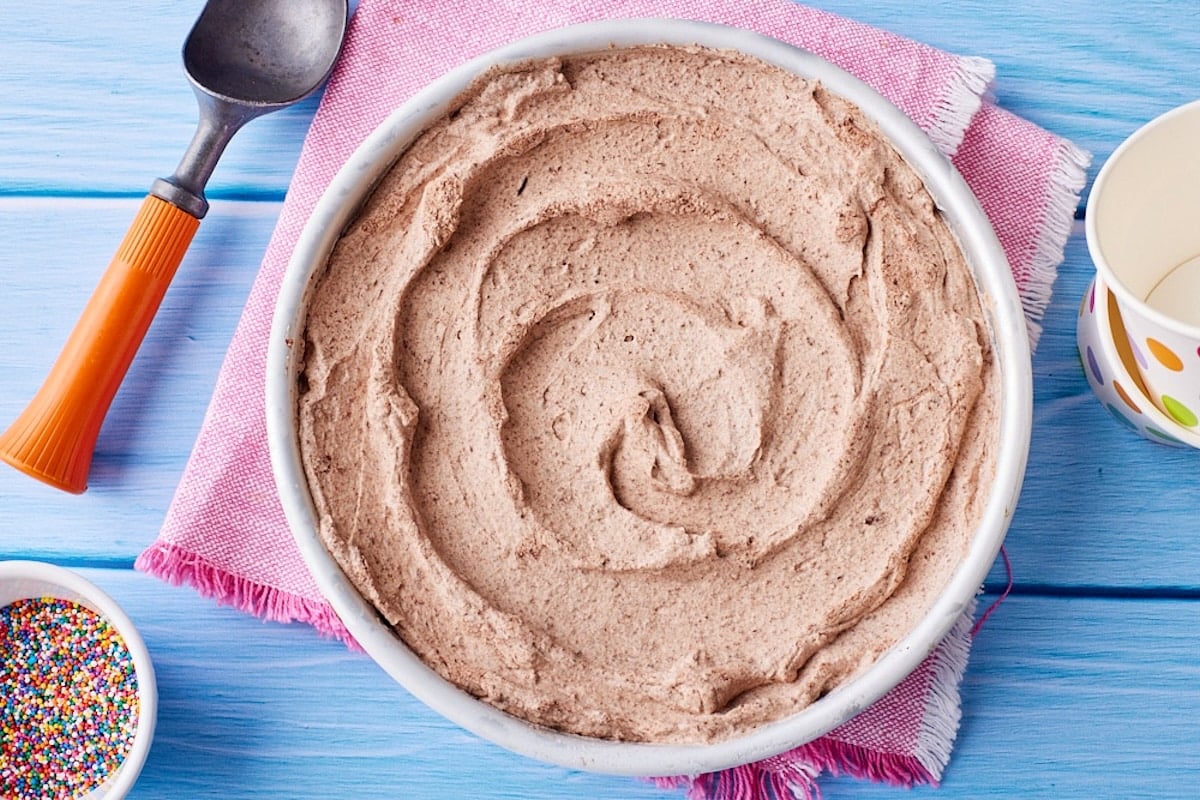
=WHY YOU’LL LOVE THIS RECIPE: My easy Homemade Chocolate Ice Cream Recipe is the simplest way to make everyone’s favorite frozen treat at home. Skip the scoop shop and make rich, creamy, homemade chocolate ice cream whenever the craving hits.
- No ice cream machine needed: This clever no-churn method uses whipped cream to create a light, airy texture similar to a churned ice cream.
- Only 4 ingredients: All you need is heavy cream, condensed milk, chocolate, and vanilla extract. No eggs, egg yolks, or custard required!
- Rich chocolate flavor: Bittersweet chocolate delivers a wonderfully intense chocolate taste that’s balanced and not overly sweet.
- 10-minute prep time: The freezer does most of the work in this incredibly easy recipe!
- Easy to customize: Add your favorite mix-ins, like cookies, nuts, or sprinkles.
It’s finally ice cream season! I’m excited, my son George is very excited, and as a professional chef, testing new flavors of my fan favorite two-ingredient ice cream has become one of my favorite summer traditions. Birthday Cake Ice Cream, Honeycomb Ice Cream, and Apple Pie Ice Cream are all delicious, but no flavor is more universally loved than chocolate. It was important for me to create a Homemade Chocolate Ice Cream Recipe that’s perfectly creamy, smooth, and scoopable—all without needing an ice cream maker.
My top tip: Use chopped bittersweet chocolate for the richest flavor and the creamiest texture. Bittersweet contains cocoa butter and 63-72% cocoa solids, which help create a smoother texture and perfectly balanced flavor.
Bold Bakers Loved This!
“I just made a batch, and my husband wants to eat all of it himself! He says it’s so good that he wants to hug you!”—Milsean
“Such a great go-to recipe. I have made quite a few of your flavours. Thank you!” —Nancy
“What an easy recipe! I whipped this delicious ice cream together in no time.” Joy
“WOW! That is seriously delicious ice cream.”—Anne
“Absolutely love this recipe. My family wants me to get on making more batches right away. Thanks again, Gemma, for another great recipe.”—Mary Ann
IMPORTANT NOTE: This recipe was improved and updated on 5/23/2026, to include NEW step-by-step photography, explanations and substitutes of key ingredients, make-ahead and storage instructions, mix-ins and flavor variations, answers to the most frequently asked questions, and Pro Chef Tips.
Table of Contents
- What is Homemade Chocolate Ice Cream?
- Tools You Need
- Key Ingredients and Substitutes
- How to Make Chocolate Ice Cream Recipe
- Gemma’s Pro Chef Tips
- Make-Ahead and Storage Instructions
- Mix-Ins and Flavor Variations
- FAQs
- More Frozen Treat Recipes
What is Homemade Chocolate Ice Cream?
My Homemade Chocolate Ice Cream is a rich, creamy, no-machine frozen dessert made by folding whipped cream into sweetened condensed milk for a smooth, scoopable texture and deep chocolate flavor. No-churn ice cream became popular among home cooks in the mid-20th century, when sweetened condensed milk made it possible to make homemade ice cream without special equipment.
Tools You Need
- Mixing bowl
- Measuring spoons
- Measuring cups
- Glass measuring jug
- Stand mixer with whisk attachment (alternatively, hand mixer or whisk)
- Thin-edge metal spoon
- Silicone spatula
Key Ingredients and Substitutes
Heavy whipping cream
- Heavy whipping cream gives the ice cream its light texture. Whipping the cream incorporates air, replacing the churning usually done by an ice cream maker.
- Importantly, heavy whipping cream prevents iciness and helps keep the ice cream smooth and scoopable.
- Additionally, the heavy cream contributes to a rich flavor and a smooth, velvety mouthfeel.
- You must use heavy cream with a fat content of at least 36% so it whips up correctly. Do not use light cream, half-and-half, or whole milk in this recipe.
Sweetened condensed milk
- Sweetened condensed milk contributes sweetness.
- The sugar in sweetened condensed milk lowers the freezing point so that the ice cream is easy to scoop and isn’t icy.
- It’s important to use cold sweetened condensed milk, so chill the can in the refrigerator for at least four hours before using.
- Using room-temperature sweetened condensed milk can result in ice cream that’s less fluffy, less creamy, and icier.
- Substitute: You can easily make your own sweetened condensed milk.
Bittersweet chocolate
- Melted, cooled chopped bittersweet chocolate gives the ice cream a rich chocolate flavor without adding too much sweetness.
- Importantly, chopped chocolate works better than chips because it melts smoothly.
- Chips contain stabilizers, which help them hold their shape, so they don’t melt as fluidly and could make the ice cream grainy.
- Additionally, bittersweet chocolate, which contains cocoa solids and cocoa butter, unlike unsweetened cocoa powder, which contributes flavor, but not richness or creaminess.
- Substitute: You can use the same amount of semisweet chocolate or dark chocolate for a milder flavor.
- Do not use milk chocolate, as it will make the ice cream overly sweet and too soft.
Vanilla extract
- Vanilla extract gives the ice cream depth and a warm note.
- Vanilla extract can also contribute to making the ice cream more scoopable.
- Additionally, the vanilla extract enhances the chocolate flavor and helps round out the sweetness.
- Substitute: You can use the same amount of Vanilla Bean Paste instead.
How to Make Chocolate Ice Cream Recipe
-
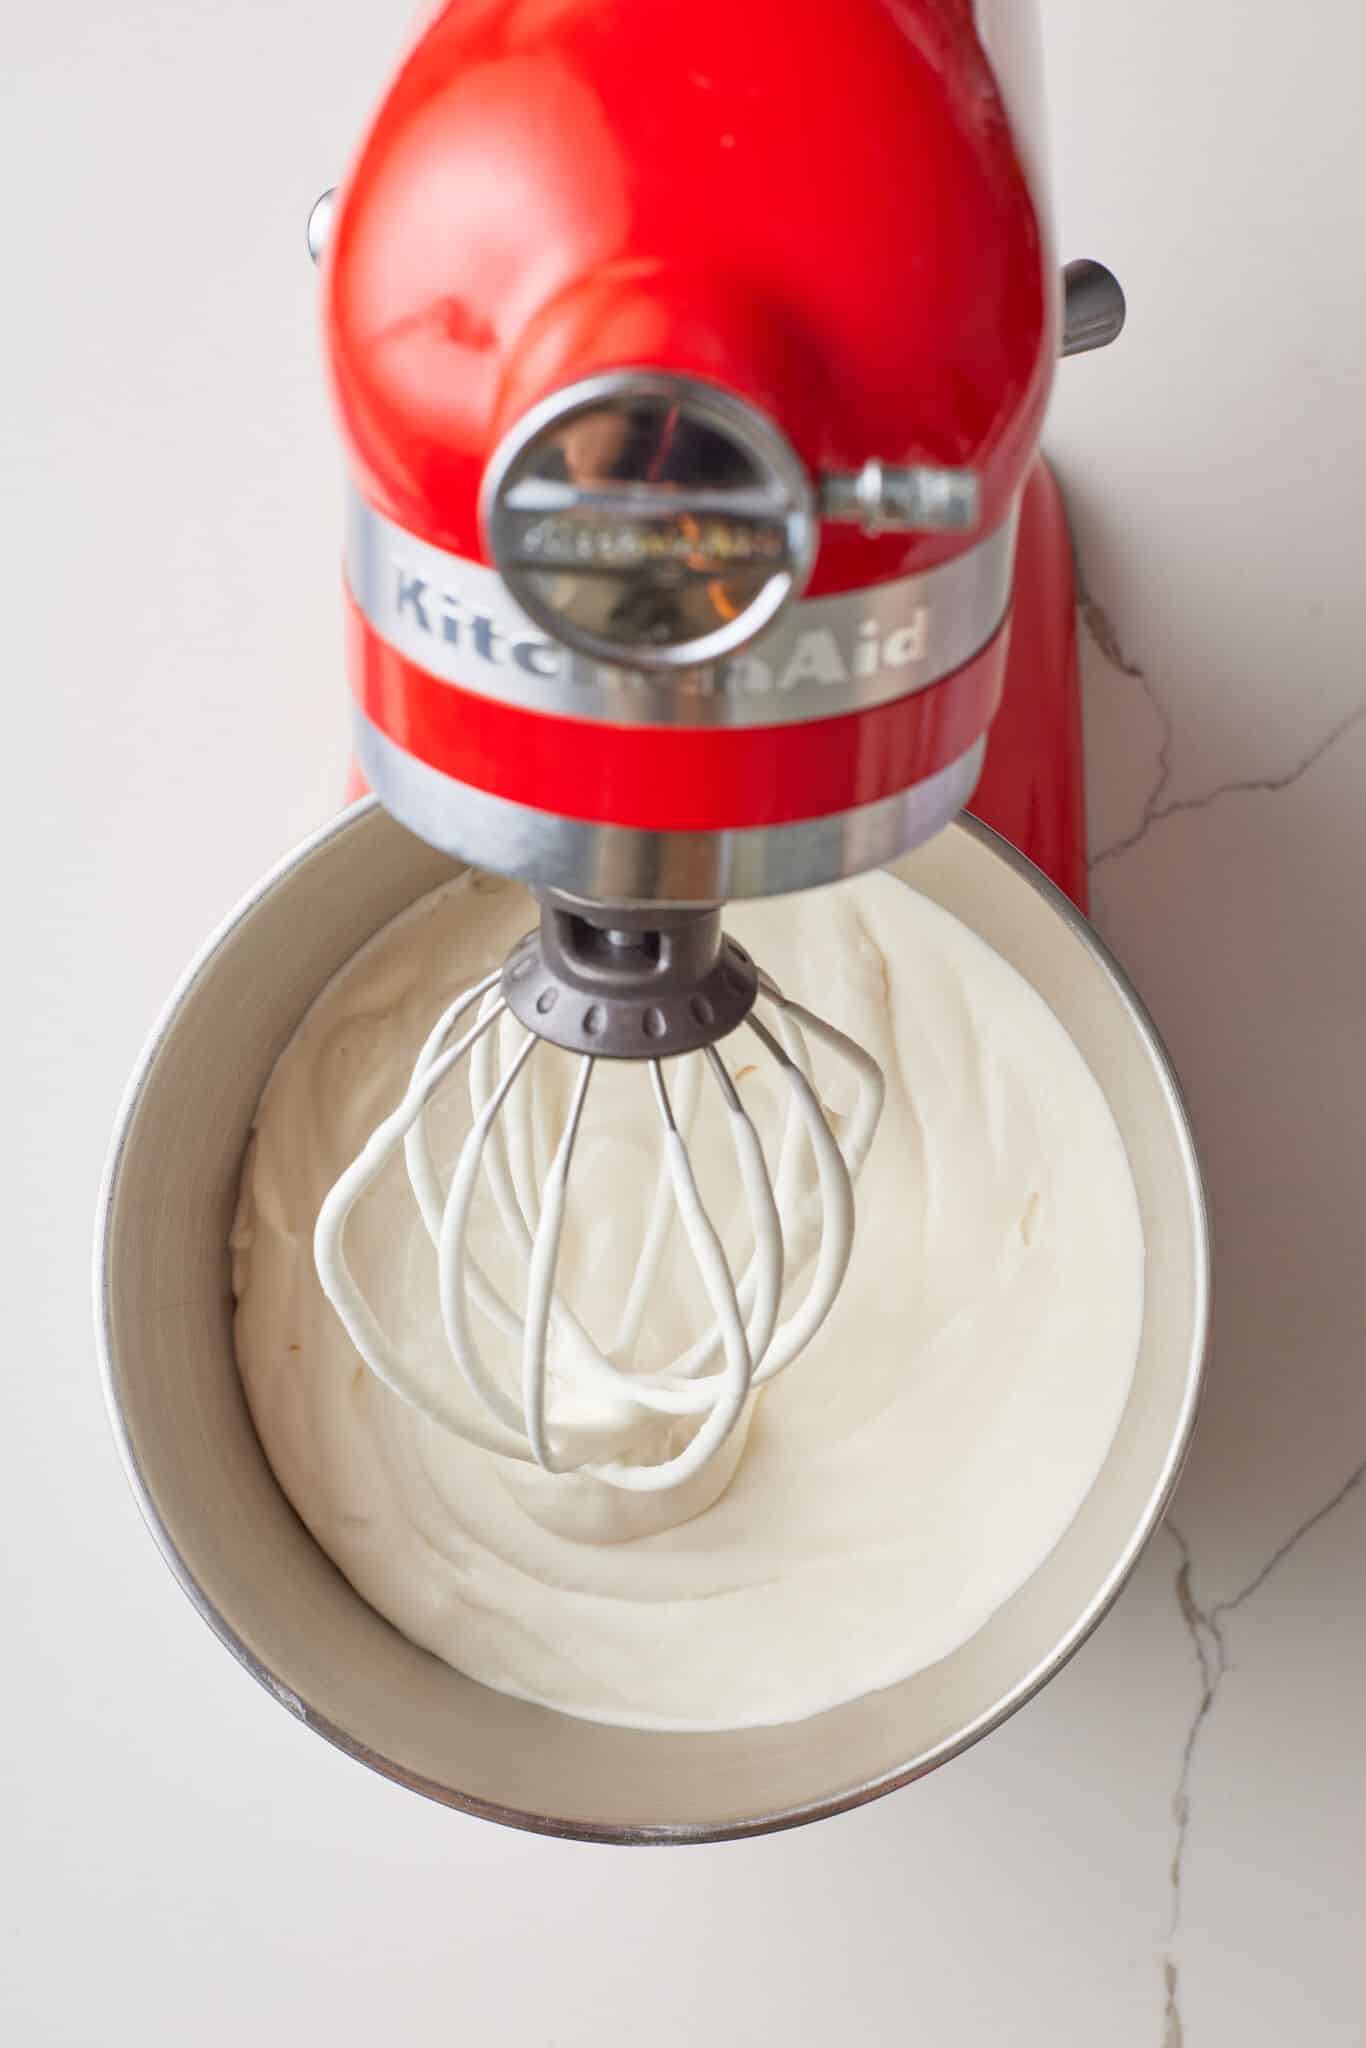
Whip until soft peaks form. Using a stand mixer with a whisk attachment (or an electric hand mixer), whip the cold heavy whipping cream on medium-high speed until soft peaks form, about 3–4 minutes.
-
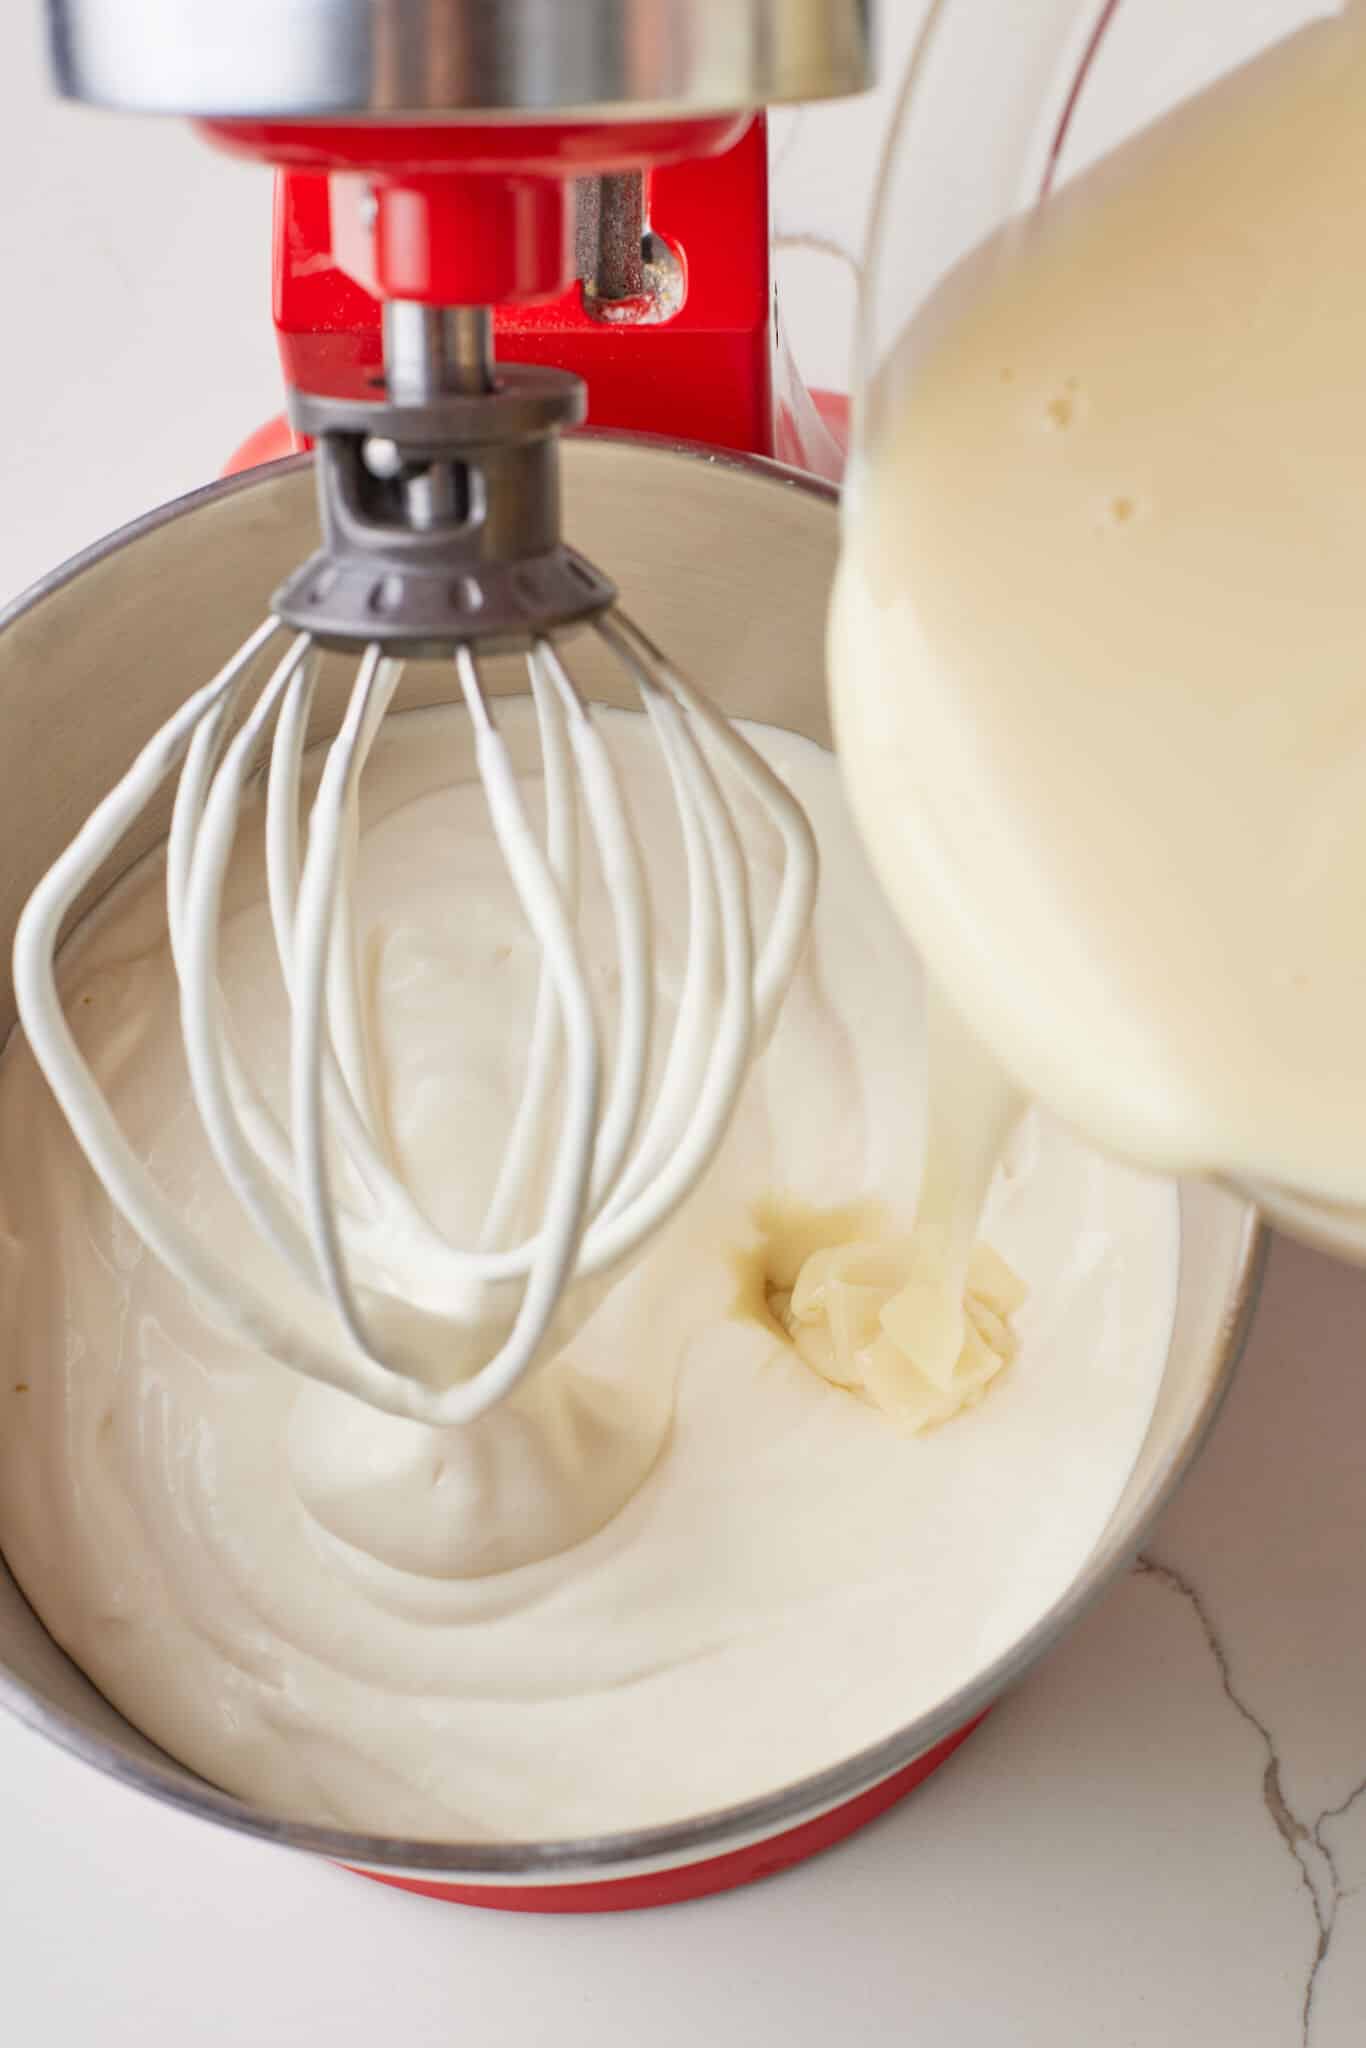
Add the condensed milk. Turn off the mixer and pour in the sweetened condensed milk.
-
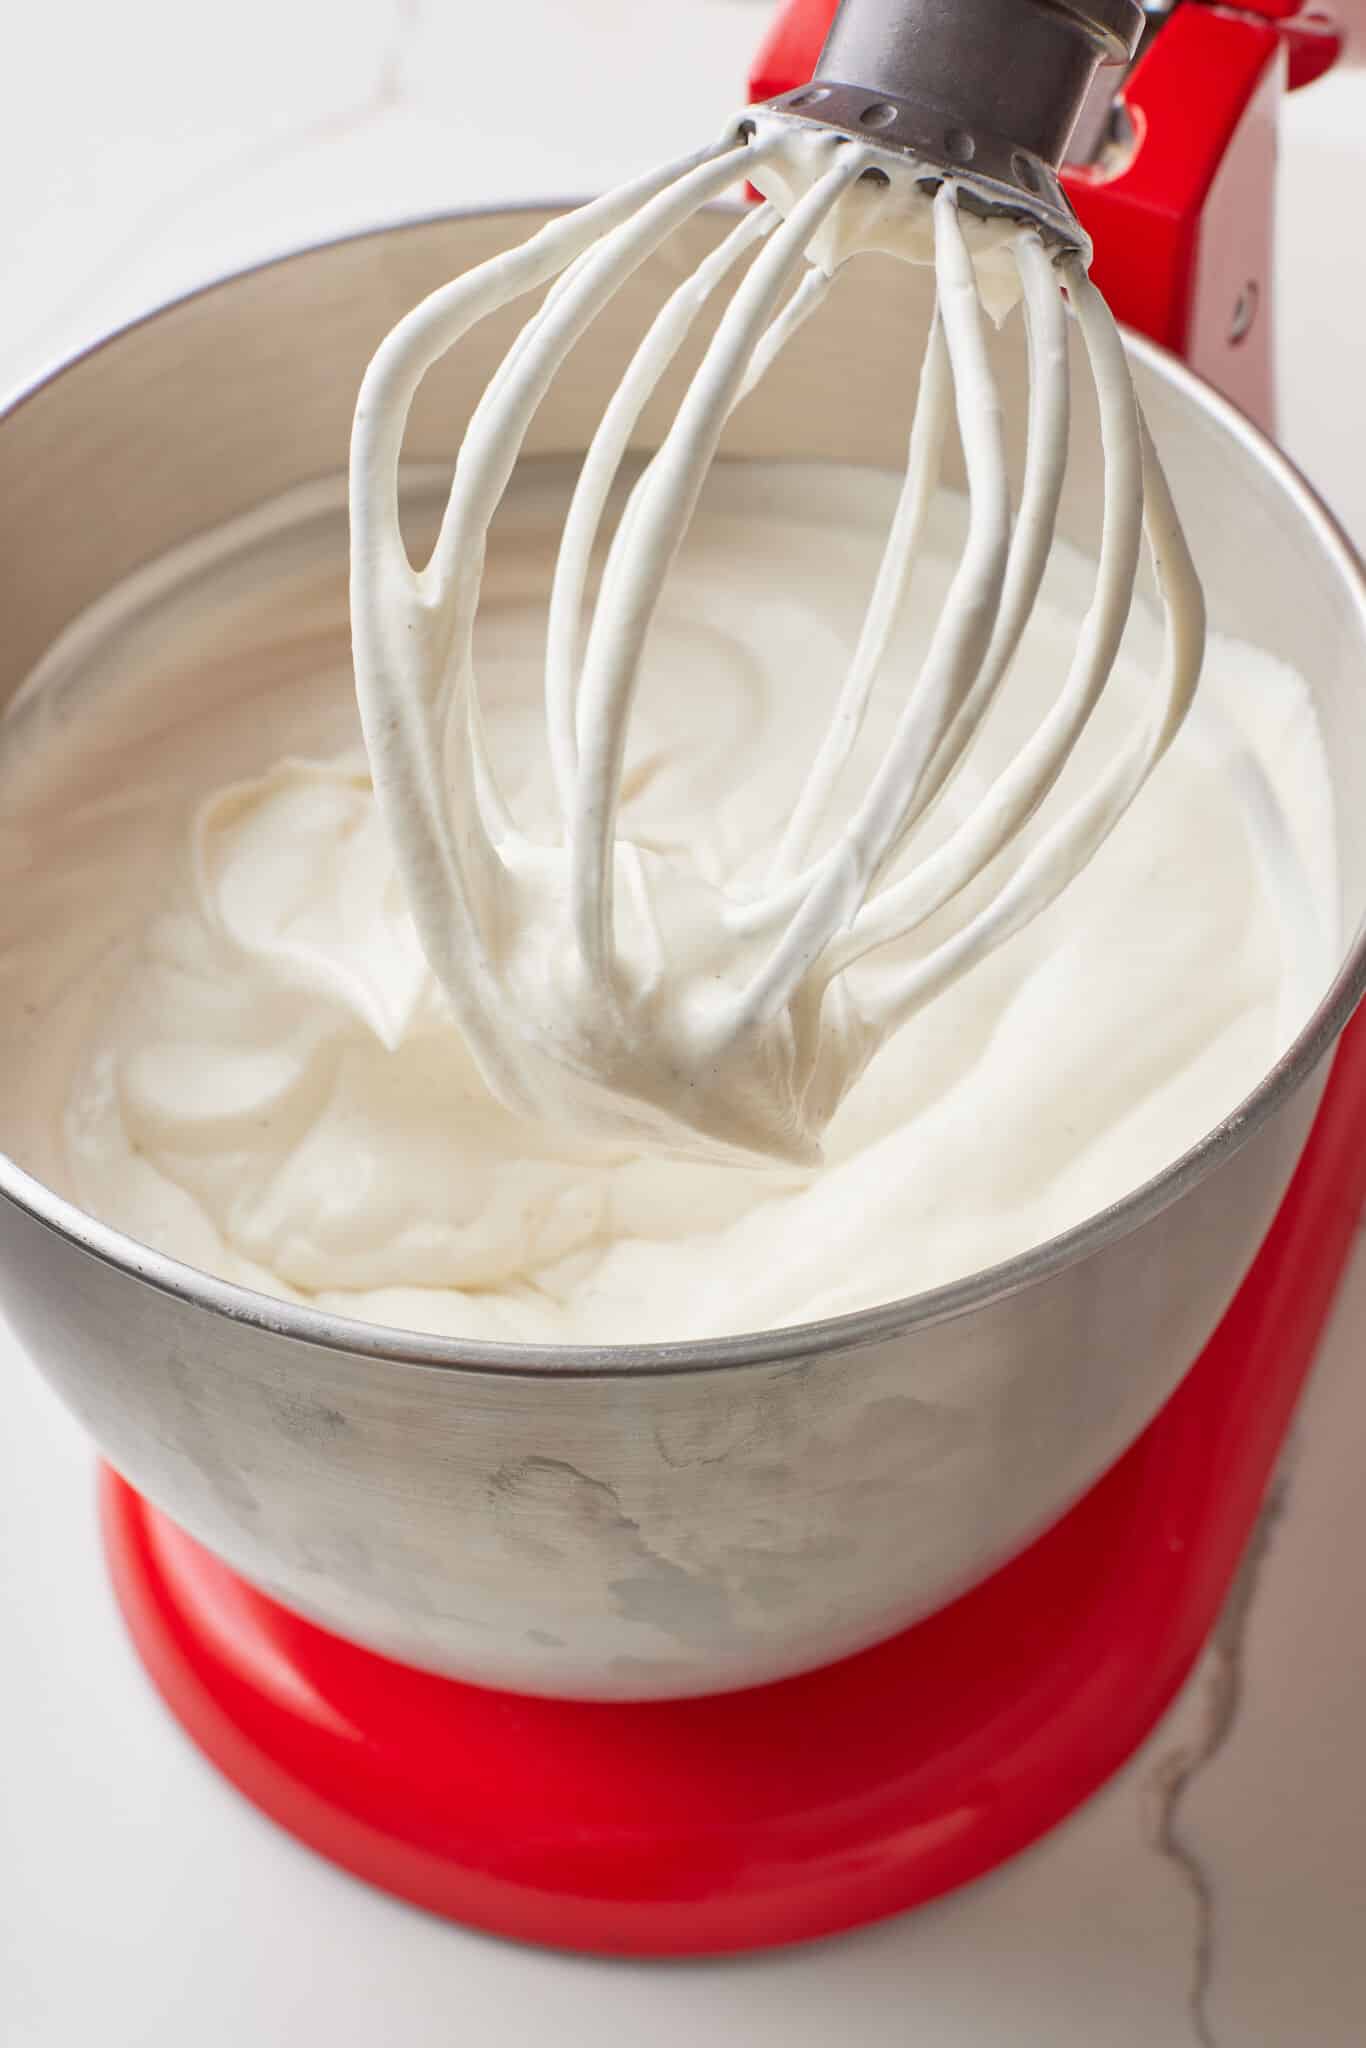
Whip until stiff peaks form. Increase the speed to high and whip until the mixture is thick and holds stiff peaks, about 1–2 minutes.
-
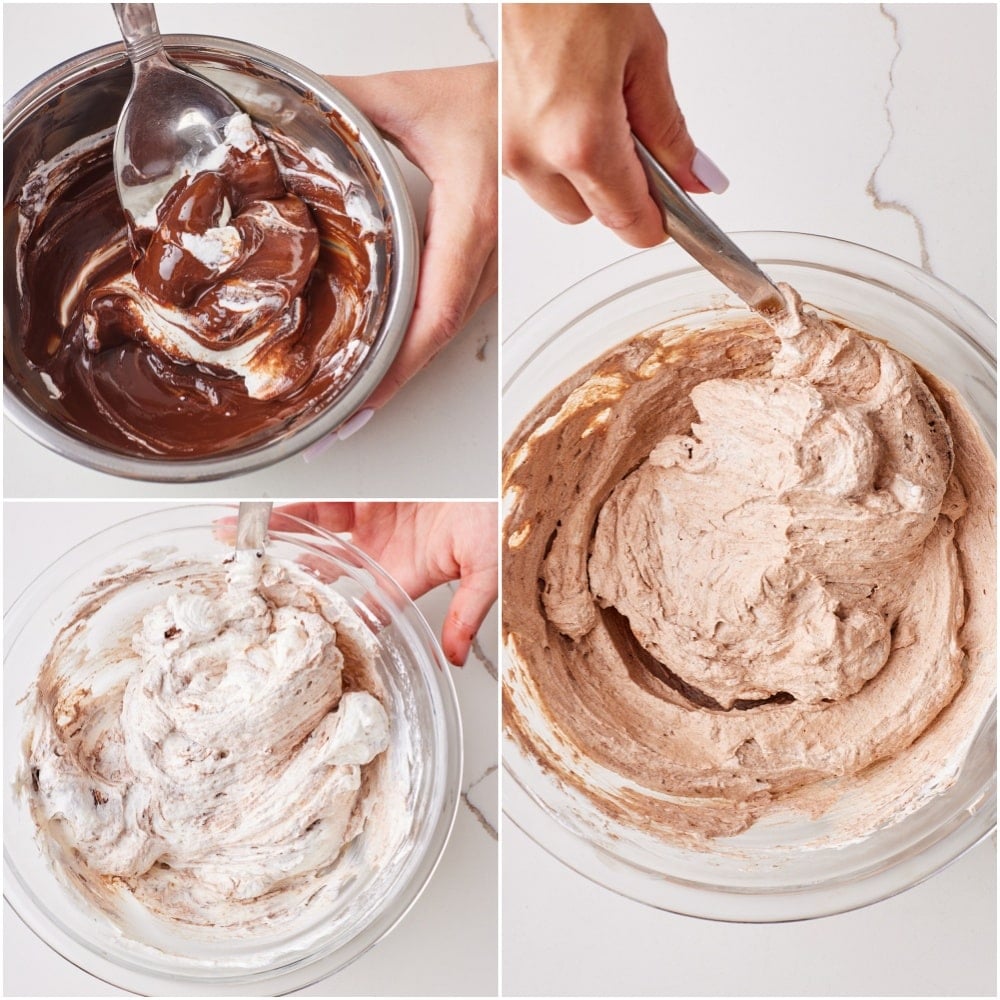
Combine cream and melted chocolate. Add a small amount of the whipped ice cream base to the cooled, melted chocolate and stir to loosen it.
-
Add the chocolate to the ice cream base. With a thin-edged spoon, swiftly fold the loosened chocolate mixture back into the ice cream base until just combined, working quickly so the chocolate does not seize.
-
Mix in vanilla extract. Lastly, mix in the vanilla extract.
-
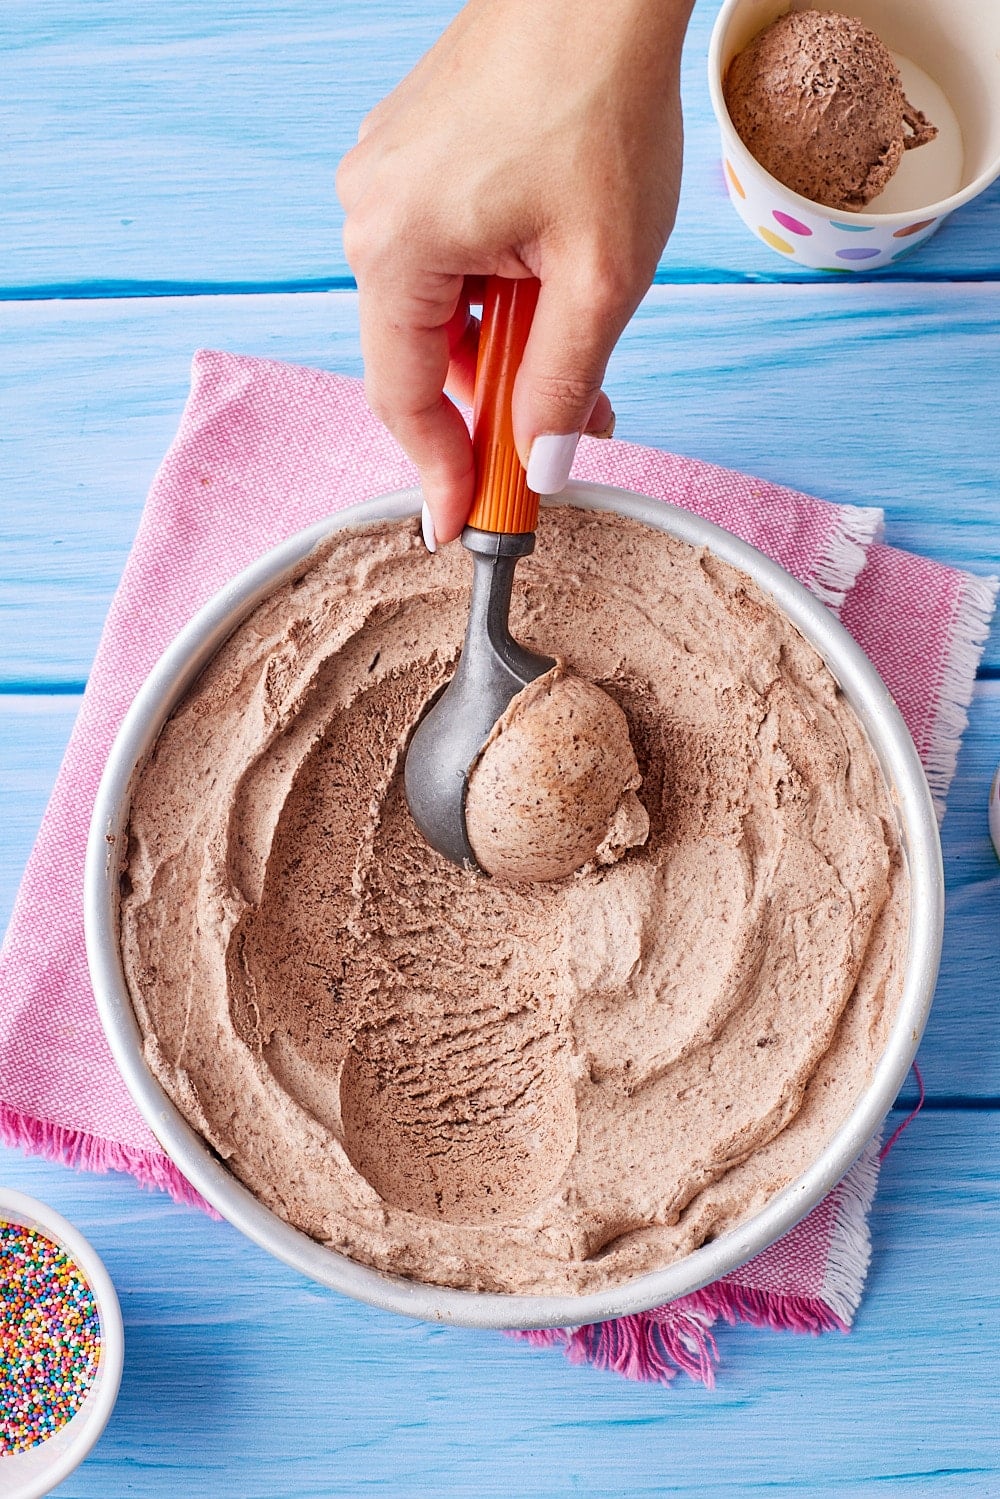
Freeze mixture. Transfer the mixture to an airtight, sealable container. Freeze for at least 6 hours, or overnight, until firm.
- Serve: Enjoy scooped straight from the freezer.
FULL (PRINTABLE) RECIPE BELOW!
Gemma’s Pro Chef Tips
- Decide your sweetness level: If you prefer your ice cream to be less sweet, reduce the condensed milk by about a quarter (9 fl oz/310 mls) for a less sweet ice cream. Keep in mind that sugar prevents ice crystals from forming, so the texture may be slightly firmer.
- Balance the Flavor: Adding ⅛ to ¼ teaspoon of salt can help cut the sweetness and bring out the vanilla taste.
- Chill First: Be sure to use cold condensed milk and cream that’s straight from the fridge, as they will whip up faster and better.
- Don’t Overwhip the Cream: Stop once you reach stiff peaks. If the cream is overwhipped, it can turn to butter, and the mixture could separate.
- Freeze at the Correct Temperature: Make sure your freezer is set to -18°C (0°F).
- Drizzle with a Topping: Try Peanut Butter Sauce, Butterscotch Sauce, or Whiskey Caramel Sauce.
- Top with cream: Make my vanilla, chocolate, or strawberry whipped cream.
- Make it portable: Serve this Homemade Chocolate Ice Cream in cones.
Make-Ahead and Storage Instructions
Make-ahead tips
- You can make this ice cream a day before you want to serve it and freeze it overnight.
- Let sit at room temperature for 5-10 minutes before scooping.
How to store leftovers
- Keep leftover ice cream chocolate in an airtight container with a lid in the freezer for up to six weeks.
- Before freezing, press parchment or plastic wrap directly onto the surface of the ice cream, then place the lid on the container to prevent ice crystals from forming.
Mix-Ins and Flavor Variations
Try the following additions to the ice cream mixture after the chocolate has been folded in, just before transferring to the freezer container.
- Mix in toasted, chopped nuts.
- Add 1 teaspoon of espresso powder.
- Stir in 2 tablespoons of Irish whiskey or rum into the chocolate base.
- Add a sprinkle of flaky sea salt.
- Stir in crushed cookies or Graham crackers.
- Mix in chocolate chips or a swirl of Nutella.
FAQs
Can I make this ice cream without a stand mixer?
- Absolutely! You can make this ice cream with either an electric hand mixer or a large whisk and a little elbow grease.
- Cold heavy cream whips beautifully by hand, especially when the cream and bowl are well chilled. Once the cream reaches soft peaks, simply whisk in the sweetened condensed milk until stiff peaks form.
What’s the difference between this no-machine ice cream and traditional ice cream?
Here’s how my no-machine ice cream is different from traditional ice cream:
- No churning needed: No ice cream maker required! Instead, the whipped cream provides the airy, light texture.
- No cooking: Traditional ice cream recipes use a custard base (cooked-egg mixture), but my no-machine recipe lets you skip that step.
- Egg-Free: Because you don’t need a custard base here, this treat is perfect for anyone who is avoiding eggs.
- Quicker, easier preparation: Less fuss all around!
- Different texture: No-machine ice cream is slightly denser than churned ice cream, but it’s just as creamy and scoopable.
Can I make this chocolate ice cream vegan?
- No, I don’t recommend making this chocolate ice cream vegan, because this 2-ingredient recipe relies on heavy whipping cream and sweetened condensed milk to create its creamy texture.
- For a delicious dairy-free recipe, check out my Coconut Ice Cream recipe with five flavor mix-ins (including chocolate!).
More Frozen Treat Recipes
- Soft Serve Frozen Yogurt
- Green Tea Ice Cream
- Tiramisu Ice Cream
- Chocolate Chip Cookie Ice Cream Sandwich
- Toasted Marshmallow Ice Cream
IMPORTANT NOTE: This recipe was improved and updated on 5/23/2026, to include NEW step-by-step photography, explanations and substitutes of key ingredients, make-ahead and storage instructions, mix-ins and flavor variations, answers to the most frequently asked questions, and Pro Chef Tips.
Try These Recipes!




Watch The Recipe Video!
Homemade Chocolate Ice Cream Recipe

Ingredients
- 2 cups (16 fl oz/480 ml) cold heavy whipping cream
- 14 oz (1 can/400 ml) cold sweetened condensed milk
- ⅔ cup (4 oz/115 g) chopped bittersweet chocolate, melted and cooled
- 1 teaspoon vanilla extract
Instructions
To Make the No Machine Ice Cream Base
- Using a stand mixer with a whisk attachment (or an electric hand mixer) whip the cold heavy whipping cream on medium-high speed until soft peaks form, about 3–4 minutes.
- Turn off the mixer and pour in the sweetened condensed milk.
- Increase the speed to high and whip until the mixture is thick and holds stiff peaks, about 1–2 minutes.
- Add a small amount of the whipped ice cream base to the cooled melted chocolate and stir to loosen it.
- With a thin edged spoon swiftly fold the loosened chocolate mixture back into the ice cream base until just combined, working quickly so the chocolate does not seize.
- Lastly, mix in the vanilla extract.
To Freeze the No Machine Chocolate Ice-cream
- Transfer the mixture to an airtight, sealable container. Freeze for at least 6 hours, or overnight, until firm.
- Enjoy scooped straight from the freezer. Store leftovers covered in the freezer for up to 6 weeks.
Recipe Notes
- Decide your sweetness level: If you prefer your ice cream to be less sweet, reduce the condensed milk by about a quarter (9 fl oz/310 mls) for a less sweet ice cream. Keep in mind that sugar prevents ice crystals from forming, so the texture may be slightly firmer.
- Balance the Flavor: Adding ⅛ to ¼ teaspoon of salt can help cut the sweetness and bring out the vanilla taste.
- Chill First: Be sure to use cold condensed milk and cream that's straight from the fridge, as they will whip up faster and better.
- Don’t Overwhip the Cream: Stop once you reach stiff peaks. If the cream is overwhipped, it can turn to butter, and the mixture could separate.
- Freeze at the Correct Temperature: Make sure your freezer is set to -18°C (0°F).
- Drizzle with a Topping: Try Peanut Butter Sauce, Butterscotch Sauce, or Whiskey Caramel Sauce.
- Top with cream: Make my vanilla, chocolate, or strawberry whipped cream.
- Make it portable: Serve this Homemade Chocolate Ice Cream in cones.








I’m not sure about ice cream lasting in the freezer for six weeks! The only way it lasts a week in my freezer is if I left home for 2 or three days! Great recipe! 🙂
Hi Gemma. Can I use Milk Chocolate Chips instead of Bittersweet Chocolate?
Hi Gemma!l really like your recipe !Do you have any suggestions on butter pecan ice cream? I really like that flavor.Thanks!
OMG Just tried this. If I made this often, they would have to wedge me through the doorway. It is too good.
Hi Gemma, my brother and I tried this recipe and it came out so well!!! We both are so thrilled…and this tastes so much better than store bought….all thanks to youuu <3
Hi, greetings from India. I made this today and it was so much better than store-bought ice cream. I loved the flavour from the dark chocolate. Had been using cocoa powder until now but never again. Thanks so much for all your recipes. Love!
Hi Gemma! Just want to say, great recipe. Well, all of them so far. Have not made one that has disappointed. Love Chocolate. Just FYI, I am currently living in Central America and one of the native gifts the region has to offer is a seasoned rice milk beverage called HORCHATA. One of those drinks where everyone has their version of it. If you haven’t tried it you should. If you do let me know if it is a suitable ingredient or as substitute as a non lactose ingredient. We tried your base and added local fruits to it like… Read more »
Is there a way to use unsweetened cocoa powder to make the chocolate Ice cream? I haven’t had much luck melting the non-dairy chocolate.
Hi! I’d been looking for a chocolate ice cream recipe and I accidentally saw your YouTube channel. I have a Ninja Creami ice cream machine, can I use this recipe using my ice cream machine? Also, can I melt the chocolate in the microwave? Sorry for the questions, I’m new to all these things. I just started learning to cook, bake bread, and try making ice cream for my husband. Thanks so much for your help.
“How to store leftovers”….what are “leftovers?! Are you mad, Gemma?! There’ll be no leftovers in our house! 🙂