This post may contain affiliate links. Please see my full disclosure for details.
Hi Bold Bakers!
WHY YOU’LL LOVE THIS RECIPE We make our own two-ingredient, No-Machine Ice Cream on Bigger Bolder Baking, so why not make our own homemade ice cream cones to double the deliciousness? No store-bought cones for us, thanks very much. The best thing is that you don’t need any special equipment, such as a waffle cone maker, a cone roller, or a pizzelle roller for this recipe. You’ll be enjoying a completely homemade ice cream treat in no time!
The cones are made with a vanilla batter that can be mixed by hand and cooked off straight away. This cannot be easier. Or make your batter in advance so that when you’re ready for your ice cream, you can cook off your cones at your leisure. They taste far superior to the average sugar cone and smell heavenly. You know when you walk by a Ben & Jerry’s Ice Cream Shop and catch the scent of waffle cones cooking? Well, imagine your own kitchen smelling like that…it’s the stuff that dreams are made of.
This recipe is one of many in my Bold Baking Basics repertoire. This section is full of essential recipes I want my Bold Bakers to know, like How to Make Homemade Food Coloring and Homemade Marshmallow Fluff.
IMPORTANT NOTE: This recipe was updated and improved on 5/10/2023 to include additional step-by-step photography, answers to the most frequently asked questions, and Pro Chef Tips.”
Table of Contents
- What are Homemade Ice Cream Cones?
- Tools You Need
- Ingredients for Homemade Ice Cream Cones and Why
- How to Make Homemade Ice Cream Cones
- Can I Make Homemade Ice Cream Cones in Advance?
- Can I Make Egg-Free Homemade Ice Cream Cones?
- FAQS
- Gemma’s Pro Chef Tips
- More Ice Cream Treat Recipes
What are Homemade Ice Cream Cones?
An ice cream cone is an edible cone-shaped or cup-shaped pastry vessel to hold ice cream.

An edible ice cream vessel shaped like a cup was invented in 1896 by Italo Marchioni, who had immigrated from Italy to New York. But actual ice cream cones became a new food sensation at the 1904 World’s Fair in St. Louis.
When an ice cream stand ran out of dishes, a nearby pastry vendor, Ernest A. Hamwi, rolled one of his thin, waffled pastry confections into a cone and offered it to the ice cream stand owner, who filled it, served it, and one of our favorite desserts was born.
Tools You Need
- Measuring cups and measuring spoons
- Mixing bowl
- Whisk
- Nonstick skillet or griddle
- Thin metal spatula
- Wire rack
- Parchment paper
Ingredients for Homemade Ice Cream Cones and Why

- Flour: All-Purpose (aka regular) flour has a protein content of around 11%, so it gives structure to your ice cream cones without making them too chewy.
- Egg whites: Using just egg whites gives the cones an airiness and crispness.
- Granulated (aka white sugar/caster) sugar: White sugar is perfect for this recipe because it has less moisture than brown sugar. White sugar caramelizes faster and gives the ice cream cones their crispier consistency.
- Salt: A pinch of salt enhances the caramel-sweetness of the cones.
- Whole milk: Whole milk adds the right amount of richness and flavor to the batter.
- Vanilla extract: Vanilla works as a seasoning to bring out the flavor of the other ingredients. You can use my homemade extract recipe to make good-quality vanilla extract at a fraction of the cost of store-bought.
- Butter: Butter contains around 80% milk fat, which adds richness to the cones and contributes to their crispness.
- Salted butter adds extra flavor and is what I always use, but unsalted butter works too.
- Semisweet Chocolate, sprinkles, and nuts: these add-ons give your cones flavor and texture and make them look extra festive.
- Go bold and make sprinkles yourself using my How to Make Sprinkles recipe!
How to Make Homemade Ice Cream Cones
Make the Ice Cream Cone Batter:
- Make sure to melt the butter first and cool down to room temperature.
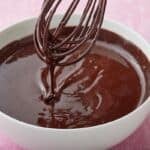
- Whisk the egg whites, sugar, milk, vanilla, and salt until combined. Mix wet ingredients first to disperse everything evenly. Then gently whisk in cooled butter and flour until smooth.
- Whisk the butter and sifted flour into the egg mixture until smooth.

Cook the Ice Cream Cone Batter:
- Make one cone at a time.
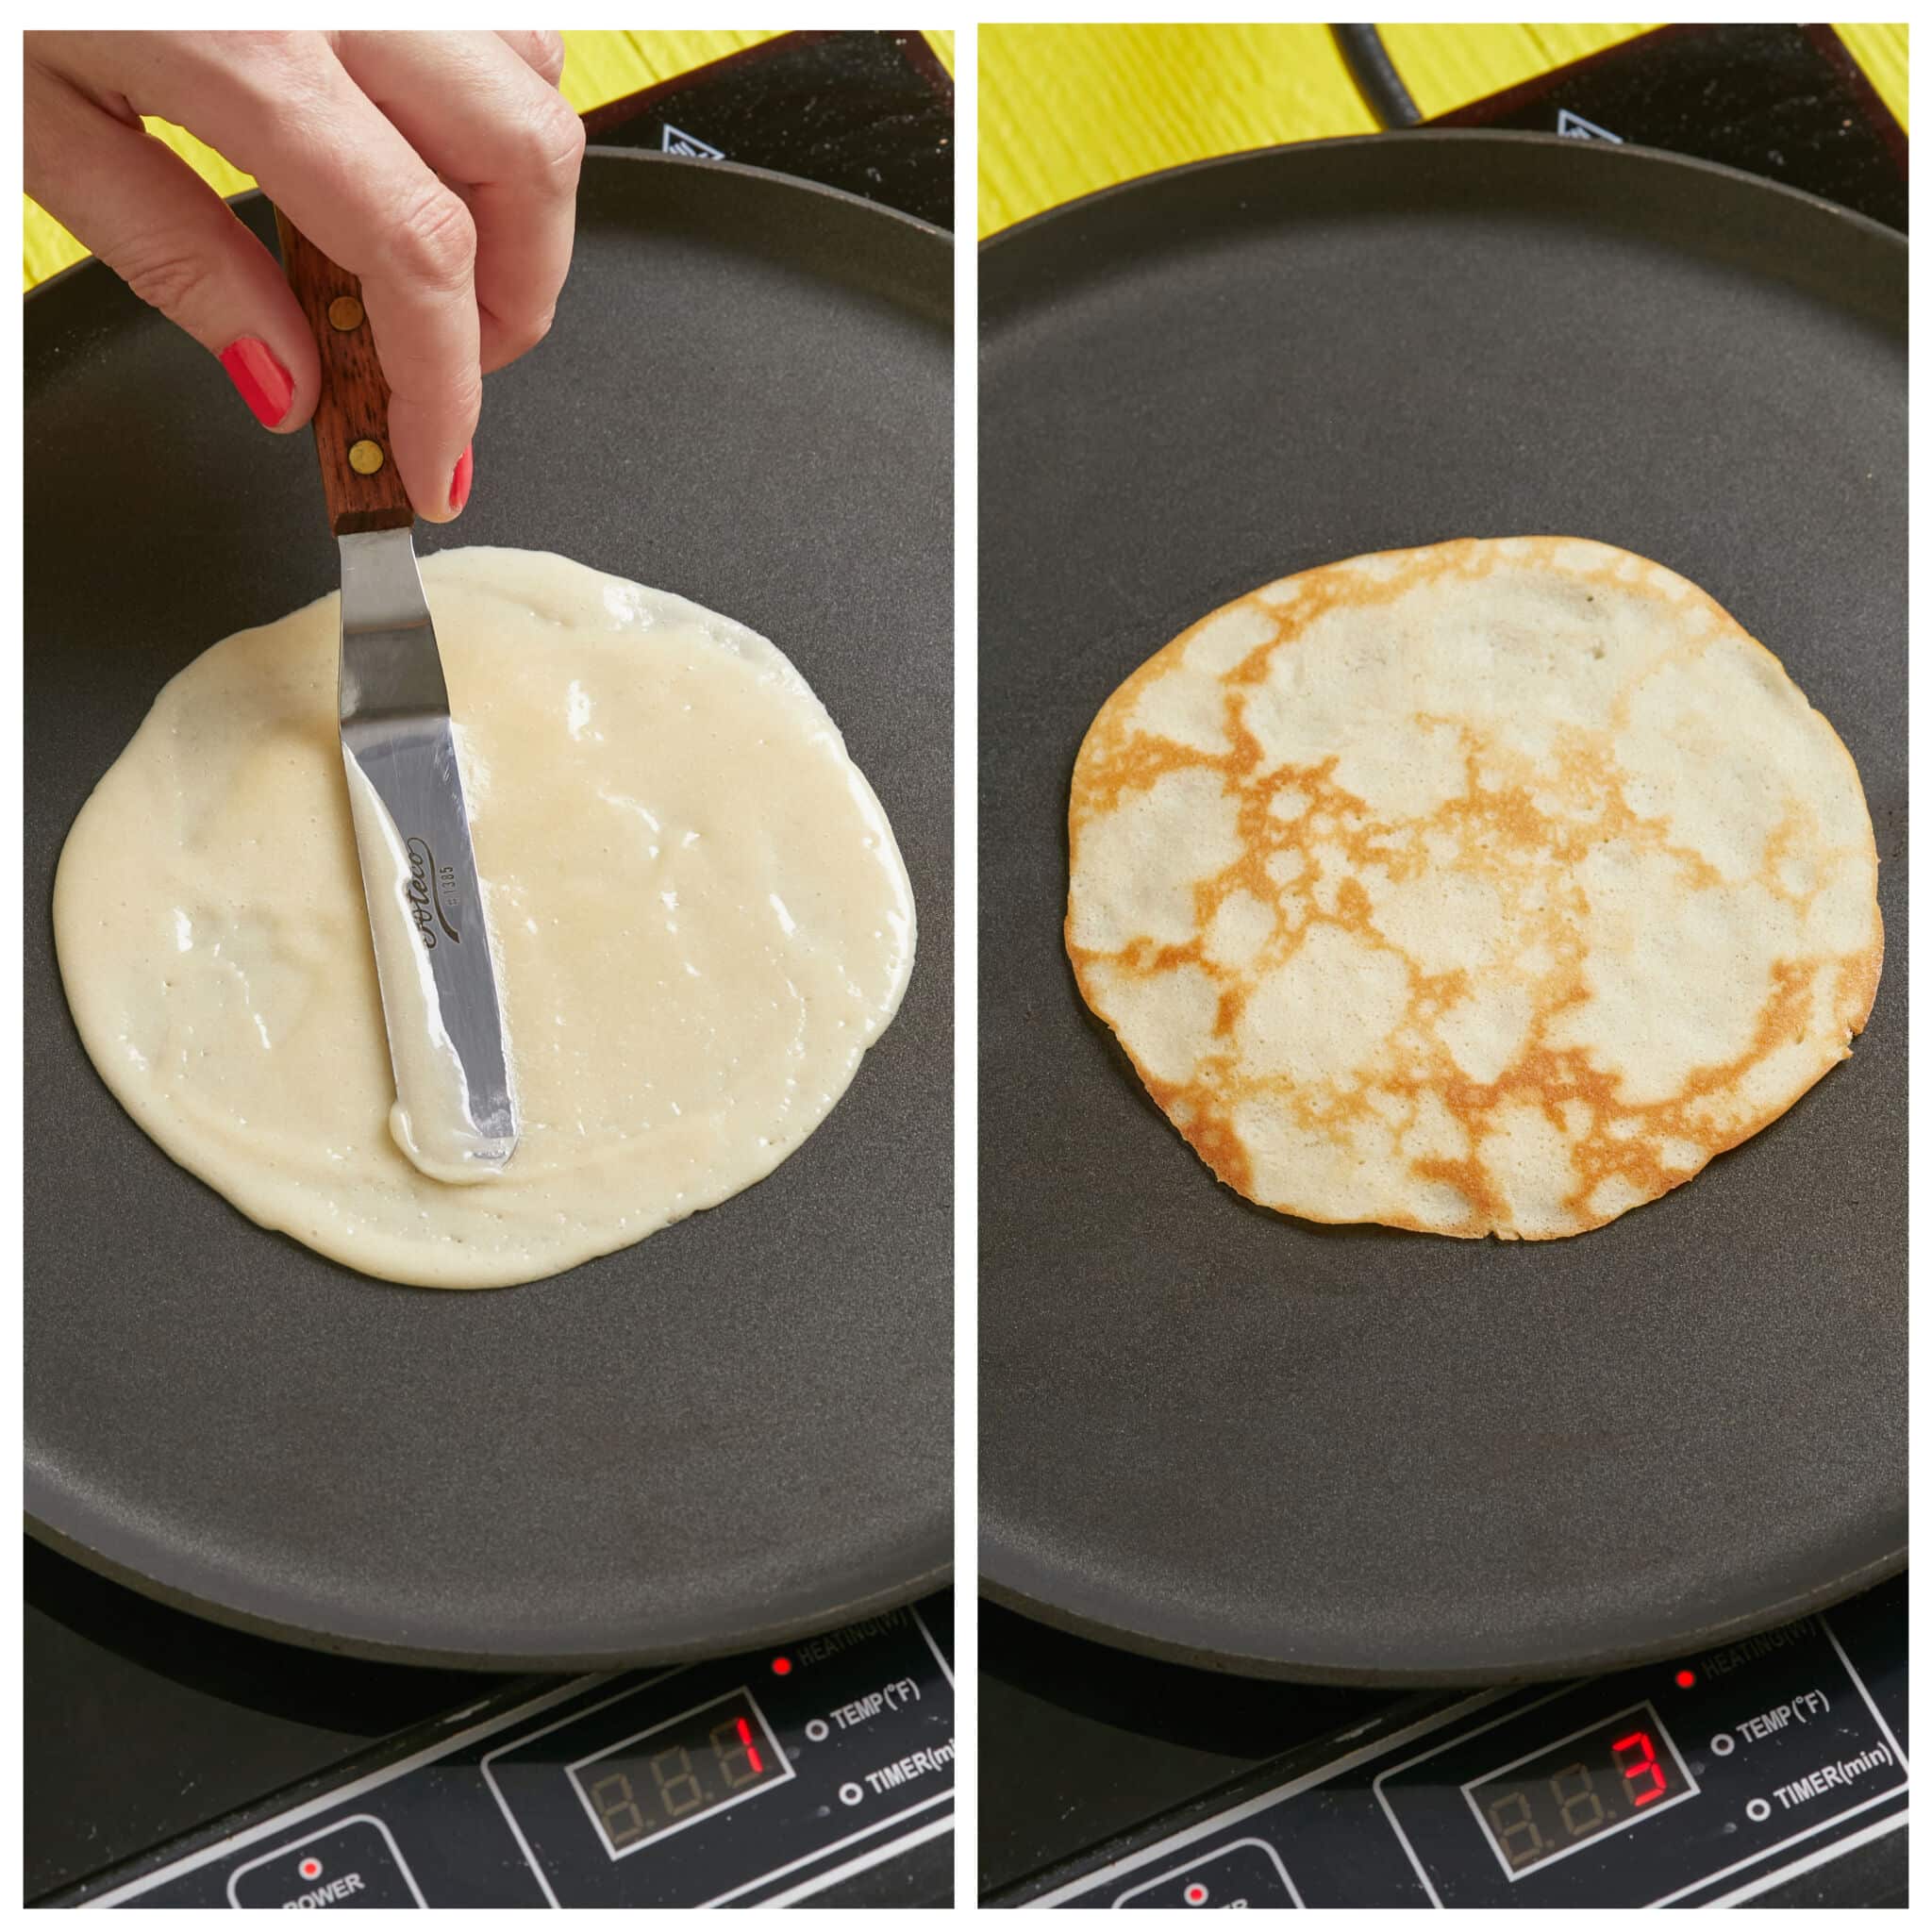
- Make sure to preheat the skillet at low heat. Quickly spread 1 1/2 tablespoons of batter into a thin, even, 6-inch diameter circle.
- Cook one side until the underneath is light golden brown, then flip it over. Cook the other side for another 1 minute or so until light golden brown.
Shape the Cones
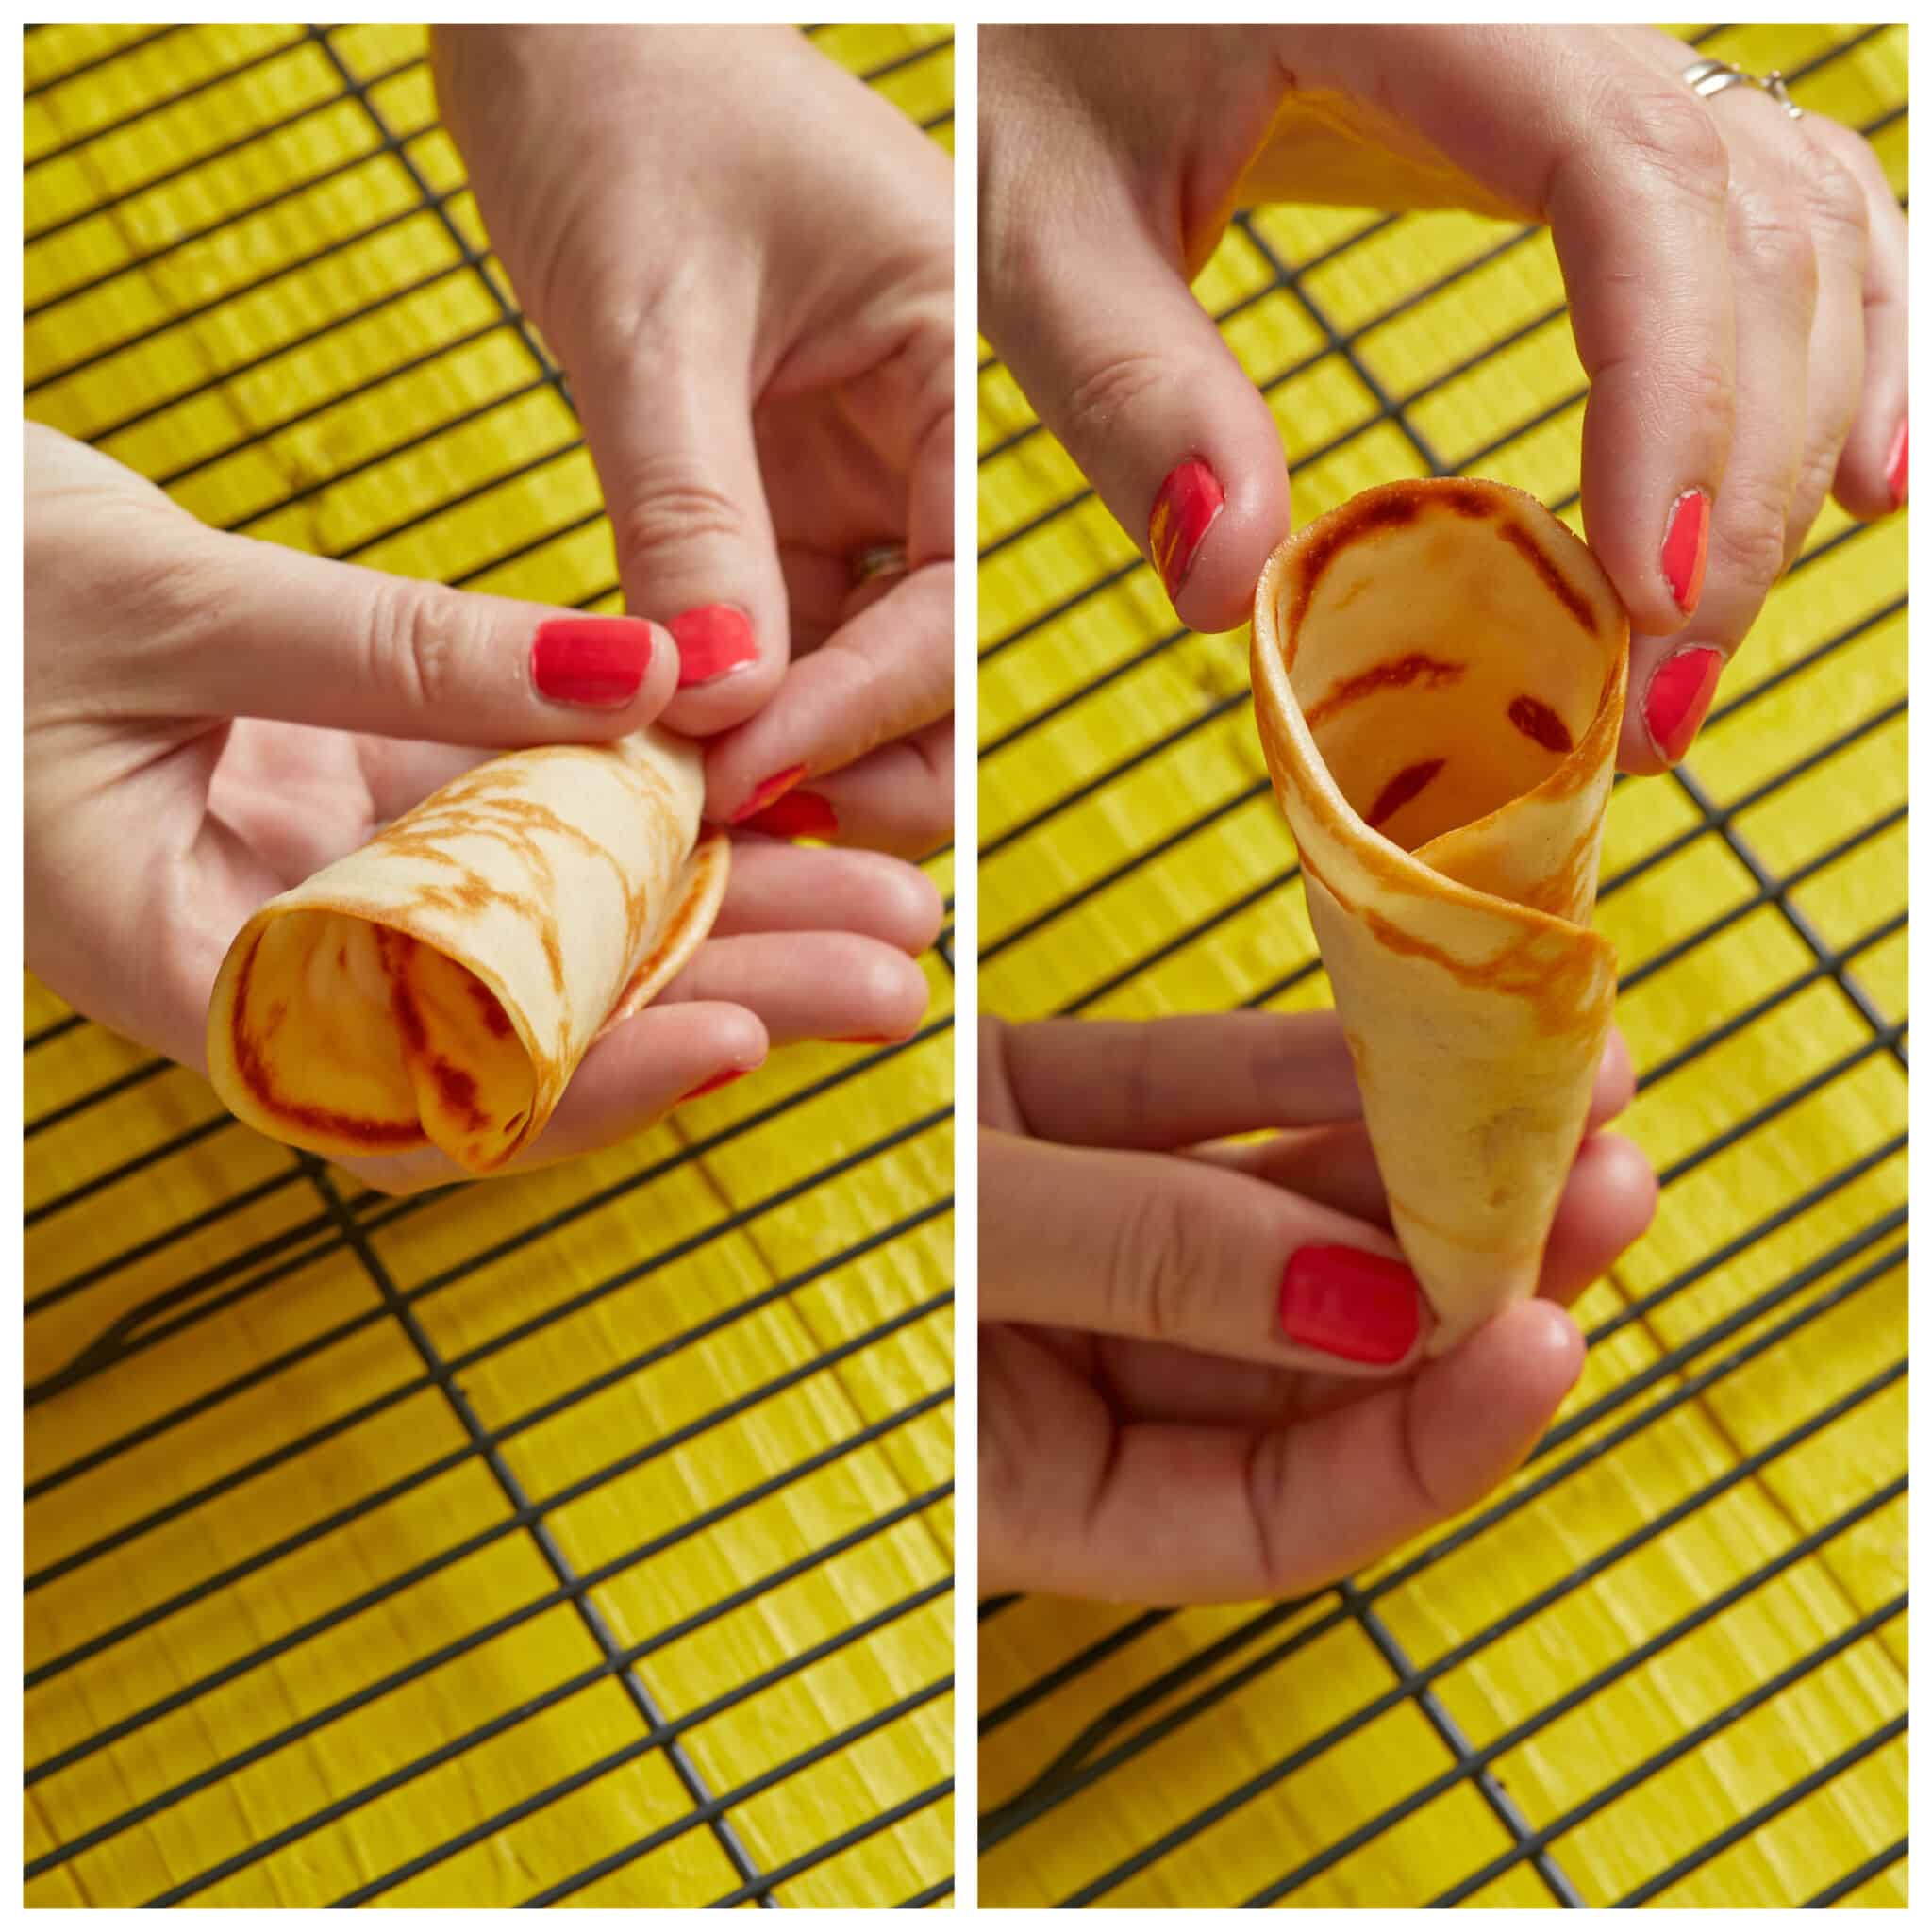
- Once ready, quickly use an offset spatula to lift it off the pan and pinch the bottom together in your palm as you’re rolling into a cone shape. Check out the video at 2:25 in this post for details!
- Proceed with the rest of the cones and let them cool on a wire rack.
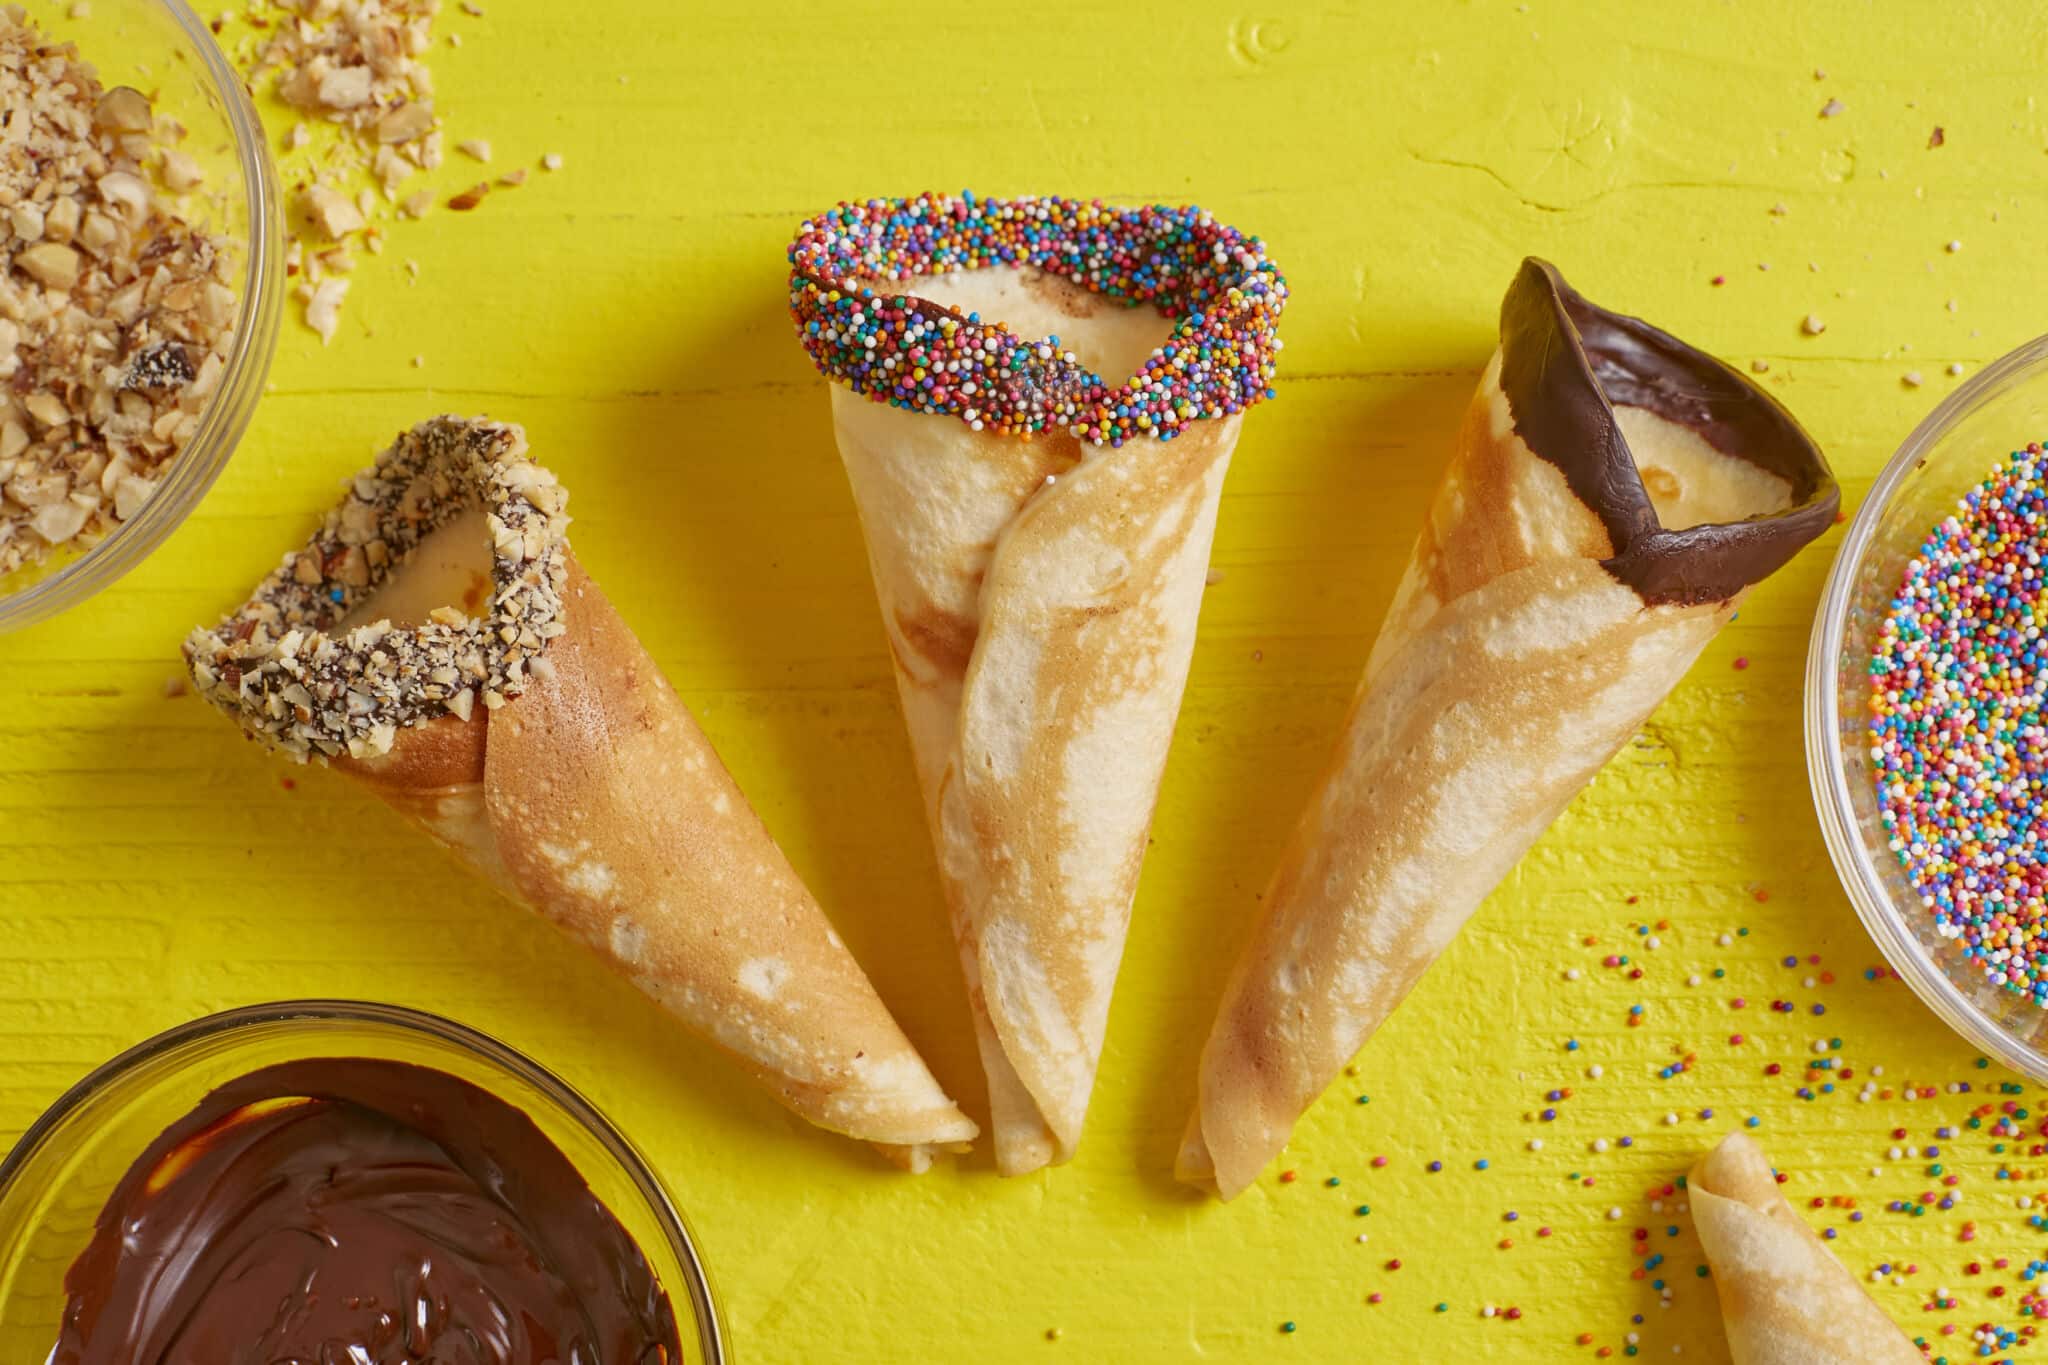
- Decorate cones with melted chocolate, sprinkles, nuts, or other mix-ins of your choice.

Can I Make Homemade Ice Cream Cones in Advance?
- You can make the batter in advance and keep it in the refrigerator for up to five days.
- After the cones are made, they are best eaten the same day, but they’ll keep in an airtight container for up to two days.
Can I Make Egg-Free Homemade Ice Cream Cones?
You can try flax eggs or cornstarch as a substitute from my guide of 12 Best Egg Substitutes for Baking Recipes & How to Use Them.
FAQs
How do I keep my Homemade Ice Cream Cones from becoming sticky and soft? How do you store ice cream cones?
Once they’re off the heat, humidity is the enemy here in keeping them crispy.
- The best way to prevent them from becoming sticky is to store them in an airtight container at room temperature or in the freezer.
- You can also re-crisp them at 400°F/200C° if preferred.
What can I dip my chocolate-covered cone in if I can’t eat nuts and don’t want sprinkles?
To get the same kind of crunch, you can also use crushed hard pretzels or chocolate bits.
Gemma’s Pro Chef Tips
- Make sure you sift your flour first because it will make the batter nice and light.
- For best results when using melted butter in a batter, make it a little ahead of time, let it cool down, and then stir it in.
- Spread your batter onto the heated skillet quickly before it begins to set. A very thin metal spatula is key for spreading and flipping.
- Don’t flip too early. Wait about four minutes until the batter is golden brown around the edges, and then gently pry it up.
- If you have a hole at the bottom of your cone, seal it up by dipping it in melted chocolate. A delicious fix!
More Ice Cream Treats to Enjoy
- Mochi Ice Cream
- Homemade Soft Serve Ice Cream (No Machine)
- Ube Ice Cream
- Homemade Vanilla Ice Cream
- Homemade Chocolate Ice Cream
GET 50+ ICE CREAM RECIPES!
Get 100+ Ice Cream recipes at my Gemma’s Freezer Section Ice Cream Destination page!

IMPORTANT NOTE: This recipe was updated and improved on 5/10/2023 to include additional step-by-step photography, answers to the most frequently asked questions, and Pro Chef Tips.”
Try These Recipes!


Watch The Recipe Video!
Homemade Ice Cream Cones

Ingredients
- 2 large egg whites (2 oz/60 g)
- ½ cup (4 oz/115 g) granulated sugar
- 3 tablespoons whole milk
- ½ teaspoon vanilla extract
- pinch salt
- ⅔ cup (3 ⅓oz/100 g) all-purpose flour, sifted
- 2 tablespoons (1 oz/28 g) butter, melted
- ⅓ cup (2 oz/57 g) semisweet chocolate, melted
- 3 tablespoons sprinkles
- ¼ cup (1¼ oz/35 g) chopped, toasted nuts
Instructions
To Make the Batter
- Place egg whites, sugar, milk, vanilla, and salt into a mixing bowl and whisk together. Whisk in flour and butter until fully incorporated and batter is smooth.
To Cook the Batter
- Place a nonstick skillet or frying pan on low heat. Pour 1 ½ tablespoons batter onto the warm skillet and spread into a thin, even layer, roughly 6 inches x 6 inches. Move it around fast to get a nice round shape.
- Cook for 3 to 4 minutes or until the underneath is a light golden brown. Flip over and continue to cook for 1 to 2 minutes.
Shaping the Cones
- Lift the disc off the griddle and QUICKLY and carefully roll from the bottom of the cone to shape it. Pull out the cone at the top to make it a wider cone. Hold the cone in place for a minute to set and harden before placing down to cool completely. (tip: Shaping the cone must be done quickly as the disc will begin to harden almost immediately after leaving the skillet)Another way to shape the cones is to lay the cone onto a clean towel and roll into a cone shape and hold, seam side down for 1 to 2 minutes or until cone cools and hardens.
Decorating the Cones
- Dip the cones in chocolate and cover in nuts or sprinkles. Set the cones on parchment until the chocolate hardens.
Storing the Cones
- These cones are best eaten the day they are made. If you have any left over carefully store in an airtight container for up to 2 days.


I formed a cone out of cardboard. Took a while to get it right but it wasn’t hard. Taped it and let it set. I bought a few silicone trivet-type round pieces and laid it over the cone. Lifted the upper flap piece and glued it to the bottom piece. Once dry, I cut the excess silicone off and pulled out a perfect cone! Repeated this again and now I have two washable cone forms. I substitute Splenda for sugar, skim milk for whole milk and have various flavorings and extracts to substitute vanilla. I’m going to try painting the… Read more »
115 grams of sugar to 100 grams flour seems very disproportionate (1:0.86). I have been making cones for years with 80 grams of sugar to 220 grams of flour (1:2.75). These are better with no milk, no butter, no egg. Oil, sugar, flour, baking soda, water and vanilla for flavour.
Hi Gemma!
I tried making these cones but they came out of the pan soft and sticky, almost like a sweet tortilla. I tried shaping them into a cone but they never hardened, even after keeping them out and then trying them in the refrigerator, and wouldn’t hold their shape – they kept deflating. Where did I go wrong?
Thanks! 🙂
Hi Gemma! Will this recipe work without whole milk, or should I pick some up? Already have 2 percent, but I didn’t know if that would work. Thanks!
How to make cone!!!!!!!!!
Gemma I want to fill up the cone with the ice cream like the store bought one but I am not sure how to do it and I just dont want a scoop of it
hello my name is wayan from bali,how long the cone stay after making,one day one week?
Thank you
Brilliant recipe! Thanks very much. An unexpected very hot Easter weekend on lockdown which I didn’t predict when I did 2 weeks worth of food shopping, so really pleased we can have ice cream cones thanks to your recipe.
Gemma can I use oil instead of butter ?
I made these with gluten-free flour, as me and my family are gluten intolerant, and it worked perfectly! I reduced the flour to 90g, added a little under 1/8 tsp xanthan gum, and let the batter rest for 10 min after mixing to let the flour absorb the liquid. It took me almost 2 hours to cook all the cones, but I definitely got more than 8, so next time I might halve the recipe. It took some practice to. get the cone shape right, especially as they are very hot right off the skillet, but eventually I had 7… Read more »