This post may contain affiliate links. Please see my full disclosure for details.
Hi Bold Bakers!
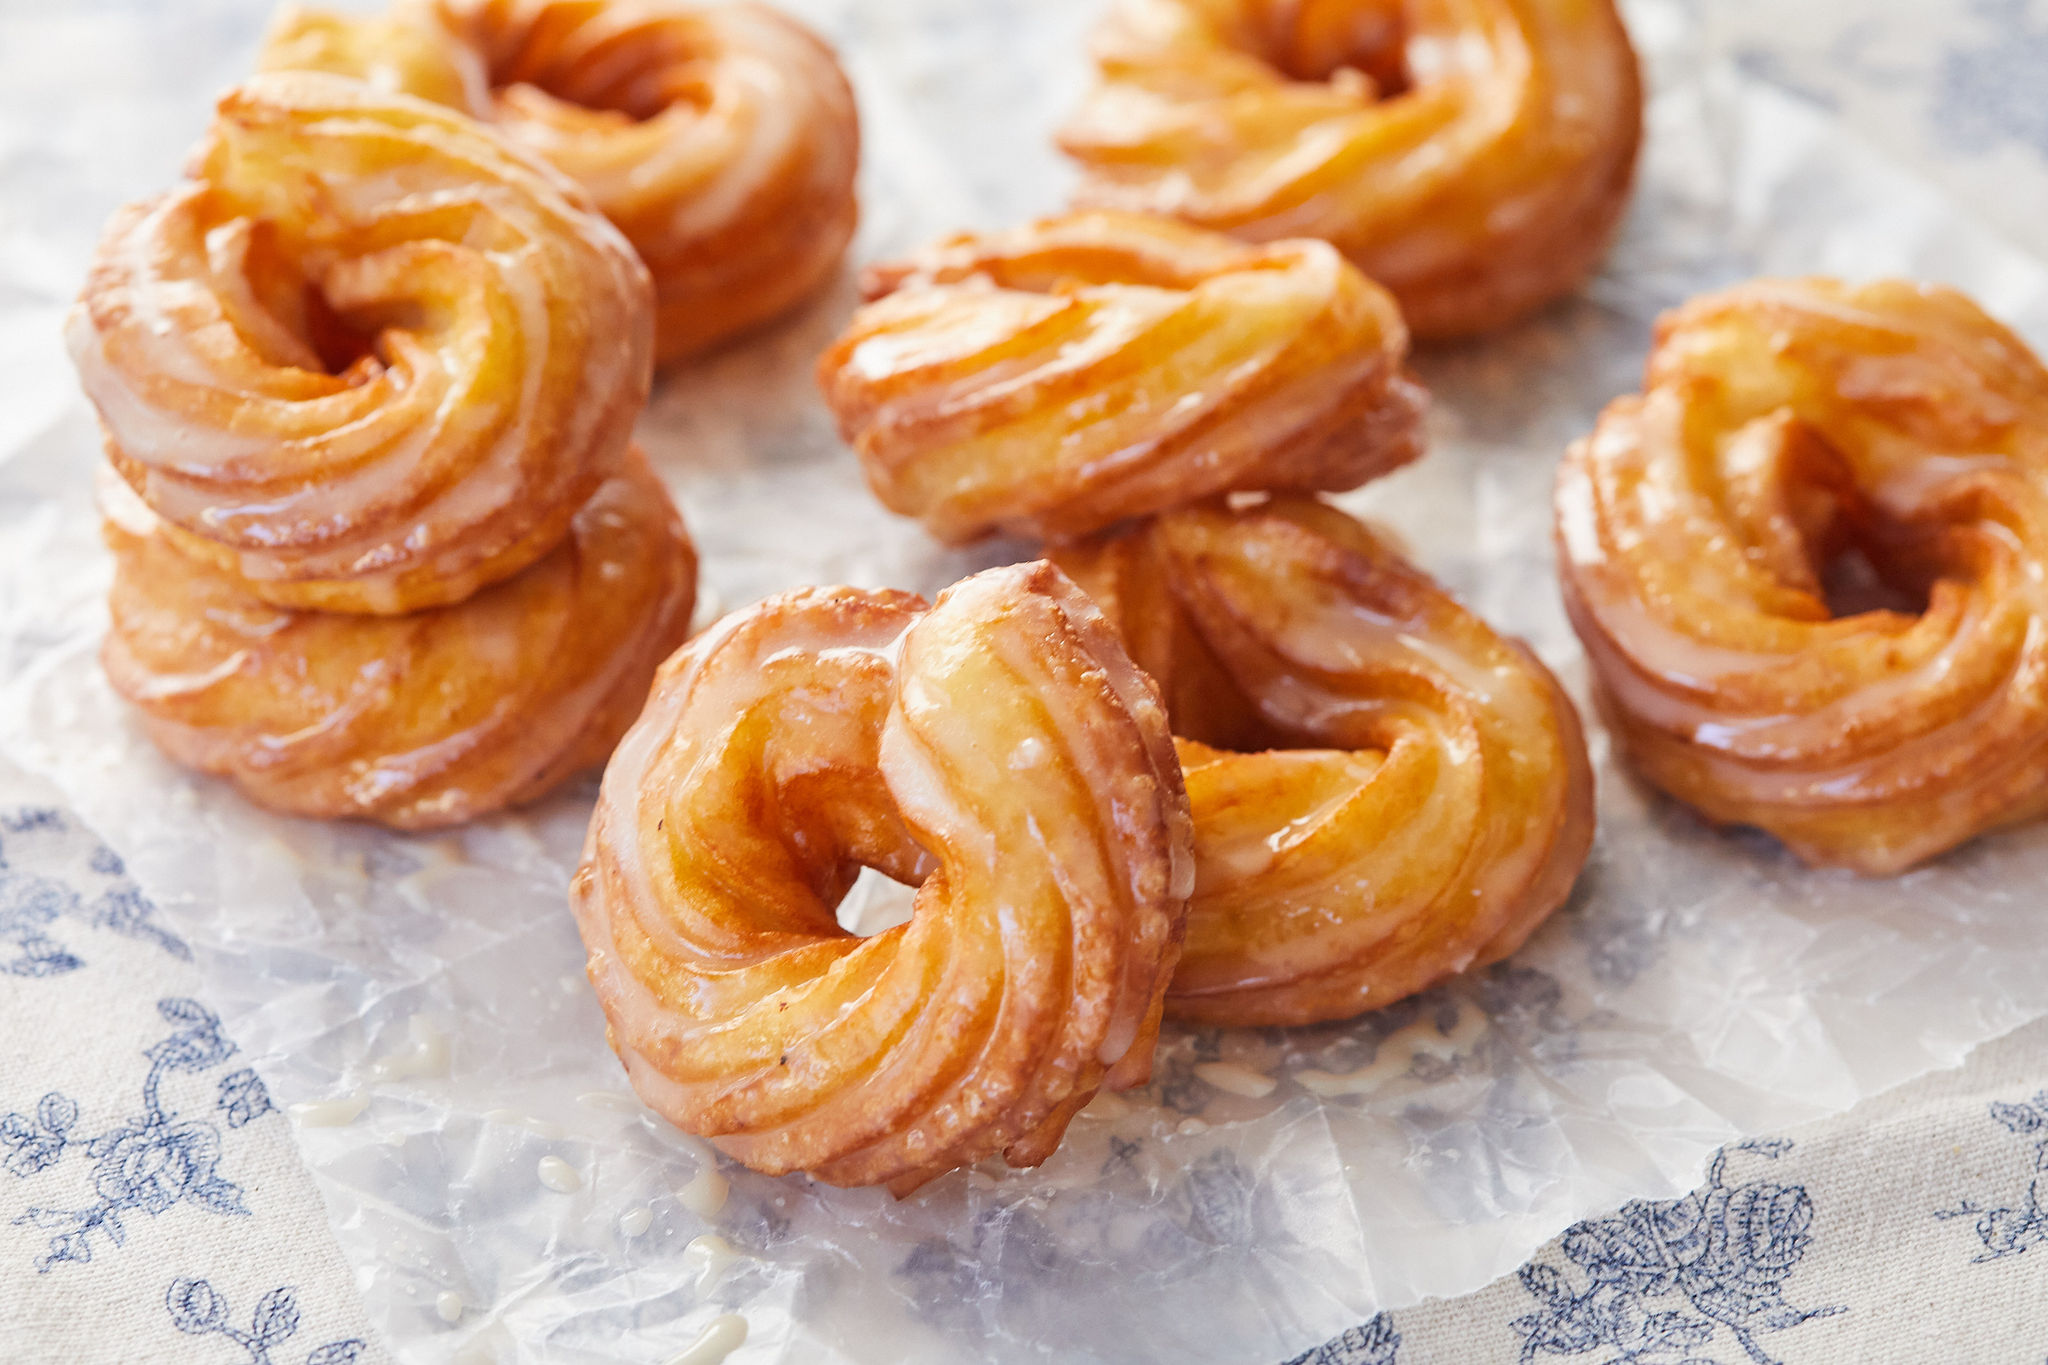
The only thing better than picking up fresh donuts on a Sunday morning is making homemade donuts and serving them warm, perfectly glazed, and with a fresh pot of coffee! My homemade French Crullers, warmed out of the oil and dipped in my vanilla glaze are a weekend maker. They’re impossible to pass up!
These French Crullers taste super light and delicate, not hefty or oily like you might experience with regular donuts. That’s because they are made with a pâte à choux dough that makes the donuts so fluffy.
Don’t be intimidated by frying at home! As long as you are careful around the oil, you’ll be surprised just how easy it is. These donuts are irresistibly crispy on the outside and so airy on the inside—you will be glad you gave it a go!
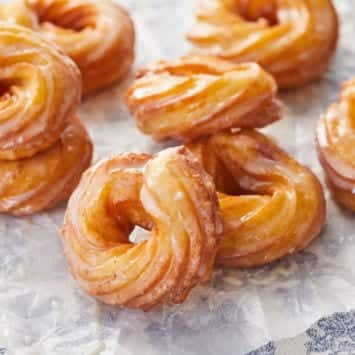
What Are French Crullers?
Crullers, which are originally Dutch, are now a favorite in America and Canada too! Unlike typical donuts, French Crullers are made with pâte à choux dough instead of yeasted dough. When choux pastry dough, made with simple ingredients like milk, butter, and eggs, is fried, it rises and stays airy thanks to the steam.
French crullers should be crispy, with edges that absorb all the wonderful vanilla glaze on the outside and super soft on the inside.

What You Need To Make French Crullers
- Measuring cups and spoons
- Heavy-bottomed saucepan
- Stand mixer or electric hand mixer
- Parchment paper
- Piping bag with large open star tip
How To Make French Crullers
They look fancy, but you’ll be surprised how easy French crullers are to make! Here is how you make French Crullers (and don’t forget to get the full recipe with measurements, on the page down below):
- In a large, heavy-bottomed saucepan, bring the milk, water, butter, sugar, and salt to a boil. Turn off the heat and dump the flour in all at once into the milk mixture. Start to stir vigorously!
- Turn the heat back on, stirring constantly, for about 2-3 minutes over medium heat. It will become a thick dough. You will be turning and pressing it onto the pan.
- After a few minutes of kneading the dough like this, it should be come smooth. At that state, remove it from the heat and spread the dough out into the bowl of a stand mixer or a large mixing bowl to cool quickly.
- After around 15 minutes, once the dough is just a little warm, add 2 of the eggs and the lemon zest. Beat until fully incorporated.
- Add in the remaining two eggs and beat until blended. Place the dough in an airtight container and refrigerate for at least an hour, until it is fully chilled.
- While the dough chills, cut parchment paper into 18 3-inch (7 1/2-cm) squares.
- Once the dough has chilled, put it into a piping bag fitted with a large open star tip. Pipe a 3-inch (7 1/2cm) circle of dough on each square of paper, making sure you connect the ends.
- In a large, heavy-bottomed pot, pour oil 2 inches deep. Clip a thermometer to the side of the pot and heat the oil to 350°F (180°C). (If you don’t have a thermometer, heat the oil on medium heat.) Place a wire rack on a baking sheet next to the pot and a bowl of the vanilla doughtnut glaze near the rack.
- Once the oil has reached the proper temperature, place a square of parchment with the cruller on it on a slotted spoon and slowly lower it into the oil. Add one or two more crullers to the pot in the same way. Be sure to leave the parchment paper on.
- After a minute, pull the paper away from the cruller with metal tongs. Fry the cruller for about 2-3 minutes on one side, until golden brown, then flip and fry the other side for another 2-3 minutes.
- Remove the cruller from the oil, dip it in the glaze, and cool it on the wire rack. Repeat with the remaining crullers, but be sure to fry only 2 or 3 at a time so the oil maintains the correct temperature.
Gemma’s Pro Chef Tips For Making French Crullers
- French cruller dough is very soft and sticky—that’s why they need to be fried on the parchment paper at first. If you would prefer not to mess around with frying with it on and then removing, you can freeze the crullers until they are cold and firm enough to handle without sticking or losing their shape.
- Oil is HOT when frying! Make sure you stay safe: place doughnuts carefully in the oil to avoid splash burns, watch carefully to make sure that the oil doesn’t start to smoke, and never walk away from oil heating on the stove! If you are a child making this recipe, make sure to get an adult’s help!
- Crullers are best the day they are made, but you can still start the recipe in advance! You can make this dough up to 3 days ahead and store it in an airtight container until you are ready to pipe.
- Coat in my vanilla donut glaze!

How Do I Store French Crullers?
French Crullers are best eaten the day they’re made, but leftovers can be stored in an airtight container in the refrigerator for up to 2 days. If you’d like to prepare the dough in advance, be sure to see my tips above!
Make More Donuts!
- No-Yeast Donuts
- Homemade Apple Cider Donuts
- Churro Donuts
- Pumpkin Donuts
- Dunkin’ Donuts Chocolate Glazed Donuts
- Old Fashioned Donuts
And don’t forget to buy my Bigger Bolder Baking Cookbook!
Full (and printable) recipe below!
Try These Recipes!

Watch The Recipe Video!
Perfect Homemade French Crullers Recipe
Ingredients
- ½ cup (4floz/115ml) whole milk
- ½ cup (4floz/115ml) water
- ½ cup (4oz/115g) butter
- 1 tablespoon granulated sugar
- 1 teaspoon salt
- 1 cup (5oz/142g) all-purpose flour
- 4 large eggs, room temperature
- Zest from 1 lemon
- 6 cups (48 fl oz/1440 ml) Vegetable oil (for frying)
- Vanilla doughnut glaze
Instructions
- In a large, heavy-bottomed saucepan, bring the milk, water, butter, sugar, and salt to a boil.
- Turn off the heat, dump the flour in all at once, and begin to stir vigorously.
- Turn the heat back on, stirring constantly for 2-3 minutes over medium heat. It will become a thick dough and you will be turning and pressing it onto the pan.
- After a few minutes, once the dough is smooth, remove from the heat and spread the dough out in the bowl of a stand mixer or large mixing bowl to cool quickly.
- After about 15 minutes, once the dough is just a touch warm, beat in the eggs one at a time followed by the lemon zest and beat until fully incorporated.
- Place the dough in a medium bowl and lay cling wrap directly on the surface of the pastry to stop a skin from forming. Chill for at least an hour but up to 24 hours.
- While the dough is chilling and stiffer, cut parchment paper into eighteen 3-inch (7 ½ cm) squares.
- Once the dough has chilled, place in a piping bag fitted with a large open star tip. Pipe a 3-inch (7 ½ cm) circle of dough on each square of paper, making sure the ends connect.
- In a large, heavy-bottomed pot, pour oil 2 inches deep, clip a thermometer to the side of the pot and heat to 350°F (180°C). (If you don’t have a thermometer then heat the oil on medium heat). Place a wire rack on a baking sheet next to the pot and a bowl of vanilla doughnut glaze near the rack.
- Once the oil is at temperature, place a square of parchment with the cruller on it on a slotted spoon and slowly lower it into the oil. Add one or two more crullers to the pot in this way, leaving the paper on.
- After a minute, pull the paper away from the cruller with metal tongs. Fry about 2-3 minutes on one side, until golden brown, and then flip and fry the other side for another 2-3 minutes.
- Remove from the oil, dip in the glaze, and let drain and cool on the wire rack. Repeat with the remaining crullers, frying only 2 or 3 at a time to keep the oil at the correct temperature.
- Serve immediately. Crullers taste best and should be eaten the day they are made. You can store any leftovers in an airtight container in the refrigerator for up to 2 days.


Hi Gemma, since they are choux pastry, could you bake instead of fry them?
I made this recipe for the first time. It’s so good! The house still smells delicious. The family loves them. Thank you for another great recipe, Gemma. I used the 1M tip and it worked well.
I’m wondering how long the dough will last in the fridge
My donuts were solid in the middle. Not very light. What did I do wrong.
I made these with dried Blueberries on top as lemon and Blueberry crullers… they were beyond divine
Are these sturdy enough when cooked to fill with a cream?
These were so delicious. They were so quick and easy to make. I used ube flavouring instead of vanilla and it was delicious. Definitely need to make these again!
Can these be done in an air fryer
Can you make the dough the night before and refrigerate until the next morning?
Hi Gemma, my crullers cracked and opened up on the top in the fryer. Any suggestions what could have caused this? Was the oil too hot maybe?