This post may contain affiliate links. Please see my full disclosure for details.
Hi Bold Bakers!
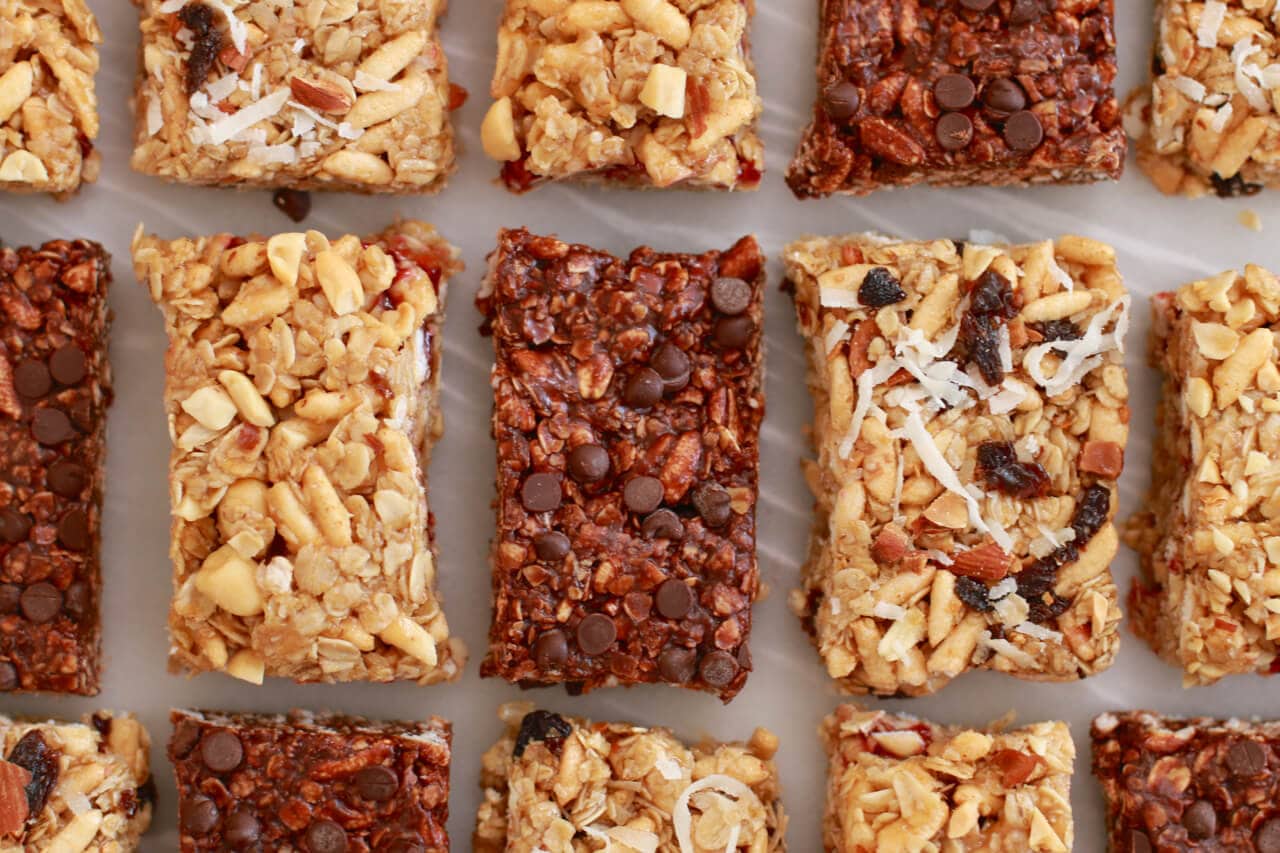
WHY YOU’LL LOVE THIS RECIPE: My No-Bake Granola Bars are proof that homemade snacks can be just as convenient as store-bought—but fresher, more flavorful, and completely customizable. With one simple base recipe, you can keep snack time interesting, prep ahead for the week, and enjoy wholesome bars everyone reaches for.
- One recipe, endless possibilities: Turn one easy base into Nut & Raisin, Peanut Butter & Jelly, or Double Chocolate granola bars.
- No oven needed: Just a few minutes of prep, then let the refrigerator do the work.
- Perfect for busy days: Great for lunch boxes, breakfast on the go, after-school snacks, or an afternoon energy boost.
- Made with everyday ingredients: Oats, cereal, honey, and pantry staples come together in minutes.
- Easy to customize: Swap in your favorite nuts, dried fruit, seeds, nut butters, or chocolate to make them your own.
As a busy mom and professional baker, I’m always looking for snacks that are easy to make, travel well, and actually taste better than anything from the grocery store. These homemade No-Bake Granola Bars have been one of my favorite make-ahead recipes for years because they come together in minutes, require no oven, and start with one simple master recipe that you can turn into three completely different flavors. My pro tip is: do not leave out the brown sugar (or its sub) as it is needed to caramelize and aid in setting the bars. Otherwise, they can be crumbly. The bars are customizable with the mix’ins but don’t change the quantity, otherwise there might not be enough butter/sugar mixture to help it stick together.
Bold Bakers Loved This!
“Love love love these bars! I have a 14 and 9 year old and they adore them. I’ve made them a handful of times, each with different “add ins”. Everything from cherry & choco, to apricot & cashew. They disappear quickly. I love knowing what my kids are eating and now they don’t like store bought in the least.” — Lynn MC
“I just found this recipe a few days ago and made them yesterday. I made the double chocolate and the peanut butter and jelly flavors, and they were so easy to throw together! And they turned out to be delicious! ” — Alesia
” I made the nut bars today.. I put cranberries instead of raisins. my kids loved them. Thank you so much.” — Sagari Anand
IMPORTANT NOTE: This recipe was improved and updated on 7/26/2026, to include explanations and substitutes of key ingredients, make-ahead and storage instrucitons, answers to the most frequetnly asked questions, and Pro Chef Tips.
Table of Contents
- What Are No-Bake Granola Bars?
- Tools You Need
- Key Ingredients
- How to Make No-Bake Granola Bars
- Gemma’s Pro Chef Tips
- Make Ahead & Storage Instructions
- FAQs
- More No-Bake Snacks
What Are No-Bake Granola Bars?
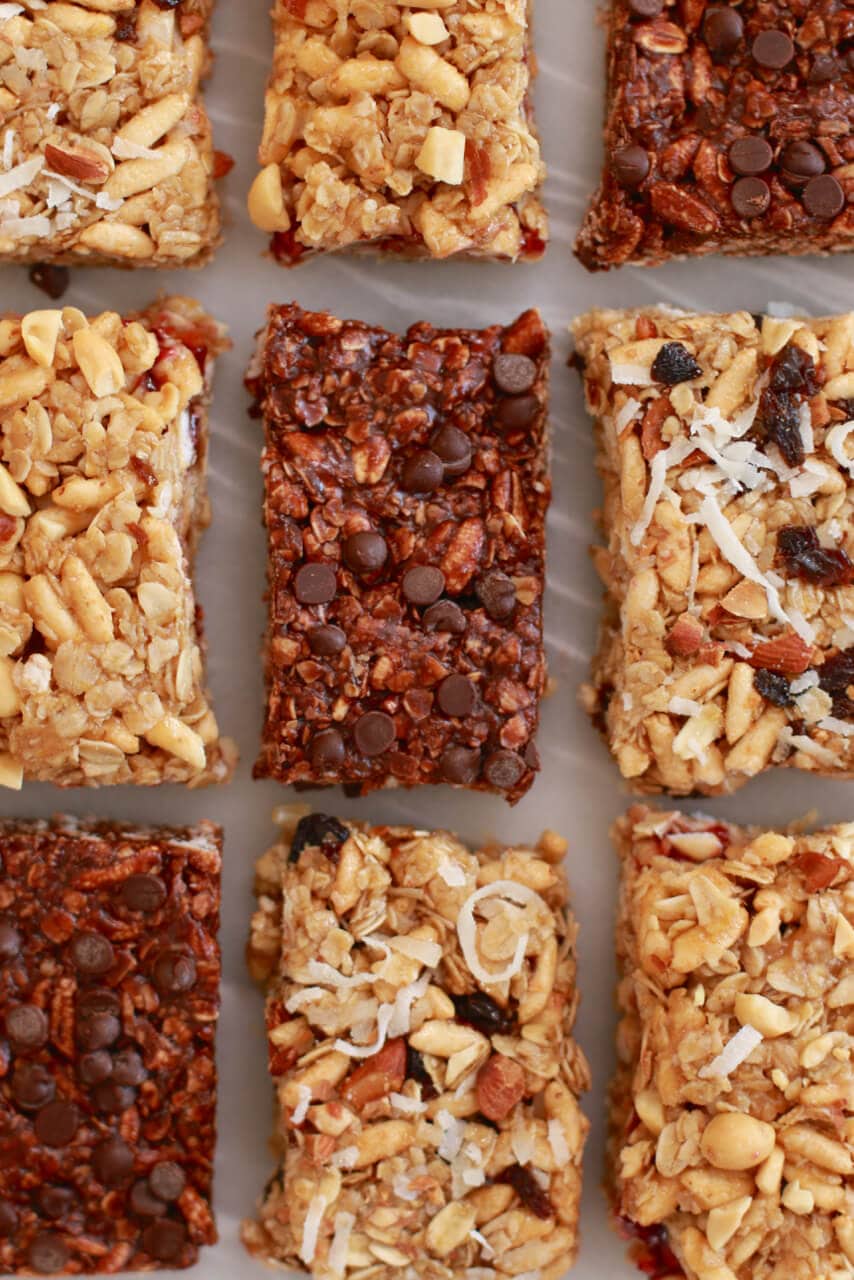
No-Bake Granola Bars are chewy snack bars made by binding oats and other mix-ins together with a cooked syrup instead of baking them. After the mixture is pressed firmly into a pan and chilled, it slices into sturdy, portable bars that are perfect for breakfast, lunch boxes, or grab-and-go snacks. My version starts with one easy master recipe that can be turned into three delicious flavors: Nut & Raisin, Peanut Butter & Jelly, and Double Chocolate.
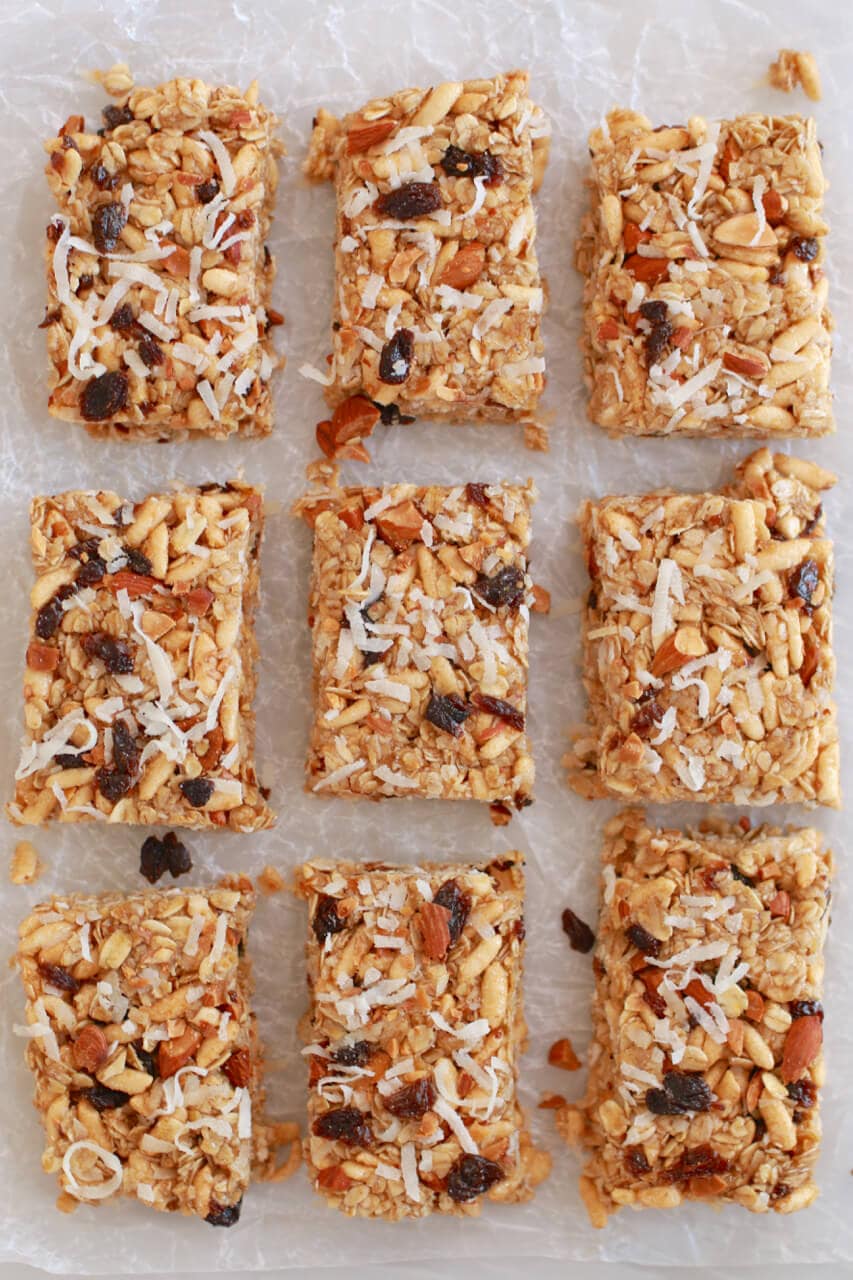
Nut & Raisin Granola Bars
A Nut & Raisin Granola Bar is normally what you buy down aisle 6 next to the cereal but no more. Homemade gives you better fuel for your family and your wallet.
Peanut Butter & Jelly Granola Bars
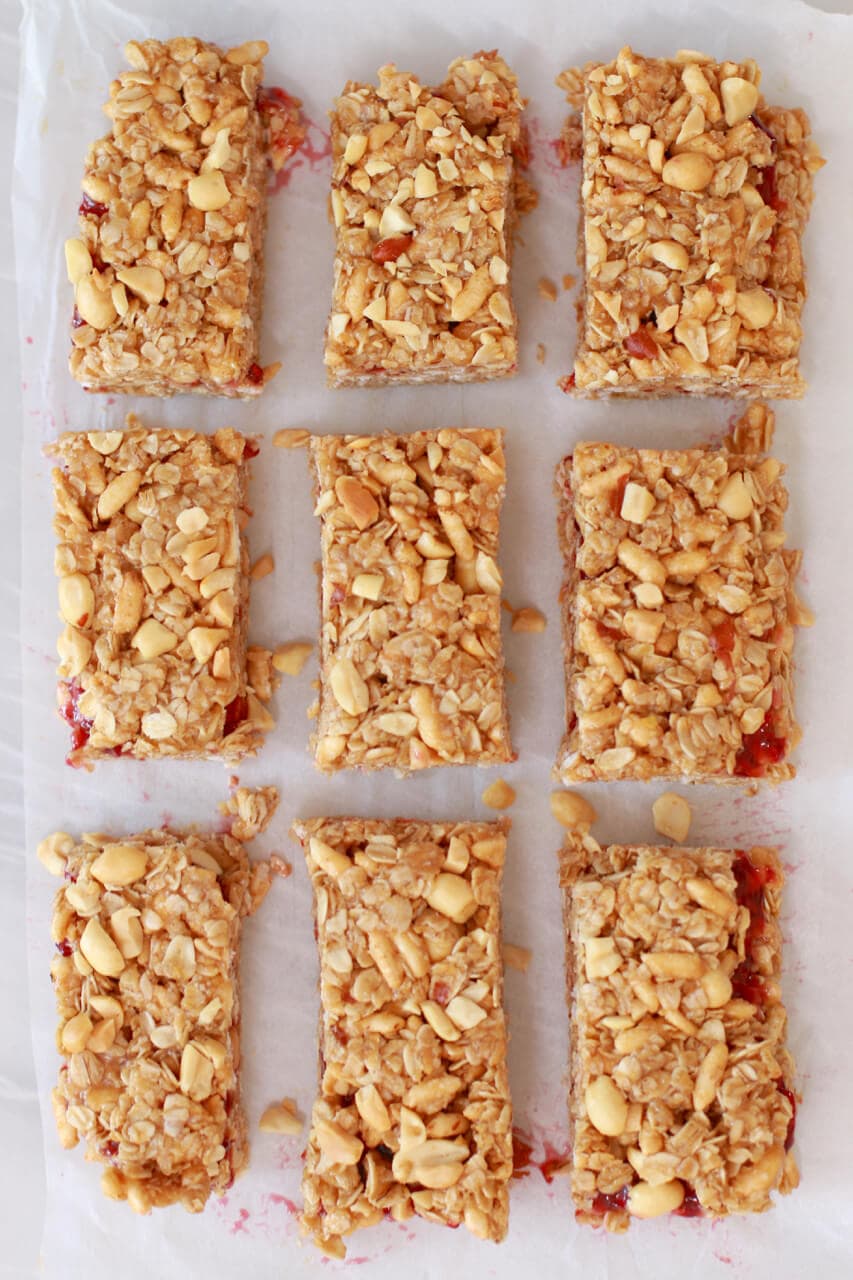
This PB&J is the bar you want for that fix of salty and sweet. It is a double whammy of protein and carbs and the perfect pick me up during the day.
Double Chocolate Granola Bars
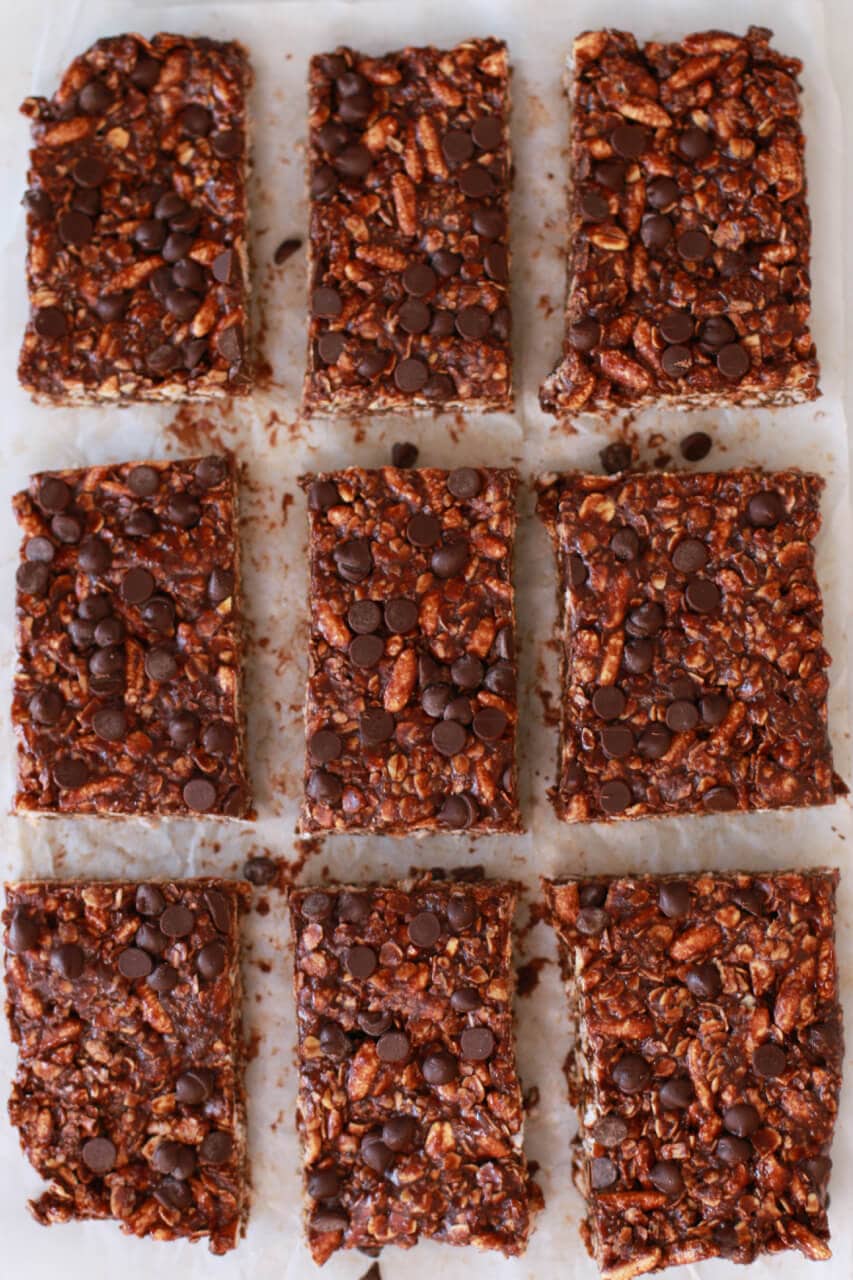
Don’t be fooled by the Chocolate, this bar is not without its benefits. Cocoa powder can lower high blood pressure, boost cognitive performance and provide essential minerals such as calcium and potassium. I have prescribed myself one a day and I already feel better.
Tools You Need
- Measuring cups
- Measuring spoons
- Measuring jugs
- Mixing bowls
- Wire whisk
- Silicone spatula
- 8×8-inch (20×20 cm) or 9×9-inch (23×23 cm) square baking pan
- Parchment paper
- Sharp chef’s knife (for slicing)
Key Ingredients & Substitutes
Oats
- The foundation of these granola bars, providing their signature chewy texture.
- Use quick-cooking oats for a softer bar or old-fashioned rolled oats for a heartier bite.
- Substitutes: Quick-cooking oats and rolled oats are interchangeable. Don’t use steel-cut oats.
Rice Crispy Cereal
- Adds lightness and crunch so the bars aren’t too dense.
- Helps create the classic crisp-chewy texture.
- Substitutes: Crispy brown rice cereal, puffed rice, or lightly crushed cornflakes.
Honey
- Sweetens the bars while acting as the main binder that holds everything together.
- Gives the bars a soft, chewy texture.
- Substitutes: Maple syrup, agave syrup, or brown rice syrup.
Brown Sugar
- Adds caramel-like sweetness and helps create a chewy consistency.
- Balances the wholesome flavor of the oats.
- Substitutes: Light or dark brown sugar, or coconut sugar for a less caramel-forward flavor.
Butter
- Adds richness and helps create a smooth syrup that evenly coats the dry ingredients.
- Substitutes: Coconut oil or your favorite plant-based butter.
Vanilla Extract
- Adds warmth and enhances all of the other flavors.
- Optional but highly recommended.
- Substitutes: You cna also use an equal amount of Vanilla Bean Paste.
Salt
- Balances the sweetness and makes the flavors pop.
Flavor Mix-Ins
- Customize the master recipe with nuts, dried fruit, peanut butter, jam, cocoa powder, chocolate chips, seeds, or shredded coconut. But don’t change the quantity, otherwise there might not be enough butter/sugar mixture to help it stick together.
- Mix and match to create your own favorite combinations.
- Substitutes: Nearly any chopped nuts, seeds, dried fruit, nut butter, or chocolate will work.
How to Make No-Bake Granola Bars
- Mix the dry ingredients: In a large bowl, mix together the oats and cereal.
- Make the syrup: In a medium microwavable bowl add in butter, honey and brown sugar. Microwave this mixture for 2 minutes. It will bubble up so make sure your bowl is big enough so it doesn’t overflow. You can also do this step in a saucepan if you don’t have a microwave.
- Season the syrup: Into the caramel, whisk in the vanilla and salt.
- Coat the oats: Pour the mixture over the oats and thoroughly stir using a rubber spatula. Mix the ingredients together until the oats are completely coated.
- Add the mix-ins and chill: Add in your desired mix-in (look below). Then press very firmly into a small tray lined with parchment. (9″ × 9″ or smaller). If you like your bars thicker, you can use a smaller pan. If you do not press firmly enough, the bars will fall apart when you eat them. Place them in the fridge for 2-3 hours then cut to size.
- Store the bars: These bars keep for up to a week after they are made. Store in an airtight container in the fridge or on the counter.
No-Bake Nut & Raisin Granola Bars
- Fold in the mix-ins: Stir the nuts, coconuts and raisins into the granola mix coating them well in the caramel. Press into the tray firmly so the bars hold together.
No-Bake Peanut Butter & Jelly Granola Bars
- Mix in the peanut butter: Mix the peanut butter into the caramel when it comes out of the microwave. Stir the caramel and the toasted nuts into the dry ingredients. Press half of the granola bar mix into a tray.
- Layer with jam: Spread on the jam and then press the reserved granola mix on top. Press into the tray firmly so the bars hold together.
No-Bake Double Chocolate Granola Bars
- Add the chocolate: Mix the cocoa powder into the caramel mix. Stir into the oats and rice along with the chocolate chips. Press into the tray firmly so the bars hold together.
FULL (PRINTABLE) RECIPE BELOW!
Gemma’s Pro Chef Tips
- Press the mixture down firmly: This is the secret to granola bars that hold together. Use the bottom of a measuring cup or glass to pack the mixture tightly into the pan.
- Toast your nuts first: Toasted nuts add deeper flavor and extra crunch, making homemade bars taste even more bakery-worthy.
- Line your pan with parchment: Leave an overhang so you can lift the entire slab out before slicing for clean, even bars.
- Chill before cutting: Refrigerate until completely firm so the bars slice neatly instead of crumbling.
- Use a sharp knife: Wipe the blade clean between cuts for professional-looking edges, especially with the Double Chocolate bars.
- Customize the mix-ins: Swap raisins for dried cranberries, cherries, or chopped apricots, or use your favorite nuts, seeds, or nut butters.
- Keep chocolate from melting: If adding chocolate chips, let the cooked syrup cool for 2 to 3 minutes before stirring them in if you want distinct chocolate chips instead of melted chocolate throughout.
- Make a double batch: These bars keep well for up to a week in an airtight container and freeze beautifully, making them perfect for meal prep and lunch boxes.
Make Ahead & Storage Instructions
- Make ahead: These granola bars are perfect for meal prep. Prepare them up to 1 week in advance and store them in an airtight container until ready to enjoy.
- Store at room temperature: Keep the bars in an airtight container for up to 1 week in a cool, dry place.
- Refrigerate: For a firmer texture, store the bars in the refrigerator for up to 2 weeks.
- Freeze: Wrap individual bars or layer them between sheets of parchment paper in a freezer-safe container or zip-top bag. Freeze for up to 2 months.
- To serve: Thaw frozen bars at room temperature for about 20 to 30 minutes before enjoying.
FAQs
Why are my granola bars falling apart?
The most common reason is that the mixture wasn’t pressed firmly enough into the pan. Use the bottom of a measuring cup or glass to compact the mixture tightly before chilling.
Can I use rolled oats instead of quick oats?
Yes! Both quick-cooking oats and old-fashioned rolled oats work well. Quick oats create a softer, chewier bar, while rolled oats give a heartier texture.
Can I make these dairy-free?
Yes. Replace the butter with coconut oil or your favorite plant-based butter.
Can I reduce the sugar?
The honey and brown sugar don’t just sweeten the bars—they also act as the binder that holds everything together. Reducing them significantly may cause the bars to crumble.
Can I customize the mix-ins?
Absolutely! Swap the nuts, dried fruit, seeds, nut butters, chocolate, or jam to create your own flavor combinations while keeping the base recipe the same.
Can I make these without a microwave?
Yes. Simply melt the butter, honey, and brown sugar together in a small saucepan over medium heat until smooth and bubbling, then continue with the recipe as written.
More No-Bake Snacks
- Easy Peanut Butter No Bake Cookies
- Chocolate No Bake Cookies
- Chocolate Chip No Bake Cookies
- Chocolate & Oat No-Bake Cookies (Vegan)
- No-Bake Chocolate Hazelnut Balls
IMPORTANT NOTE: This recipe was improved and updated on 7/26/2026, to include explanations and substitutes of key ingredients, make-ahead and storage instrucitons, answers to the most frequetnly asked questions, and Pro Chef Tips.
Try These Recipes!


Watch The Recipe Video!
No-Bake Granola Bars (Nut & Raisin, Peanut Butter & Jelly, and Double Chocolate)


Ingredients
No-Bake Granola Bars Base Recipe
- 1 ½ cups (3 oz/85 g) oats (quick cooking or rolled oats)
- 1 cup (1 ½ oz/43 g) rice crispy cereal
- ¼ cup (2 oz/ 57 g) butter
- ¼ cup (2 ½ oz/71 g) honey ( agave, rice or maple syrup)
- ½ cup (3 oz /85 g) brown sugar
- ½ teaspoon salt
- ½ teaspoon vanilla extract (optional)
No-Bake Raisin Nut Granola bars
- ¼ cup (¾ oz/21 g) unsweetened shredded coconut
- ⅓ cup (1 ½ oz/43 g) raisins, chopped
- ⅓ cup (1½ oz/43 g) almonds, toasted and chopped
No-Bake Peanut Butter & Jelly Granola bars
- ⅓ cup (2 ½ oz/71 g) smooth peanut butter
- ⅓ cup (1½ oz/43 g) chopped peanuts
- 6 tablespoons jelly (strawberry, grape, raspberry)
No-Bake Double Chocolate Granola bars
- ¼ cup (1 oz/28 g) unsweetened cocoa powder
- 1 cup (6 oz/170 g) mini semi-sweet chocolate chips
Instructions
No-Bake Granola Bars Base
- In a large bowl, mix together the oats and cereal.
- In a medium microwavable bowl add in butter, honey and brown sugar. Microwave this mixture for 2 minutes. It will bubble up so make sure your bowl is big enough so it doesn’t overflow. (You can also do this step in a saucepan if you don’t have a microwave)
- Into the caramel, whisk in the vanilla and salt.
- Pour the mixture over the oats and thoroughly stir using a rubber spatula. Mix the ingredients together until the oats are completely coated.
- Add in your desired mix-in (look below). Then press very firmly into a small tray lined with parchment. (9″x 9” or smaller). If you like your bars thicker, you can use a smaller pan. If you do not press firmly enough, the bars will fall apart when you eat them. Place them in the fridge for 2-3 hours then cut to size.
- These bars keep for up 2 weeks after they are made. Store in an airtight container in the fridge.
No-Bake Nut & Raisin Granola bars
- Stir the nuts, coconuts and raisins into the granola mix coating them well in the caramel. Press into the tray firmly so the bars hold together.
No-Bake Peanut Butter & Jelly Granola bars
- Mix the peanut butter into the caramel when it comes out of the microwave. Stir the caramel and the toasted nuts into the dry ingredients. Press half of the granola bar mix into a tray.
- Spread on the jam and then press the reserved granola mix on top. Press into the tray firmly so the bars hold together.
No-Bake Double Chocolate Granola bars
- Mix the cocoa powder into the caramel mix. Stir into the oats and rice along with the chocolate chips. Press into the tray firmly so the bars hold together.
Recipe Notes
- Press the mixture down firmly: This is the secret to granola bars that hold together. Use the bottom of a measuring cup or glass to pack the mixture tightly into the pan.
- Toast your nuts first: Toasted nuts add deeper flavor and extra crunch, making homemade bars taste even more bakery-worthy.
- Line your pan with parchment: Leave an overhang so you can lift the entire slab out before slicing for clean, even bars.
- Chill before cutting: Refrigerate until completely firm so the bars slice neatly instead of crumbling.
- Use a sharp knife: Wipe the blade clean between cuts for professional-looking edges, especially with the Double Chocolate bars.
- Customize the mix-ins: Swap raisins for dried cranberries, cherries, or chopped apricots, or use your favorite nuts, seeds, or nut butters.
- Keep chocolate from melting: If adding chocolate chips, let the cooked syrup cool for 2 to 3 minutes before stirring them in if you want distinct chocolate chips instead of melted chocolate throughout.
- Make a double batch: These bars keep well for up to a week in an airtight container and freeze beautifully, making them perfect for meal prep and lunch boxes.







Hi, could you list the calories, carb, sugars, etc somewhere in your recipes? That would help a lot!
Great bars I just switched I did 1/2 cup syrup (I used vitafiber ) and 1/4 brown sugar.I felt it holds better the bar and it makes it more chewy like store bought.
And coconut oil instead butter. Came out great!
Hi Ma’am, can I omit rice crisps? As it is a bit hard hard to find it in country.thanks
Love love love these bars! I have a 14 and 9 year old and they adore them. I’ve made them a handful of times, each with different “add ins”. Everything from cherry & choco, to apricot & cashew. They disappear quickly. I love knowing what my kids are eating and now they don’t like store bought in the least. 😉
Thank you!
Good luck with the new wee’n!
Help tried first recipe no bake granola bar but just breaks into pieces
I’ve been making batches of these recently. I substitute a little molasses for some of the honey to add a richer flavor as well as iron and other minerals. My favorite is the almond although I added cranberries instead of raisins or currants. The second batch I also added 1/4 c popped quinoa and 1/4 cup popped amaranth – next time I’ll increase the syrup amount by 1/2. I also like the peanut butter – although added chocolate chips so more like a peanut butter cup – also added the pop quinoa and popped amaranth to that one as well.… Read more »
As a huge BBB fan, I grudgingly must admit that this is my first negative review, and these were disappointing. Ultra sweet and my bars never set. Even after 6 hours in the fridge they were soft, sticky and bendy on the parchment paper. I’ll leave them in the freezer overnight. They were pressed very firmly into the pan with the base of a glass. Any idea how I can try to salvage them and get firm bars?
My family loved this! and Thank you for sharing this recipe
Hi Gemma, I and my children adore this recipe and I have been making it for years. However, when I measure my oats, 85 grams does not equal 1 cup and a half. Has anyone noticed this? If I used the cup and a half measurement the bars come out more with oats and if I use 85 grams of oats the bars come out more 50/50 of oats to crispy cereal. I’m just wondering how you intended the recipe to be. Thanks so much!
Hello! If I replace the butter with coconut oil, would it work?