This post may contain affiliate links. Please see my full disclosure for details.
Hi Bold Bakers!
WHY YOU’LL LOVE THIS RECIPE: These chocolate covered caramels look like they came from a fancy chocolatier—but they’re surprisingly easy to make at home. With just a handful of ingredients , you’ll have shiny, gift-worthy luxurious treat in just an hour—perfect for holidays, Valentine’s Day, or any sweet occasion.
- Professional Finish: Glossy shells and a perfect bite—just like store-bought, but better.
- Beginner-Friendly: made in the easiest way without special candy-making skills required.
- Quick & Easy: From start to finish in about an hour.
- Perfect for Gifting: Impress friends and loved ones with homemade chocolates.
- Great for Celebrations: Ideal for holidays, Valentine’s, or party platters.
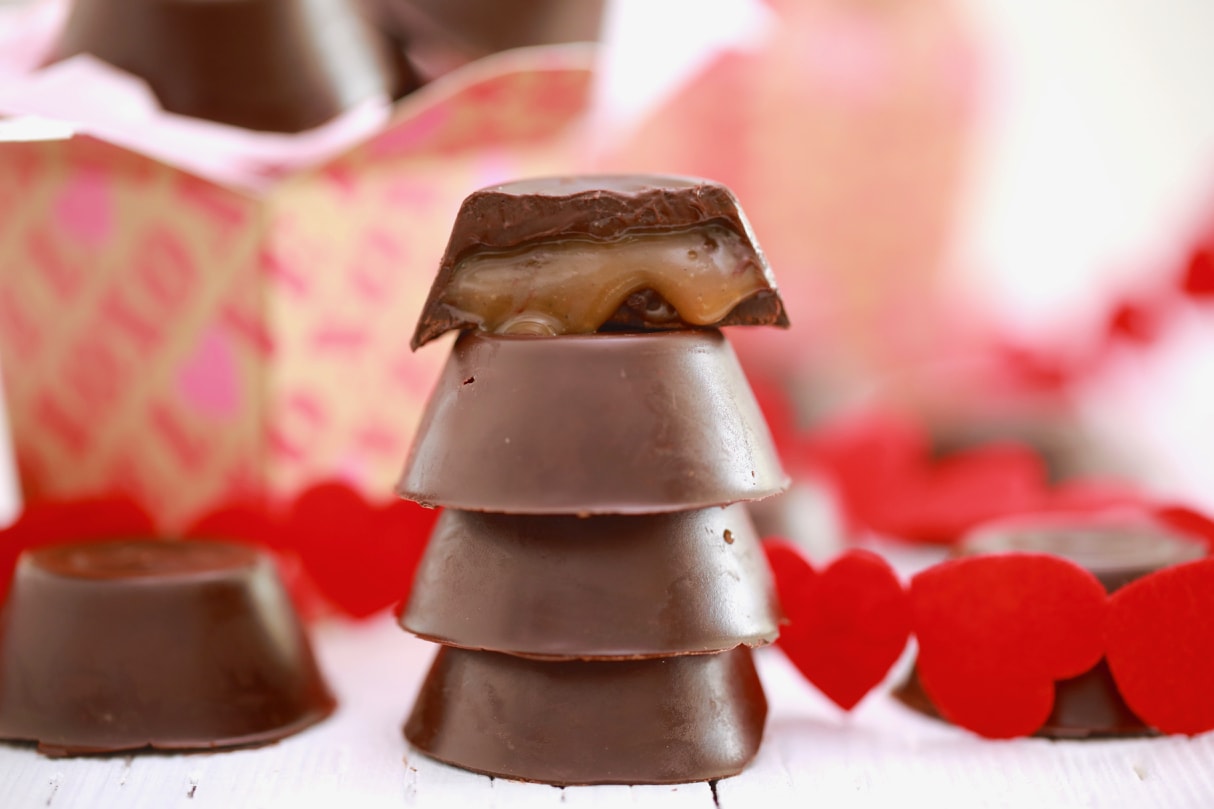
As a baker, the gifts I love most are edible. These chocolate with caramels inside can be made a few days in advance, making them perfect for Valentine’s Day, birthdays, or holiday gifts. I like to prepare the caramel chocolate ahead of time, so the assembly is quick and easy. While I used a baking pan here, you can also use various chocolate molds. The great thing about using a cupcake pan is that it gives the chocolates a lovely, shiny finish. If you’re worried about your chocolate blooming, check out my post on tempering chocolate in the microwave—it’s a simple fix!
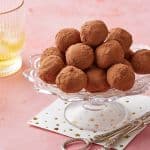
Craving more irresistible chocolate creations? Be sure to try my Heavenly Champagne Truffles, Easy Saltine Cracker Toffee, and Reese’s Peanut Butter Cups recipes. They’re all just as easy to make and perfect for any occasion, so you’ll always have a new favorite chocolate to share!
Bold Bakers Loved This!
“Worked out wonderfully. Tried quite a few different caramel recipes online. This was the only one that worked. Thanks.” — Kathleen K.
“Tried these for a birthday gift and they were a huge hit! Love how simple the caramel was to make—definitely felt like I was making something store-bought quality at home.” — Emma
“I never thought I could pull off homemade chocolates, but this gave me the confidence to try. They turned out shiny and delicious—thank you for the tips!” — Daniel
IMPORTANT NOTE: This recipe was improved and updated on 5/4/2025, to include NEW step-by-step photography, explanations and substitutes of key ingredients, make-ahead and storage instructions, how to make caramel without a candy thermometer, answers to the most frequently asked questions, and Pro Chef Tips.
Table of Contents
- What are Chocolate Covered Caramels?
- Tools You Need
- Key Ingredients
- How to Make Chocolate Covered Caramels
- Gemma’s Pro Chef Tips
- Make-Ahead and Storage Instructions
- How to Make Caramel Without a Candy Thermometer?
- FAQs
- More Homemade Candy Recipes

What are Chocolate Covered Caramels?
Chocolate covered caramels are bite-sized confections made by encasing rich, chewy homemade caramel in a glossy chocolate shell. They’re often found in fancy chocolate boxes—but with the right method, they’re surprisingly easy to make at home.
- Decadent Layers: Smooth, buttery caramel inside a crisp chocolate shell.
- Homemade Upgrade: Made from scratch with simple ingredients—giving you full control over flavor, quality, and sweetness—no preservatives or shortcuts.
- Perfectly Giftable: Ideal for holidays, Valentine’s Day, birthdays, or just treating yourself.
- Professional Look: Shiny finish and classic shape when made in a cupcake or candy mold.
- Better Than Store-Bought: Same indulgent flavor and texture, but fresher and made with real ingredients.
Tools You Need
Key Ingredients
Caramel Sauce
Granulated Sugar
- Base for the caramel; melts and browns to create rich flavor.
- Substitutes: Don’t substitute with brown sugar or alternative sweeteners—they’ll change the texture and flavor.
Water
- Helps the sugar dissolve and cook evenly without burning.
Vanilla Pod & Vanilla Extract
- Adds warm, aromatic depth to the caramel.
- Substitutes: Vanilla bean paste works well too.
Salt
- Balances sweetness and deepens caramel flavor. Sea salt will yield the best flavor.
Heavy Whipping Cream
- Creates smooth, creamy caramel with a chewy texture.
- Substitutes: coconut milk (from a can) will work. Milk may curdle and half-and-half may result in thin caramel.
Chocolate Shells
Bittersweet Chocolate
- Forms the crisp outer shell and provides a rich chocolate flavor.
- Substitutes: Semi-sweet chocolate, dark chocolate or unsweetened chocolate will also work. Avoid chocolate chips unless labeled for melting. Check out my Ultimate Guide to the Different Types of Chocolate and choose your preferred cocoa percentage.
How to Make Chocolate Covered Caramel Candy
For the Caramel Filling for Chocolates
1. Start the base: In a heavy-bottom saucepan over medium heat on the stove, combine sugar, water, vanilla seeds, and salt. Whisk constantly until it comes to a simmer, about 4 minutes.
2. Simmer and caramelize: Lower the heat and simmer without stirring (you can gently swirl the pot). When the syrup mixture turns a medium amber color, about 10 minutes, it’s ready for cream.
3. Add cream and finish: Carefully pour in the cream and whisk until fully combined. Continue cooking until a candy thermometer reads 325℉ (165°C), about 3 more minutes.
4. Cool the caramel: Stir in the vanilla extract and transfer the caramel to a heatproof bowl to cool completely.
To Assemble the Chocolates
5. Form the chocolate shell: Add 1 tablespoon of melted chocolate to each well of the prepared pan. Swirl to coat the sides evenly. Freeze for about 15 minutes.
6. Add the filling: Spoon 2 teaspoons of the cooled caramel over the set chocolate layer.

7. Seal with more chocolate: Top each with another tablespoon of melted chocolate. Freeze for 20 minutes until fully set.

8. Unmold and store: Flip over the pan to release the chocolates. Tap any stuck ones with a wooden spoon or run a sharp knife along the edge of the chocolate cups.

FULL (PRINTABLE) RECIPE BELOW!
Gemma’s Pro Chef Tips
- Use high-quality chocolate: Choose couverture or baking chocolate (not chocolate chips) for the best flavor and a glossy finish.
- Chop chocolate evenly: Uniform pieces melt more evenly and prevent scorching, especially when using the microwave.
- Avoid stirring caramel as it simmers: Stirring can cause crystallization—gently swirl the pan instead to ensure even cooking. Check out my guide for How To Make Caramel (Troubleshooting & Video) for more details.
- Pre-measure your cream: Have the heavy cream ready to pour in quickly once the caramel hits the right color—this prevents burning in those final seconds.
- Use a mini muffin pan for shine and shape: Compared to the dipping method—which can be messy and leave you with excess chocolate to clean up or waste—a mini baking sheet keeps things tidy. It creates clean, uniform shapes with a glossy finish, no dripping or pooling.
- Finish with flaky sea salt: After assembling, sprinkle a few flakes of sea salt on top before the final chill. It adds a beautiful touch and balances the sweetness with a pop of flavor—just like gourmet confections.

Make-Ahead and Storage Instructions
Make-Ahead Tips
- Caramel in Advance: You can prepare the caramel up to 1 week ahead. Store it in an airtight container in the refrigerator and let it come to room temperature or gently warm before assembling.
- Fully Assembled Chocolates: Make the chocolates up to 5–7 days ahead for gifting. The flavor and texture hold up beautifully when stored properly.
Storage Instructions
- Refrigerator: Store chocolates in an airtight container in the fridge for up to 6 weeks. Place parchment between layers to prevent sticking.
- Freezer (Optional): Freeze for up to 2 months. Thaw in the fridge overnight before serving to avoid condensation or blooming.
- Serving Tip: Let chocolates sit at room temperature for 10–15 minutes before enjoying for the best texture.
How to Make Caramel Without a Candy Thermometer?
1. Watch for Color Changes
- The sugar syrup starts off clear, then turns pale yellow, then amber.
- Telltale sign: When it reaches a rich, medium amber color (like honey or copper), it’s ready for cream.
- Don’t wait for it to get too dark—it can go from perfect to burnt in seconds.
2. Smell the Aroma
- As the caramel cooks, it develops a deep, nutty scent.
- Telltale sign: When it smells toasty and sweet, with a slight bitterness (like crème brûlée), it’s close.
3. Look for Slower Bubbling
- The syrup bubbles rapidly at first, but as moisture cooks off and it thickens, bubbles get slower and more spaced out.
- Telltale sign: Slower bubbling and darker color mean you’re nearly there.
4. Use the Ice Cold Water Test (Optional)
- Drop a bit of hot caramel into a cup of ice water.
- If it forms a firm but pliable ball, it’s in the “firm ball stage”—great for caramel that sets softly.
Bonus Tip: Use a Light-Colored Pan
A stainless steel or light-bottomed pan makes it easier to see color changes clearly than nonstick or dark cookware. Refer to my guide and video for more details !

FAQs
Can I make the chocolate caramel candy without a candy thermometer?
Yes! Just follow the visual and aroma cues—look for a medium amber color, a nutty caramel scent, and slower bubbling before adding cream. You can also use the ice water test to check the stage.
Why did my chocolate turn dull or streaky?
That’s likely “bloom,” which happens when chocolate isn’t tempered. For the glossiest results, check out my easy guide to tempering chocolate in the microwave.
More Homemade Candy Recipes
- Homemade Honeycomb Candy
- Candy Bar Fudge (Snickers)
- Candy Cane And Chocolate Peppermint Bark
- Salted Homemade Chewy Caramels
- Sugar Free Candied Spiced Nuts
IMPORTANT NOTE: This recipe was improved and updated on 5/4/2025, to include NEW step-by-step photography, explanations and substitutes of key ingredients, make-ahead and storage instructions, how to make caramel without a candy thermometer, answers to the most frequently asked questions, and Pro Chef Tips.
Try These Recipes!


Watch The Recipe Video!
Chocolate Covered Caramels Recipe

Ingredients
Caramel Sauce
- 1 ¼ cups (10 oz/282 g) granulated sugar
- ½ cup (4 fl oz/120 ml) water
- 1 vanilla pod , cut open with seeds scraped out
- ½ teaspoon salt
- 1 cup (8 fl oz/240 ml) heavy whipping cream
- 1 teaspoon vanilla extract
Chocolate Shells
- 3 cups (18 oz/510 g) bittersweet chocolate , chopped and melted
Instructions
For the Caramel Sauce
- In a heavy bottom sauce pan, over medium heat, combine sugar, water, vanilla seeds and salt. Whisk constantly until it comes to a simmer, about 4 minutes.
- Lower the heat and simmer without stirring (you can swirl the pot as needed to ensure even caramelization). When the syrup turns a medium amber color (about 10 minutes), carefully add the cream and whisk until combined. Continue cooking until a candy thermometer reads 325℉ (165°C), about 3 minutes. Stir in the vanilla extract and carefully transfer to a heat-proof bowl to cool down.
To Assemble the Chocolates
- Spoon 2 teaspoons of the caramel on the set layer of chocolate. Top with an additional tablespoon of melted chocolate. Allow to set in the freezer for another 20 minutes.
- Turn out the caramel filled chocolates by flipping over the pan, they should pop right out. If some don't pop out then tap the upturned tin with a wooden spoon on the well to release it.
- Keep refrigerated for up to 6 weeks.
Recipe Notes
*Caramel sauce will be runny while warm, but thicken as it cools, turning just a little chewy when cold. Refrigerate up to 1 month in an airtight container.


Worked out wonderfully. Tried quite a few different caramel recipes online. This was the only one that worked. Thanks.
Hmmm, a little disappointed that you didn’t stress the importance of tempered chocolate and did give the method. The chocolates will not be glossy and crisp without tempered chocolate.
I think the temperature is written incorrectly. 325F is hard crack stage, i stopped mine around 225 and it turned out well.
1 hour more like 5 hours, please make a recipe with options why do i have to buy your equipment in order to make a recipe.
Would mini silicone muffin cups work for this?
Gemma, Do you have a peanut butter cup recipe?
Hi Gemma!
Can I use heavy whipping cream for the caramel sauce?
Hi Gemma
I have a question, I made the caramel recipe and everything went well, the sugar dissolved well, it didn’t crystallize, but after it was finished and I took it out of the heat I noticed that the caramel had a slightly curdled/separated texture, it wasn’t silky-smooth, I used 17% UHT cream, what could have possibly caused that?
It says “Store in fridge”, however, we’d like to make these for Christmas gifts to send to relatives (in northern states so they won’t melt). Do you think they will be ok if packaged well to go through the mail? It will be about 5 days. Thank you!
Hiya Gemma, I generally use a brand of cream called Elmlea, its just a bit lower fat than full cream, I use both the single and double versions in my baking, I’m just wondering if I could use either of these creams in the caramel, they tend to act like fresh cream within recipes.
Thank you.