This post may contain affiliate links. Please see my full disclosure for details.
Hi Bold Bakers!
Welcome to the fourth and final episode of my Bold Baking Boot Camp. This week we are learning How to Make Non-Dairy Milk including Almond Milk, Cashew Milk and Coconut Milk. In previous weeks we covered how to make Gluten-Free Flours, a Sugar Substitute Chart and a Weight Conversion Chart, so if you missed those you can always catch up.
Whether you eat dairy free or not, nut milks have made their way into our everyday diets. We have them in drinks like coffee, smoothies and also curries and soups. They taste great and they are incredibly easy to make. I’m going to show you how to make 3 of the most popular non-dairy milks.
We have come a long way in recent years from thinking that dairy free, gluten free and vegan ingredients and recipes are just for those who are intolerant or have a particular diet. Chefs and restaurants have educated themselves and learned how to serve up 5 star food that is geared towards anyone who wants to eat a particular way.
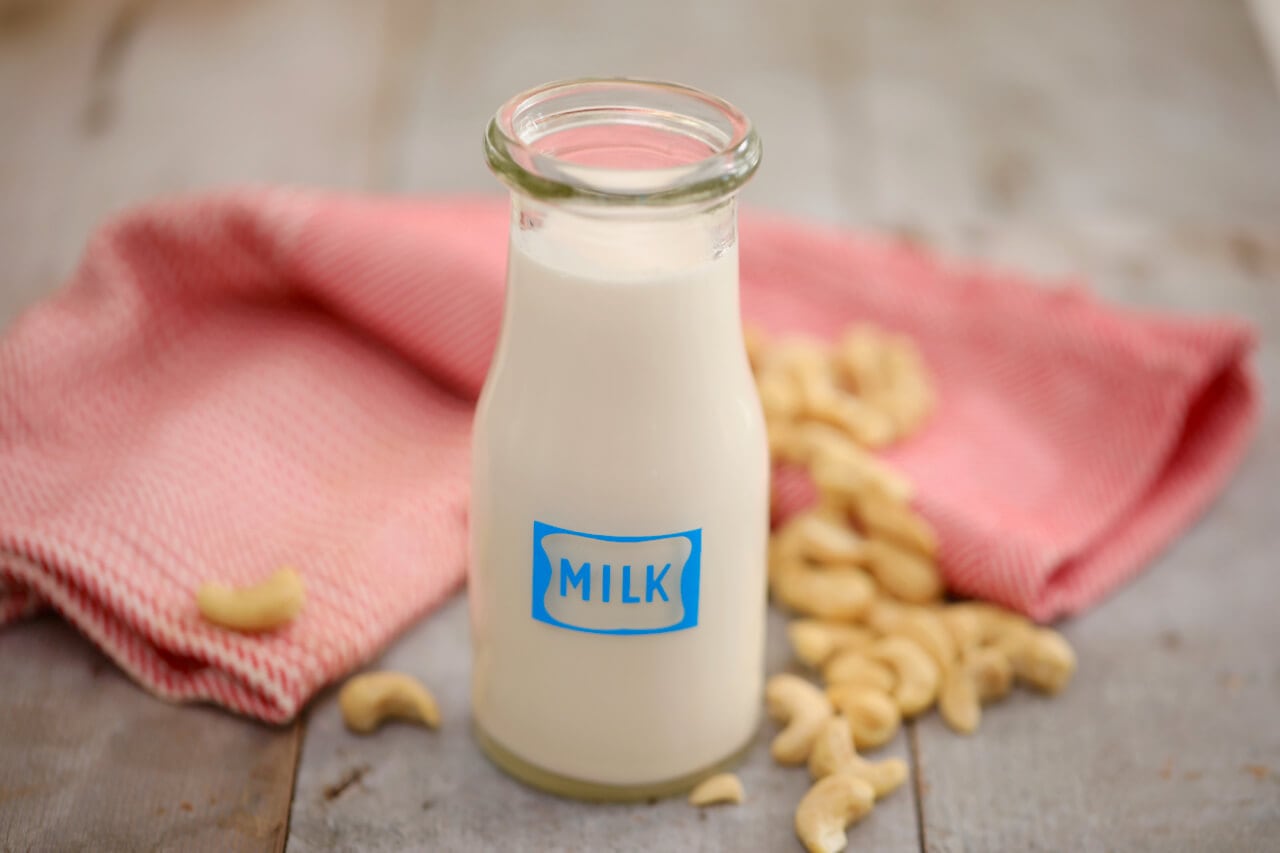
Cashew Milk is rich and silky, I like to add this non-dairy milk to smoothies and even dishes like Korma for its nutty flavor. If you’re looking for more non-dairy milks, get my recipes for Almond Milk and Coconut Milk

Important Note: You can replace Non-Dairy Milks for regular milk or water in your recipes. The equation is equal parts 1:1 ratio.
Try These Recipes!

Watch The Recipe Video!
Cashew Milk

Ingredients
- 1 cup (50oz/142g) cashews raw unsalted
- 4 cups (32floz/900ml) filtered or purified water
Instructions
- Soak your nuts in 4 cups of water (2 pints) for 8 hours at room temperature.
- Discard soaking water and rinse your nuts in a colander.
- Place soaked nuts and fresh new water in high speed blender. Cover and blend on high for 1-2 minutes. It will be milky and have a bit of foam on the top.
- Strain milk through a clean tea towel or a nut bag and squeeze into a bowl.
- Store in a covered glass jar, bottle or pitcher in the refrigerator, it’ll be good for about 4-5 days.
- Feel free to add vanilla, cinnamon or other flavors to your milk.
Recipe Notes
These same instructions work for any nut that you prefer to use. Though, generally almonds are my go-to choice.
Separation is totally natural with homemade nut milks, just be sure to shake it up just before serving.
And in case you missed previous episodes, make sure to get my Homemade Gluten Free flours and Weight Conversion Chart.


hii sis gemma… if i make that coconut milk..
have i COOK coconut before i blend with water?
thx you
Super easy to make and I didn’t strain it and it was super smooth and silky.
I added cinnamon to half of it.
Thank you Gemma.
Hi Gemma
About almond milk , is it the same amount of water soaked overnight i.e. ( 4 cups of filtered water for 1 cup of almond to blend) ? !
Thank you
I have another use for the pulp after making nut milk. Add it to no-bake chocolate/oatmeal cookies!
Sally, I think I am going a bit mad!
sorry, I corrected this recipe more than once, and for some reason it did not take correction!
I have returned to it right now again, and corrected it, your patience is really appreciated. thank you for sticking with it, I need this level of support sometimes!
Gemma 🙂
Hi Gemma, i have question. In the video you said cashew have to soaked for only 2 hours. Later in the recipe you wrote 8 hours. Which one the best? Thanks 🙂
The recipe for cashew milk calls for 1 cup of almonds.