This post may contain affiliate links. Please see my full disclosure for details.
Hi Bold Bakers!
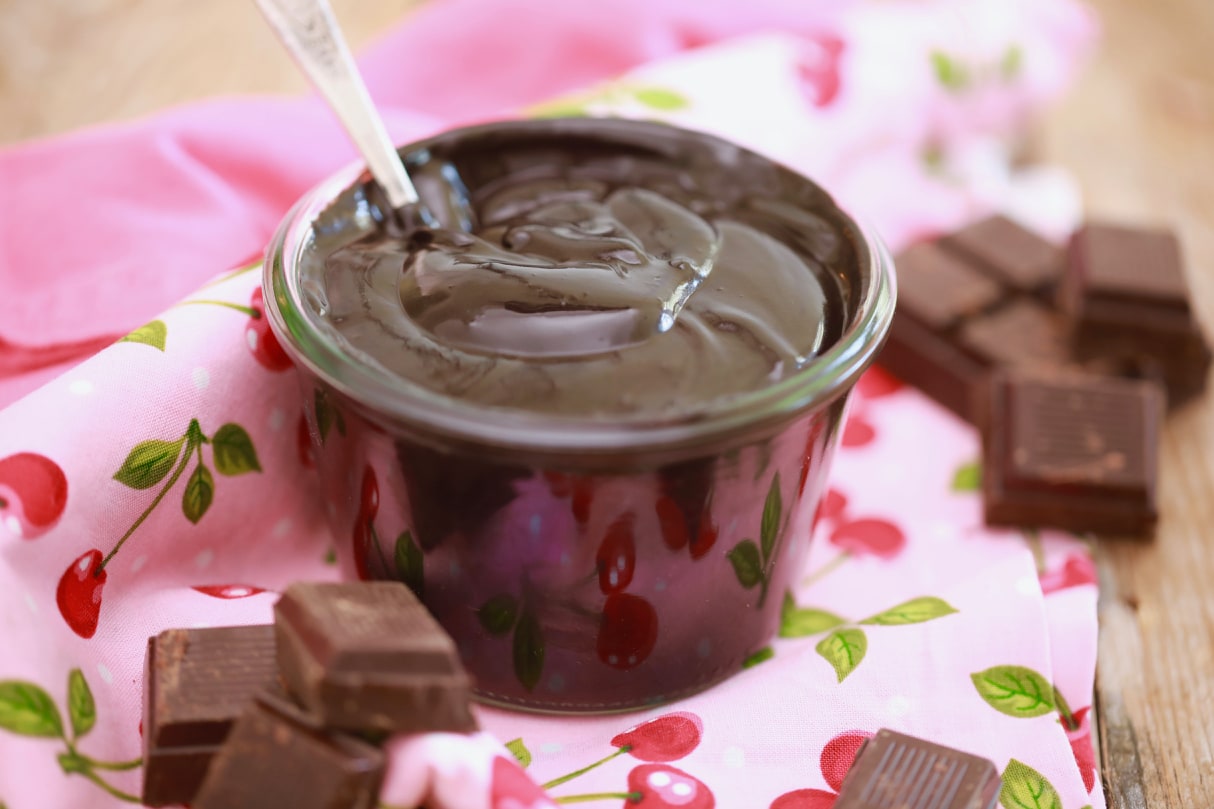
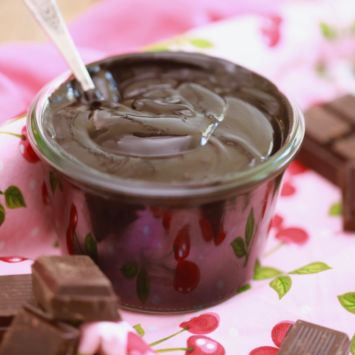
WHAT YOU GET: Deep, rich, and bittersweet Chocolate Syrup. My Homemade Chocolate Syrup recipe is a versatile sauce that can amp up the deliciousness in all desserts spanning from ice cream to cakes. Using just 5 ingredients, you can whip this syrup up in a matter of 12 minutes.
One of my favorite things to show you Bold Bakers is how to take simple ingredients and turn them into the building blocks for show-stopping desserts. This Homemade Chocolate Syrup recipe is an absolute staple that you can top off and incorporate into scrumptious treats like my S’more Ice Cream Sundae with Marshmallow Sauce, No-Bake Cheesecakes, Best Ever Brownies, and even Homemade Chocolate Milk!
Store-bought chocolate sauce pales in comparison to my Homemade Chocolate Syrup packed with a crazy chocolate punch. Once you try this recipe, there really is no going back!
What’s In Chocolate Syrup?
While the stuff you get in a supermarket is loaded with extra ingredients, such as flavoring, colors, and preservatives, my Homemade Chocolate Syrup recipe consists of only 5 ingredients you most definitely already have on hand.
This sauce is the real deal composed of only water, sugar, unsweetened cocoa powder, vanilla, and salt. It’s perfectly balanced because there isn’t too much sugar, and it includes good-quality cocoa.
Tools You Need To Make Homemade Chocolate Syrup:
- Measuring cups and spoons
- Medium saucepan
- Airtight container

What Kind Of Cocoa Powder Should I Use?
I recommend using unsweetened cocoa powder. However, if you want to use Dutch Process cocoa powder, go for it! This kind of cocoa powder isn’t usually sweetened and tends to be darker in color. It’s also alkalized so it won’t be as acidic as regular cocoa powder.
You can use the exact measurements of ¾ cup (3oz/85g) unsweetened cocoa powder for your Dutch Process cocoa powder.
How To Store And Reheat Homemade Chocolate Syrup
To store your Homemade Chocolate Syrup, transfer it to an airtight container and pop it in the refrigerator. It will last at least 12 weeks, but it may last longer.
If you’d like to reheat your syrup after storing it in the refrigerator, you can heat it up for around 30 seconds in the microwave, or you can heat it in a small saucepan over low heat for a few minutes.
Gemma’s Pro Chef Tips For Making The Best Homemade Chocolate Syrup:
- If you’d like to use more natural sugar in this recipe, that will work just fine. You can reference my Substitute Sugar Chart for more information.
- Feel free to leave out vanilla extract if you don’t have it. Adding vanilla extract simply enhances the already existing chocolate flavor by balancing it with some sweetness.
- If you find that your Chocolate Syrup ends up more bitter and runnier than you’d prefer, you can add a tablespoon or two of sugar and a tablespoon of water or milk. This Chocolate Syrup recipe leans more like a dark chocolate syrup to contrast with the sweetness of ice cream when drizzled over it.
- To prevent lumpy Chocolate Syrup, make sure the temperature is not too high when on the stovetop. Otherwise, the sugar will caramelize and clump together. If this is the case, return your mixture to the stove on low heat, and keep stirring to dissolve the lumps.
Looking For Different Flavors?
- 3 Ingredient Homemade Raspberry Sauce
- Homemade Butterscotch Sauce
- Marshmallow Sauce
- Gemma’s Signature Salted Caramel Sauce
- Vegan Caramel Sauce
- Spiced Rum Caramel Sauce
- Homemade Applesauce
Want To Go Deeper?
Level up your baking skills even further and subscribe to the Bold Baking Academy today! You’ll get access to all the in-depth baking courses both past and present, access to the Bold Baking Academy Community, and the one-of-a-kind Baking Concierge — which is a fast & direct connection to Gemma & her team of culinary experts to answer any baking question you might have.
That’s right, inside or out of the Academy! So subscribe now!

Try These Recipes!


Watch The Recipe Video!
Homemade Chocolate Syrup Recipe
Ingredients
- 1 cup (8floz/225ml) water
- 1/4 cup (2oz/57g) sugar (check notes to use natural sugars)
- 3/4 cup (3oz/85g) unsweetened cocoa
- 1 1/2 teaspoon vanilla extract
- 1/8 teaspoon salt
Instructions
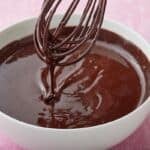
- In a heavy-bottomed sauce pan, mix sugar and water together. Bring the mixture to a simmer at medium-low heat until the sugar has dissolved.
- Whisk in cocoa powder until lump-free. Let the mixture simmer for around 2 minutes or until thickens, whisking constantly so the chocolate doesn't burn.
- Turn off the heat, add in vanilla extract and salt.
- Transfer to an airtight container and store in the fridge for 12 weeks.


Hi Gemma, I love your recipes. Gonna try them all. The Chocolate Syrup turned out soo good.
Dear Gemma, I made this yesterday. Followed to the T. Flavor and texture excellent. The sauce does thicken the longer it simmers on medium heat. The flavor was perfect with the vanilla extract and salt added after removing sauce pan from heat. We enjoyed a delicious chocolate milk for lunch yesterday with this and delicious ice cream (made your homemade ice cream base recipe (vanilla) earlier in the week) and drizzled this chocolate syrup. Yummy! Taste much better than the best ice cream in the grocery store. Thank you for sharing this.
Can the syrup be used for drizzle design in cakes
I made three syrups for a huge party l threw. One syrup following your recipe (for adult smores in a cup), another with one full cup of sugar ( for the kids), and a dark chocolate syrup. I ended up adding a little more sugar to the dark coco powder syrup. Thanks for the recipe! I plan on trying a replacement sugar for my sugar free friends.
Hai Gemma. Thank you for sharing this recipe. I want to ask how long does this Chocolate Syrup last? I want to sell packaged food in bottles with this chocolate syrup in it. Can the chocolate last long? Or are there any tips to make the chocolate last longer? Thank you so much, have a nice day Gemma! 🙂
The chocolate syrup is so easy and a work of genius. There are two of us and we got through a jar in 2 weeks so we don’t know how long it might last in the fridge! We love a spoonful stirred into natural yogurt.
I am not rating this recipe because I don’t want to give it 1 star as the issue may be more about my expectation that the recipe not working. One point is that what Gemma does in the video doesn’t match the recipe, which I found strange. Also there wasn’t much flavour to the syrup but I was able to fix that by adding 200g dark chocolate at the end. Then it was perfect!
I made this during my late-night chocolate milk craving and the texture came out perfect. I used about 1 1/4 cups of sugar and it had a nice amount of sweetness. One thing I might change in the future is the amount of water, the liquid was very thin and required about 2 1/2 tbsps of syrup to get a similar strength of pre-bottled Hershey’s syrup in milk. It was still warm so time will tell. Anyways thanks for the recipe!
I followed the written directions on your website, but I should have watched the video first because the directions you give there are significantly different. The recipe says to “Combine all ingredients in a medium saucepan and simmer for no longer than 1 minute.” However, in the video, you say to bring the water to a boil and then add the sugar. When the sugar dissolves, you mix in the cocoa powder and cook for up to a minute. THEN you add the vanilla and salt. Huge difference!! Please do your followers a favor and correct the directions on the… Read more »
How much does this recipe make?