This post may contain affiliate links. Please see my full disclosure for details.
Hi Bold Bakers!
WHY YOU’LL LOVE THIS RECIPE: You all know by now I have a real passion for bread. There’s something truly magical about the process of making the dough, watching it rise and ferment, then shaping it into a lovely round loaf and watching it bake up to golden-brown perfection. There is something so satisfying about knowing how to take just water, flour, and yeast, and turn it into a full-blown gorgeous loaf of aromatic yeasty bread.
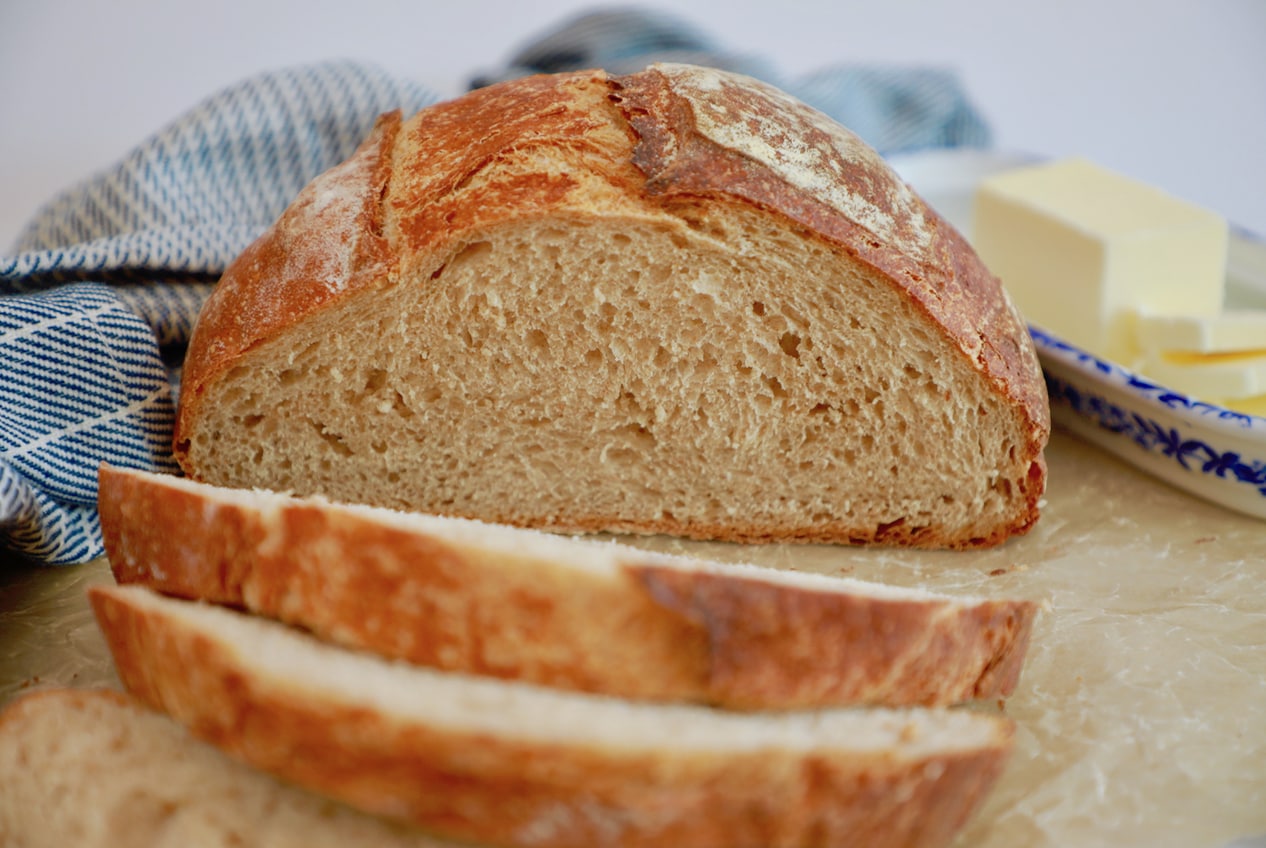
This no-knead Whole Wheat Bread Recipe is one of my absolute favorites. Having this crusty bakery-style whole wheat loaf in your repertoire is a must. Get ready to be seriously proud of yourself!
But first, I want you to check out my 7 Common Breadmaking Mistakes You’re Probably Making before making bread as it covers from beginning to baking essential tips for bread making at home.
IMPORTANT NOTE: This recipe was updated & improved on 1/9/2024, to include explanations of ingredients and answers to the most frequently asked questions.
Table of Contents
- What is Artisanal Whole Wheat Bread?
- Tools for Artisanal Whole Wheat Bread
- Key Ingredients for Whole Wheat Bread Recipe and Why
- How to Make Whole Wheat Bread
- How to Store Whole Wheat Bread
- Can I Substitute Whole Wheat Flour for ALL-Purpose Flour to Make it All Whole Wheat?
- At What Stage Can I Refrigerate the Dough?
- FAQs
- Gemma’s Pro Chef Tips
- More Bread Recipes
What is Artisanal Whole Wheat Bread?

Artisanal whole wheat bread refers to a type of bread that is handmade using traditional, artisanal techniques and is made predominantly from whole wheat flour.
The term “artisanal” implies that the bread is crafted by bakers who often use traditional methods, high-quality ingredients, and take great care in the preparation process.
Tools for Artisanal Whole Wheat Bread
- Measuring cups and measuring spoons
- Measuring jugs
- Glass mixing bowls or
- Stand mixer with a dough hook
- Measuring jugs
- Shower cap and kitchen towel
- Scoring blade or sharp knife
- Baking trays and cast iron pan
- Or Dutch oven
Key Ingredients for Whole Wheat Bread Recipe and Why
-
All-purpose flour
- Comparatively, all-purpose flour (plain flour) has a protein content of 8%-11%.
- Less gluten makes the dough more pliable than using bread flour and helps with a softer and more tender crumb.
- All-purpose flour offers a mild and neutral flavor.
-
Whole Wheat Flour
Whole wheat flour contains the entire wheat kernel, including the bran, germ, and endosperm.
-
- As a result, whole wheat flour contains more nutrients and fiber, and imparts a nutty and slightly earthy taste.
- Whole wheat flour can contribute to a denser and heartier texture and a darker color in bread due to the presence of bran.
(The combination of all-purpose flour and whole wheat flour allows bakers to achieve a balance of perfect characteristics with improved texture, flavor, and structure. )
-
Instant yeast or active dry yeast
- Yeast works through a slow, natural biological reaction to release carbon dioxide to make bread rise and release alcohol to add flavors.
-
Salt
- Salt enhances flavors and strengthens gluten to give the bread a nice chew.
-
Honey
- Honey provides natural sugar to feed the yeast, to release gas to make breads rise, and alcohol to add flavors.
-
Water
- Before baking, water hydrates flour working with protein to form a gluten network and activates yeast and enzymes, contributing to the rise and flavor of breads.
- During baking, water is involved in the gelatinization of starches in the flour. This process helps set the structure of the bread, contributing to its final texture and crumb.
- Warm water will help to activate the yeast in a cold environment.
How to Make Whole Wheat Bread
-
Make the dough:
- Mix dry ingredients including flour, whole wheat flour, yeast and salt.
- In a separate bowl, combine the wet ingredients namely honey and water.
- Add the water mixture to the dry ingredients, and stir until you form a ball of dough and it cleans the bowl (see video above). Add more water if needed.
-
Proof the dough: Let the dough rise for 18-24 hours at room temperature (about 70 degrees)until it has puffed up in volume, about double in size.
-
Shape: Knock the air out with your hands and transfer it onto a lightly floured surface.
-
Fold the dough in half and then fold it in half again. Shape the dough into a ball by tucking the sides underneath itself.
- Final proof the dough on a floured tray seam side down. Cover with cling wrap and a kitchen towel and proof for roughly 45 minutes -1 1/2 hours or until it has doubled in size.
-
- Bake the bread:
- Score the top with a blade or sharp knife.
- Bake it off at 400°F (200°C) for roughly 50-60 minutes. ( Watch for baking bread tips https://www.biggerbolderbaking.com/7-common-breadmaking-mistakes/)
How to Store Whole Wheat Bread
-
Cover and store at room temperature for up to 3 days or freeze for up to two months.
Can I Substitute Whole Wheat Flour for ALL-Purpose Flour to Make it All Whole Wheat?
- When it comes to whole wheat/grain flour, I suggest whole wheat/grain: AP or bread flour in 1:1 or 1: 2 ratio, so you won’t wind up with a dense result. Because whole wheat (or grain) has bran which weighs down protein a lot to make it difficult to rise.
- A good rule of thumb to keep in mind while alternating the recipe: note to hold back some liquid by using up to 3/4 in one go and adjust it accordingly to get the same consistency as the recipe.
At What Stage Can I Refrigerate the Dough?
- You can refrigerate the dough after 2 hours of proofing at room temperature during fermentation to slow down the process and allow for longer flavor development.
- Or after 12-18 hours of proofing at room temperature, you can choose to put your dough in the fridge and use it within 2 days.
FAQS
Is a Whole Wheat Bread Recipe Actually Healthier Than Other Kinds of Bread?
- The incredible thing about all bread it’s always made of the same ingredients: flour, water, and yeast. What makes each loaf unique is the way in which they are combined, and the amount of time they spend fermenting, proofing, and developing flavor.
[ One dough not enough? Try my Crazy Dough! One dough, endless recipes! ]
- This beginner bread recipe, instead of using just white flour, uses a combination of white and whole wheat. Whole wheat flour is a less-processed grain. This makes the flour have a more robust flavor, darker color, and higher fiber content than white flour. The whole wheat component of this bread is an added bonus for so many reasons. It adds flavor, texture, color as well as some added nutrition.
What Makes This Beginner Bread Recipe No-Knead?
I know it sounds impossible to make bread without kneading the dough, but this whole wheat bread recipe is here to show you how and why it works.
While normal bread dough needs to be kneaded to develop the gluten in the bread, this dough does it on its own. The secret ingredient to my no-knead bread is… time. About 24 hours is what allows this dough to develop without any of my help. Over that period the dough is fermenting, it’s no only developing flavor but it’s building its own gluten content and filling up with air that’s released in the process. The result is a light and fluffy interior filled with tiny air bubbles and a thick crunchy crust.
I know it sounds crazy, but just trust me: all you have to do with this bread is set it and forget it — no babysitting “kneaded” (get it 😉 ).
What is Dry Active Yeast?
My Whole Wheat Bread Recipe uses one of my favorite things to have on hand: dry active yeast.
Dry active yeast is the most commonly available form of yeast for home bakers and is available in ¼-oz packets at most local grocery stores. The yeast is dormant, needs to be “proofed” and re-hydrated.
It gets activated during the fermentation process by combining the water and honey. From there it creates a lovely almost beer-like flavor and smell. Dry yeast should be stored in a cool dry place. I keep mine in a container in the refrigerator.
Is Whole Wheat Bread OK for Diabetics?
Whole wheat and whole grain bread is a preferred option for diabetics. Whole wheat is a more complex carbohydrate and has the added fiber content I mentioned earlier, making it something that really everyone can enjoy both making and eating! So give this Whole Wheat Bread Recipe a go — but, as always, when it comes to health the best bet is to contact your doctor.
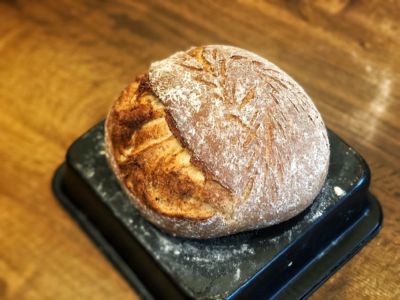
Can I bake this Whole Wheat Bread in a Dutch Oven?
Yes, you absolutely can bake it in a Dutch oven. That will give you a lovely texture and finish to your crust. I put it in at 450°F (225°C), then immediately turn it down to 400°F (200°F) and bake for 30 minutes with the lid on. Then remove the lid and bake for the remaining time. Works beautifully every time.
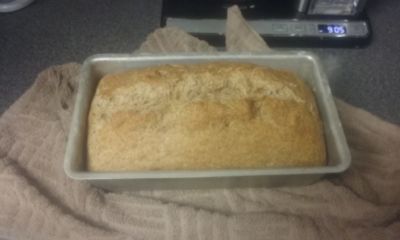
Can I bake this recipe in a loaf pan?
Yes, you can bake this bread in a 9*5-inch loaf pan. Bake at 450°F(225°c) a hot oven to give it a spring, then after 10 minutes or so reduce the temperature to 400°F(200°C), without opening the oven, for the remainder of the bake.

Top Tips for Making No Knead Whole Wheat Bread
- Always cut whole wheat flour with some white flour. It will lighten your bread and give your better end results
- If using ‘instant yeast’ add it directly into the dry ingredients
- If using ‘active dried yeast’ then you have to sponge it in water first
- Ferment for a minimum of 18 hours for best flavor and texture
- After 24 hours if you don’t bake your dough then pop the dough in the fridge for up to 3 days
- Steam your bread for the first 20 minutes of baking to create a chewy crust
Big Fan Of Bread? Try Out These Recipes!
And don’t forget to follow us on Facebook for all the latest and greatest baking videos!
IMPORTANT NOTE: This recipe was updated & improved on 1/9/2024, to include explanations of ingredients and answers to the most frequently asked questions.
Try These Recipes!


Watch The Recipe Video!
No-Knead Whole Wheat Bread
Ingredients
- 2 cups (10oz/284g) all-purpose flour, plus extra for dusting
- 1 cup (5oz/142g) whole wheat flour
- 1/2 teaspoon instant yeast or 1 teaspoon of Dry Active yeast *
- 1 1/2 teaspoons salt
- 2 tablespoons honey
- 1 1/4 cups (10 floz/282ml) water
Instructions
- Make the dough: In a large bowl whisk the flour, whole wheat flour, yeast and salt.
- In a separate bowl, combine the honey and water. Add the water mixture to the dry ingredients, and stir until you form a ball of dough and it cleans the bowl (see video above). If your dough seems very dry, add more water (do this 1 tablespoon at a time) until desired consistency is achieved.
- Cover with plastic wrap. Let the dough rise for 18-24 hours at room temperature (about 70 degrees). Your dough is ready when it has puffed up in volume, about double in size.
- Once the dough has proofed knock the air out with your hands.
- Shape the dough by transferring onto a lightly floured surface. Fold the dough in half and then fold it in half again. Shape the dough into a ball by tucking the sides underneath itself.
- Place the dough on a lined baking tray seam side down. Cover with cling wrap and a kitchen towel and proof for roughly 45 minutes -1 1/2 hours depending on how warm your kitchen is. You will want it to have doubled in size. (Note: Watch the above video on how to proof in a bowl)
- Once the dough has risen a second time, score the top with a blade or sharp knife. Bake it off at 400oF (200oC) for roughly 50-60 minutes. ( Watch for baking bread tips https://www.biggerbolderbaking.com/7-common-breadmaking-mistakes/)Want to bake this bread in a dutch oven? I put it in at 450oF (225oC), then immediately turn it down to 400oF (200oF) and bake for 30 minutes with the lid on. Then remove lid and bake for the remaining time.
- Once the bread has formed a crisp golden crust you can transfer it to a wire rack and allow to cool completely to room temperature before slicing. Another tip to tell if it is fully bake is if you tip the base of the bread and it makes a hollow sound.
- Cover and store at room temperature for up to 3 days. This bread also freezes really well.
- * Dry Active Yeast needs to be sponged before use. This means allowing the yeast to hydrate in the tepid liquid you are using in your bread. It will form a sponge which you stir through before adding to the flour, this will ensure success.


Is it okay to use a loaf pan to make it more “sandwich sized”?
Hi Gemma, I live in a tropical country with a generally warm climate at an average of 30 degrees during the day. Would my dough still need to ferment for 18 hours minimum? I’m afraid that it might over ferment.
Dear Gemma,
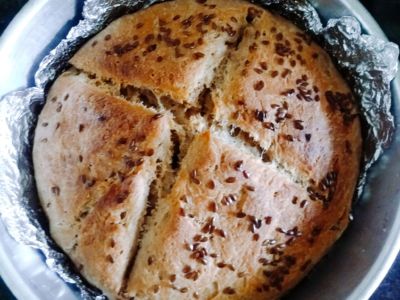
Can I put raisin and cinamon to this bread recipe? I already baked the cinamon rasisin bread, It was too perfect. But I want to use whole wheat flour, so I wanna try this recipe, but I still like raisin and cinamon for stronger flavor.
Thanks for your advice.
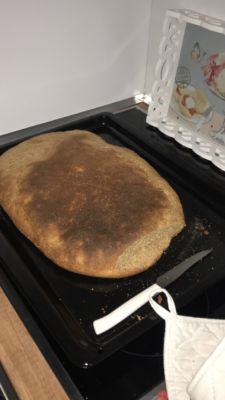
LOVE this recipe. I tried it for my first time making bread and it was so delicious I ate the whole loaf in one sitting.
Will definitely make this bread again. Prepping is quick and easy….resting takes a bit of time but so worth it.
What can be used if we do not have a loaf pan?
Gemma, thank you for all the hard work. I enjoy following you and periodically trying your recipes. The granola bars are my favorite. Quick question – most cooking websites use 4.5 oz as weight of 1 cup of flour. King Arthur uses 4.25oz. You use 5 oz. That’s quite a difference. What are your thoughts?
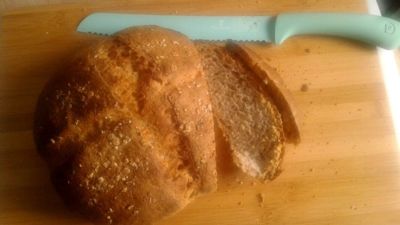
Made it! Really good bread. Not at all difficult to make either. Hardest part was turning it out of the bowl after rising. Maybe I should’ve oiled that.
Hi Gemma ..
Can I add corn meal ? If yes, when (before/after proofing) and how much?
Hi, I have been following you on facebook for some time but not really had
the timeto really make something. Now I am on Corona Virus lockdown here in the UK which is the perfecttimeto get on your recipes. The only thing is there is a shortage of flour. I only have the normal plain and self raising at the moment so wondered if the plain would be any good in making my `1st loaf. I did manage to get some dried yeast…..