This post may contain affiliate links. Please see my full disclosure for details.
Hi Bold Bakers!
WHY YOU’LL LOVE THIS RECIPE: This Garlic Breadstick Recipe makes it easy to create soft, buttery, restaurant-style breadsticks in your own kitchen. Ready in about an hour and made with just seven simple ingredients, these golden-brown breadsticks are perfect for weeknight dinners, holiday meals, or any occasion that calls for a delicious, savory side.
- Quick and Easy: Ready in about an hour with straightforward steps.
- Restaurant-Quality Results: Soft, fluffy interiors with a golden, garlic-butter finish.
- Versatile Pairing: Ideal for dipping, serving with Italian dishes, or enjoying on their own.
I make this garlic breadstick recipe often because it’s perfect for any occasion. These breadsticks pair beautifully with hearty dishes like lasagna and are also the ideal size to pack in my son George’s lunchbox. Pro tip: This recipe is highly adaptable, so feel free to get creative!
Garlic breadsticks truly shine as a effortlessly complementing any meal. Naturally, they’re a match made in heaven with Italian dinners. Pasta has a special place in my heart, and I’ve shared with you over the years how easy it is to make your own delicious, fresh pasta. These garlicky homemade breadsticks are a lovely accompaniment to dishes like Homemade Penne Pasta, Farfalle Pasta, Orecchiette Pasta with marinara sauce, or The Best Lasagna Recipe.
Bold Bakers Loved This!
“Best homemade breadsticks ever! Soft inside, crispy outside, and packed with garlic flavor. Quick and simple to make—highly recommend!” — Jessica
“The breadsticks turned out fluffy and golden with amazing flavor. Great for any meal or just snacking. Will make again!” — Emma
“Super easy and absolutely delicious! The texture is spot on, and the garlic butter makes them irresistible. A must-try recipe!” — Daniel
IMPORTANT NOTE: This recipe was updated on 1/22/2025, to include key ingredients substitute, make-ahead and storage instructions, serving options, and Pro Chef Tips.
Table of Contents
- What are Garlic Breadsticks?
- Tools You Need
- Key Ingredients and Why
- How to Make Garlic Breadsticks
- Gemma’s Pro Chef Tips
- Make Ahead and Storage Instructions
- Serving Options
- FAQs
- More Breadstick and Roll Recipes

What are Garlic Breadsticks?
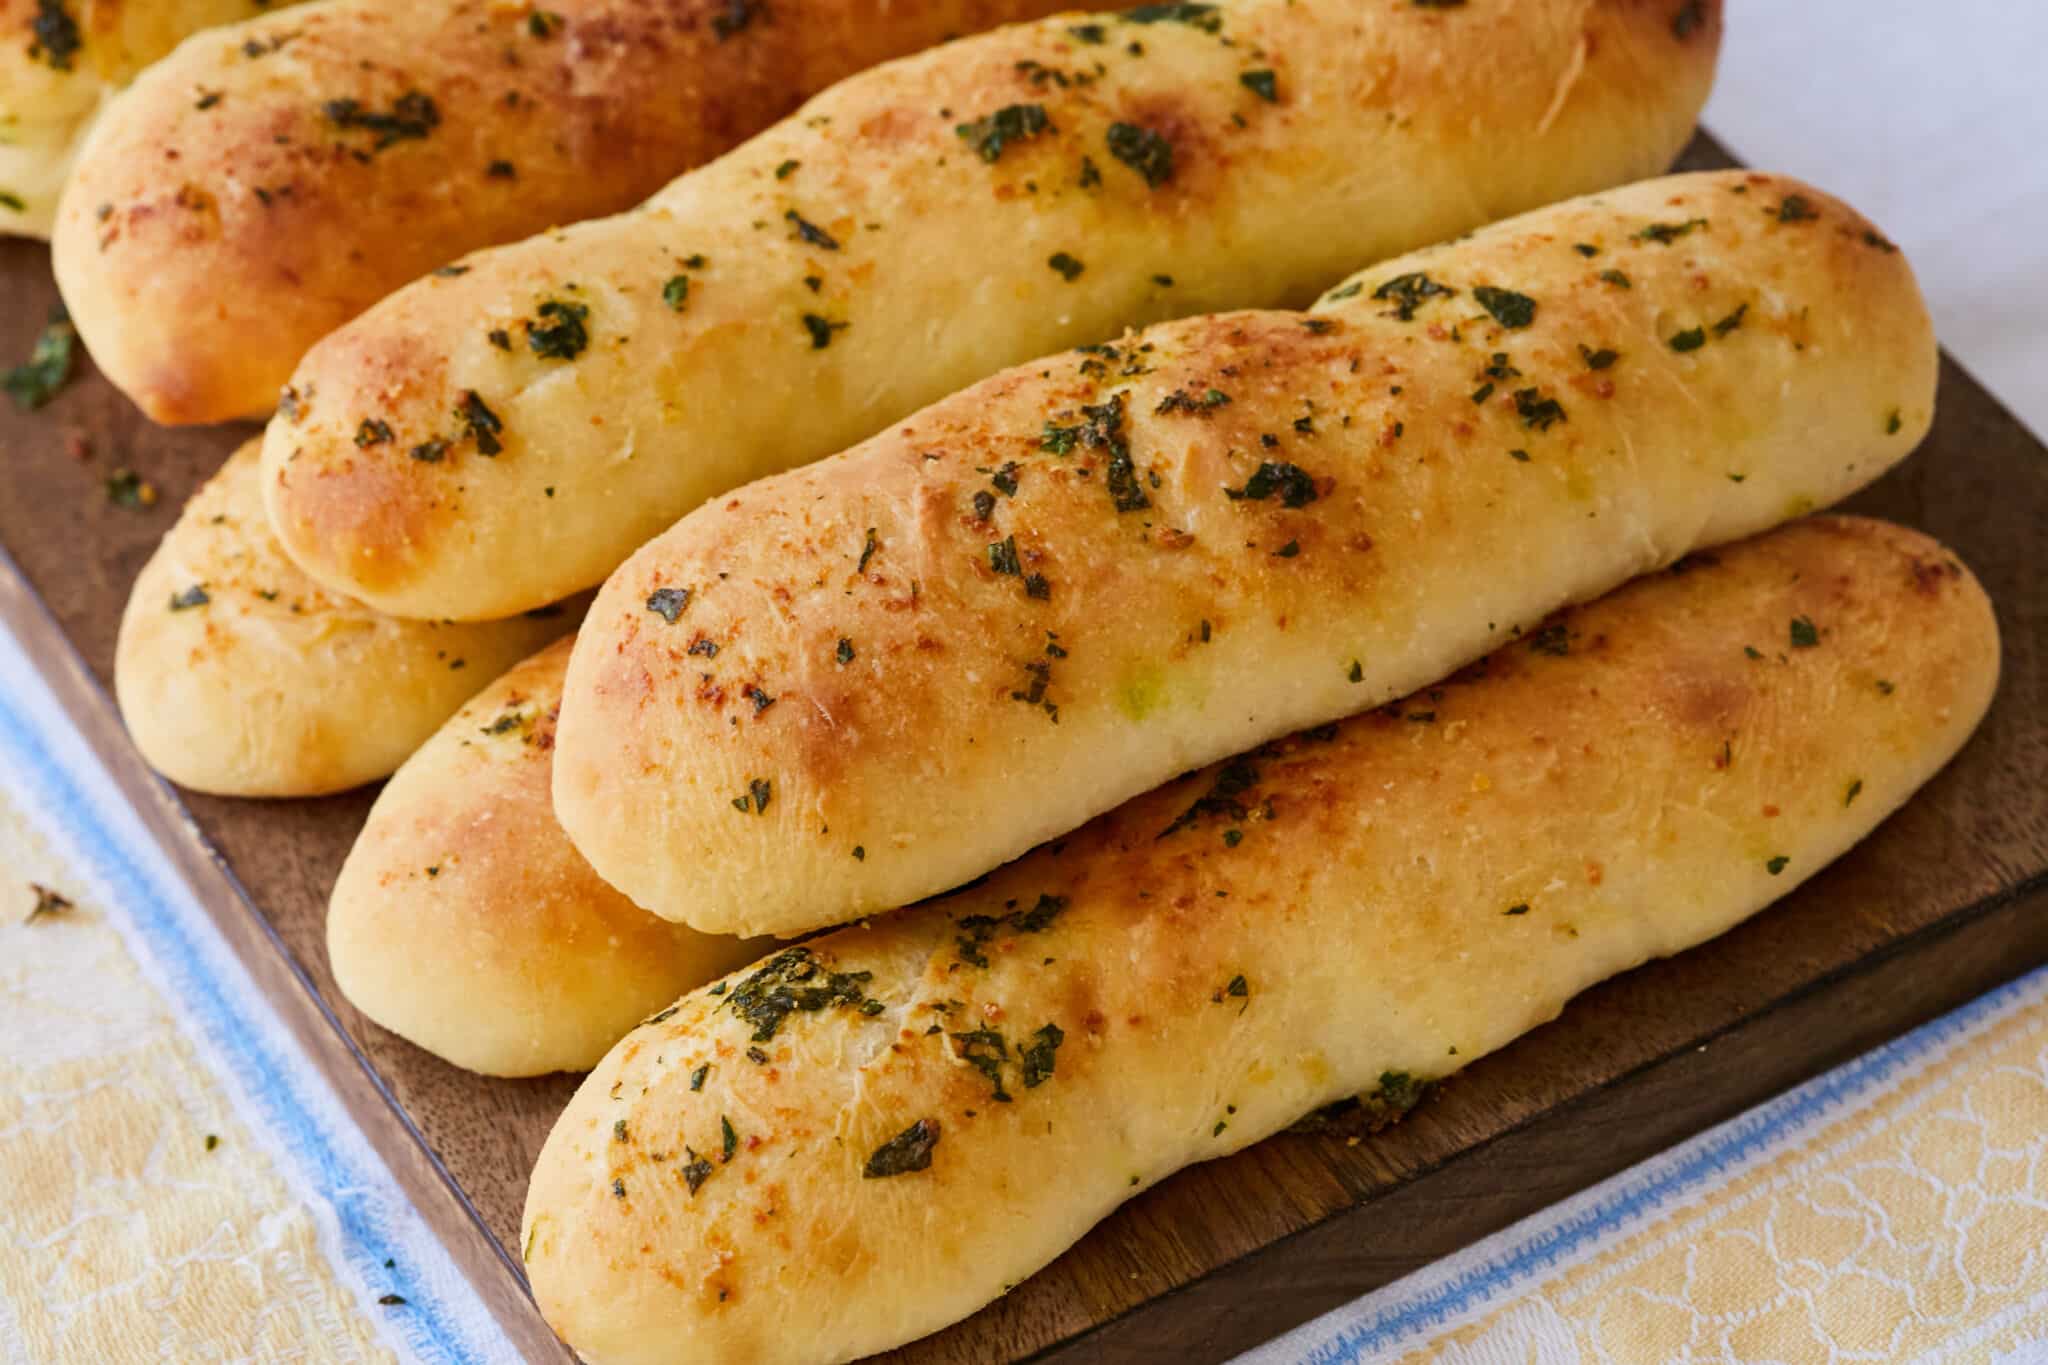
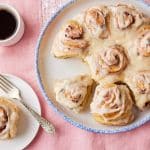
- These Garlic Breadsticks are bread made from yeast dough and shaped into elongated rolls. They’re brushed with melted butter mixed with garlic and parsley, and baked until golden brown.
- Since this Garlic Breadsticks are leavened with yeast, they have gluten strands. That makes them fluffy with a pleasant chewiness and a slightly crispy crust. In contrast, my 3-Ingredient Breadsticks Recipe (No Yeast) is leavened with baking powder and has a finer crumb. See FAQs below to find out why.
- Garlic bread originated in ancient Rome, and those early versions evolved into traditional Italian bruschetta. Garlic bread’s popularity exploded in the mid-20th century when it became a staple in Italian-American restaurants and pizza parlors. Garlic breadsticks, an individualized twist on garlic bread, are loved on their own and are the perfect bread for dipping in tomato sauce!
Tools You Need
- Two baking sheets and parchment paper
- Stand mixer with a dough hook attachment
- Mixing bowls
- Measuring cups and measuring spoons
- Tea towels
- Pastry brush
Key Ingredients and Why
")
-
All-purpose flour
- All-purpose flour has a 9-11% protein content, perfect for making pleasantly soft breadsticks with a slight chewiness.
-
Granulated sugar
- Sugar feeds yeast, converting it into gas, making the dough rise and making the breadsticks light and airy.
- Sugar helps to retain moisture in the dough, ensuring a tender crumb.
- In addition, sugar is an element of the Maillard Reaction that contributes to the browning of the crust.
-
Instant yeast
- Instant yeast does not require sponging and gives a quicker, more efficient rise than active dry yeast.
- Mix instant yeast with flour first to avoid direct contact with salt so the yeast won’t get deactivated.
- If you use active dry yeast: for every teaspoon of instant yeast, use 1 ¼ teaspoons of active dry yeast. Bring the liquid in your recipe to blood temperature and mix in active dry yeast. Let it sit at room temperature for roughly 5 minutes until foam forms on top.
-
Salt
- Salt enhances the breadsticks’ flavor and strengthens the gluten, giving breadsticks the perfect chew.
- Salt also relaxes the dough so that it’s easier to shape.
-
Olive oil
- Olive oil also contributes to the texture of breadsticks, giving them a tender, moist crumb.
- Olive oil gives the breadsticks fruity and peppery notes.
- It allows for steam and carbon dioxide created during mixing, kneading, and fermentation to be trapped in the batter as it is baked, which causes the bread to rise more.
-
Salted butter
- Melted salted butter brushed on the breadsticks permeates them with savory flavor, and its richness perfectly balances the garlic’s boldness.
- The butter also works on the exterior of the dough to create a delectably crispy crust and a lovely sheen.
- Did you know it’s easy to make your own butter? How to Make Homemade Butter guides you through the process.
-
Garlic
- Garlic elevates this recipe with its robust, zingy, aromatic taste and aroma.
- Because it’s combined with melted butter in this recipe, the garlic is slightly mellowed and takes on a subtle sweetness.
-
Parsley
- Parsley adds a bright, herbaceous note and an appealing, colorful touch.
How to Make Garlic Breadsticks
- Prepare two baking sheets lined with parchment paper and oil in a large mixing bowl.
- Mix the dry ingredients including flour, salt, sugar, and yeast in the bowl of a stand mixer fitted with a dough hook.
- Add wet ingredients including olive oil and water to the dry ingredients. Knead on medium speed for 10 minutes until smooth and elastic.
- Proof the dough covered for 1 1/2 hours or until doubled in size.
- Shape the dough by punching the dough down and dividing it into 14 balls. Roll them into strips, place them on prepared baking sheets, and cover them with a damp, clean kitchen towel. Let rise for 40 minutes.

- Bake breadsticks: Combine melted butter, garlic, and parsley. When the dough has doubled in size, brush with half of the butter mixture. Bake at 375°F (190°C) for 25 minutes, until golden brown. Brush with the remaining butter mixture.
FULL (PRINTABLE) RECIPE BELOW!

Gemma’s Pro Chef Tips
- Use lukewarm water for best yeast activation.Warm water helps yeast activate and thrive, ensuring your dough rises beautifully. Heat the water in the microwave for a few seconds until it’s slightly warm to the touch, but not hot.
- Instant yeast is my go-to, but active yeast works too. If you prefer active yeast, substitute with 2 ½ teaspoons and dissolve it in lukewarm liquid first. Let it sit for about 5 minutes until it becomes foamy before using.
- No stand mixer? No problem! This dough can be kneaded by hand for about 8 minutes. It may take a little more effort, but the results will be just as delicious.
- Get creative with flavors. Add savory spices, grated Parmesan cheese, or even sprinkleherbs on top for a flavorful twist. You can also mix in bacon bits or other favorites for an extra-special touch.
- Pair these breadsticks with soups or salads for a complete meal. They make a wonderful side for dishes like Homemade Microwave Chicken Ramen in a Mug or The Easiest Potato Soup Recipe, adding a warm and hearty touch to any meal.
Make Ahead and Storage Instructions
Refrigerating Unbaked Breadsticks
- After the first rise, portion the dough, shape it into breadsticks, and refrigerate for up to one day.
- Refrigeration will slow the rise, so ensure the breadsticks don’t over-proof. If they more than double in size, bake them immediately.
Freezing Unbaked Breadsticks
- After the first rise, shape the dough into breadsticks and place them in oiled freezer bags. Seal tightly and freeze for up to four weeks.
- When ready to bake, remove from the freezer and let the breadsticks defrost for about 15 minutes.
- Cover with a tea towel and allow them to rise until doubled in size and a finger indent doesn’t spring back. Brush with garlic butter and bake as directed.
Freezing Baked Breadsticks
- Fully baked breadsticks can also be frozen. Wrap them tightly and store them in the freezer for up to eight weeks.
Storing Baked Breadsticks
- Store baked breadsticks in an airtight container at room temperature for up to three days.
Serving Options
- With Pasta: These garlic breadsticks go great with pasta dishes like lasagna or spaghetti, soaking up the sauce for extra flavor.
- As an Appetizer: Serve them with marinara or garlic dipping sauce for a tasty appetizer at parties or family meals.
- With Soups and Stews: They pair wonderfully with soups like potato soup or chicken ramen, adding a warm and hearty touch.
- With Salad: Enjoy them alongside a fresh salad for a simple, satisfying meal.
- For Lunchboxes: These breadsticks are the perfect size for kids’ lunchboxes, making for a great snack or side dish.
FAQs
What’s the difference between breadsticks made with yeast and those made without yeast?
- In this Garlic Breadsticks recipe, yeast works through a slow, natural, biological reaction by feeding on the sugars to release carbon dioxide that makes bread rise.
- During this slow fermentation process, with every burst of carbon dioxide that the yeast releases into an air bubble, protein, and water molecules move about to have another chance to connect and form more gluten.
- Kneading also causes protein and water to bond, forming gluten, a stretchy protein strand network that gives bread its structure.
In a recipe such as 3-Ingredient Breadsticks Recipe (No Yeast), the baking powder works through a quick acid-base chemical reaction. Once baking powder is mixed with liquid, carbon dioxide is immediately released to make the baked goods rise.
My dough is very sticky! What should I do?
Be sure you’re kneading the dough for the recommended time. Kneading forms gluten, which absorbs some of the excessive moisture.
When the dough is over-hydrated, the gluten networks can’t develop properly. Only add enough of the liquid until your dough forms a ball and the bowl is clean. Depending on your flour and location, you might need less—or a bit more—water to get the desired smooth and elastic consistency.
Why didn’t my breadsticks rise?
- If your dough didn’t rise, check whether your yeast is expired. Also, storing it in the fridge or freezer will keep it fresh longer.
- Salt does retard yeast growth, and in concentrations that are too high, it can kill the yeast. Keep salt and yeast separate, or mix each with flour first.
- Adjust the liquid. If your dough was super wet and only had tiny bubbles, it was over-hydrated. So only use three-quarters of the recommended amount of liquid at first, and then add more gradually until the dough is smooth and elastic, as noted in the recipe. If your dough was too dry, you need to add more liquid.
- Do not over-proof or under-proof the dough. If the dough has doubled in size, almost feels lighter but still strong and a finger indent doesn’t spring back right away, then it’s ready.
Can I substitute another flour in this recipe?
You can use bread flour in this recipe, but the breadsticks won’t be as soft as those made with all-purpose flour. Since bread flour has more protein, you may need to use more liquid. Add a tablespoon at a time until the desired smooth and elastic consistency.
If you prefer whole wheat, I don’t suggest you use more than 50% whole wheat flour. If you use more, you may end up with heavy or dense breadsticks.
How can I make gluten-free breadsticks?
This yeast-bread recipe relies on gluten formation, so it’s unsuitable for gluten-free diets.
Please try my quick and delicious 3-ingredient Breadsticks (No Yeast) recipe instead.

More Breadstick and Roll Recipes
- Soft and Fluffy Pumpkin Dinner Rolls
- Sage and Cheddar Biscuits (No Yeast)
- Buttery Crescent Rolls from Scratch
- How to Make Waterford Blaas (Authentic Irish Rolls Recipe)
- Pepperoni Pizza Rolls
Try These Recipes!
Garlic Breadsticks Recipe

Ingredients
- 3 ½ cups (17½ oz/497 g) all-purpose flour
- 1 tablespoon granulated sugar
- 2 teaspoons instant yeast
- 1 ½ teaspoons salt
- 1 ¾ cups (14 fl oz/420 ml) lukewarm water
- 2 tablespoons olive oil
- ¼ cup (2 oz/57 g) salted butter, melted
- 2 large cloves of garlic, crushed
- 2 tablespoons finely chopped parsley
Instructions
Make the Dough
- Line a large baking sheet with parchment paper and set aside.
- In the bowl of a stand mixer fitted with a dough hook, combine the flour, sugar, yeast and salt.
- Add the warm water and olive oil and knead on medium speed for 10 minutes.
- Transfer the dough to an oiled bowl, turn the dough to coat in oil, cover with plastic wrap and let rise in a warm place until doubled in size, about 1 ½ hours.
- Once risen, punch the dough down and divide into 14 balls.
Shape the Breadsticks
- On a floured surface, roll each ball into a 6” (15 cm) log and place on the prepared baking sheet.
- Cover loosely with cling wrap and a kitchen towel and let proof until doubled in size, about 40 minutes.
Make the Garlic Butter
- In a small bowl, combine the melted butter, garlic and parsley. Set aside.
Baking the Breadsticks
- When the dough has almost risen, pre-heat the oven to 375°F (190°C).
- Once the dough is ready, brush with half of the garlic butter and bake for about 25 minutes, or until golden brown.
- Remove from the oven and brush with the remaining garlic butter. Serve while still warm.
- Store leftovers in an airtight container for up to 3 days.


Maybe it was me but I found this dough quiet sticky. I had to add.more flour.
Hi Gemma. This recipe looks so delicious. I want to make it but I don’t have a stand mixer. But I have a ninja blender with a dough blade. Will it work? If so how long do I need to run the machine?
flour is impossible to get where I am, could I use oats and what quantity?