
This post may contain affiliate links. Please see my full disclosure for details.
Hi Bold Bakers!
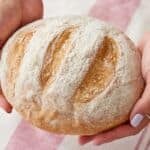
WHY YOU’LL LOVE THIS RECIPE: With my delectable Same Day Sourdough Bread, you’ll be enjoying a warm loaf of sourdough in no time! Chewy, beautifully bubbly inside, and wonderfully crusty outside, this clever technique gives you the sourdough boule bread you adore without the long wait!
- Perfect sourdough bread for beginners (or folks in a hurry!). This streamlined recipe is a great place to start your sourdough baking journey. There’s no kneading required, and you don’t need special equipment such as a banneton basket (proofing basket) or stand mixer with dough hook is necessary, and you get quick gratification
- All the steps, half the time: Most sourdough bread recipes require at least two days to prepare. But this streamlined recipe gets you through mixing the dough, the bulk ferment, shaping, final proofing, and baking in one day.
- The magic of heat: Instead of the typical room temperature or refrigerator rise, I show you how a warm environment makes a speedy timeframe possible.
- Naturally fermented: Bread made with sourdough starter has fantastic flavor, no additives, and is easier to digest than bread made with commercial yeast.
After testing this recipe several times, I made a few adjustments, particularly to the method. While it’s fantastic to make a loaf of sourdough from start to finish in just one day, I discovered that, if you have the time, the bread benefits greatly from fermenting for an extra day or two. The unique flavor and texture of sourdough improve with a longer fermentation, enhancing its depth and chewiness. So, if you have the luxury of extra time, let the dough bulk ferment for up to 12 hours (overnight). Afterward, you can shape it into a boule or place the dough in the fridge to continue fermenting slowly for up to three days. The dough will stay happy in the fridge, developing even more flavor and texture.
My Same Day Sourdough Bread is wonderfully convenient and gives you the chance to get the satisfaction of making a sourdough boule bread to use for toast or sandwiches in an efficient timeframe. If you’re a beginner baker, or if you love baking loaves of bread and you’re looking for more speedy recipes, you’ll love High Protein Bread (with Greek Yogurt). Mum’s Traditional Irish Soda Bread, and Hearty No-Yeast Bread.
IMPORTANT NOTE: This recipe was improved and updated on 7/31/2025, to include a NEW step-by-step tutorial video.

Table of Contents
- What is Same Day Sourdough Bread?
- Tools You Need
- Key Ingredients and Why
- How to Make Same Day Sourdough Bread
- Gemma’s Pro Chef Tips
- Make Ahead and Storage Instructions
- FAQs
- More Sourdough Recipes
What is Same Day Sourdough Bread?
- Same Day Sourdough Bread is a sourdough bread with made with a faster rise time than standard sourdough bread recipes.
- By using heat to accelerate the dough’s rising periods, this Same Day Sourdough Bread recipe compresses the typical two-day baking period into one day.
- Sourdough is a type of bread made using a naturally fermented starter instead of commercial yeast.
- Sourdough starter contains wild yeast and lactic acid bacteria which produce carbon dioxide gas to make bread rise, and gives the bread a more complex, richer flavor than bread made with commercial yeast.
- Sourdough is known for its chewy interior, crispy crunch, tangy flavor, and beautifully rustic appearance.
- Note that sourdough starter is required to make this bread. If you have an active sourdough starter on hand and you’ve been putting off baking because you’ve been busy, this recipe is perfect for you. And if you don’t have starter, use my Sourdough Starter Recipe!
- Sourdough bread is an ancient food, and long fermentation periods were traditionally a hallmark of this type of bread. However, recent innovations like no-knead bread baked in a Dutch oven led bakers to explore new techniques. This modern, convenient twist on sourdough baking is both authentic and practical.
Tools You Need
- Mixing bowl
- Measuring spoons
- Measuring cups
- Glass measuring jug
- Kitchen scale (optional)
- Shower cap or cling wrap
- Parchment paper
- Cast iron Dutch oven
- Scoring blade
Key Ingredients and Why
")
Active sourdough starter
- The starter is essential for fermenting the dough, contributing both rise and the characteristic tangy flavor of sourdough bread.
- Sourdough starter is a fermented mixture of equal parts flour and water. It is fed and maintained separately from any specific bread recipe.
- You start this Same Day Sourdough Bread process by feeding your starter. In this recipe, your starter must be recently fed and bubbly.
- Substitute: If you don’t have an active sourdough starter, you can create your own using my Sourdough Starter Recipe. All you need is a lidded jar (like a glass mason jar), flour, and water. In my recipe, I guide you through the process with step-by-step instructions and tips.
Bread flour
- Bread flour, with a protein content of 12-14%, helps form the strong gluten structure that gives sourdough bread its signature chewy texture.
- Bread flour is also known as “strong flour.“
- Substitute: All-purpose flour can be used, but its lower protein content (9-11%) will give your bread a slightly softer texture.
Lukewarm water
- Lukewarm tap water (filtered water isn’t necessary) activates and optimizes the growth of the wild yeast.
- To tell whether the water is lukewarm, take a small amount of water and put your finger in it; if it feels close to your body temperature or slightly warmer, then it’s lukewarm water.
Salt
- Salt enhances flavor, regulates fermentation, strengthens the gluten network, and acts as a natural preservative to extend the bread’s shelf life.
How to Make Same Day Sourdough Bread
Feed the starter (6 am)
- Feed your starter as you normally would and put it in a warm place until doubled in size, about 4 hours.

Make the dough & bulk ferment (10 am)
- In a large mixing bowl add the active starter, water, flour, and salt and mix briefly to combine. Let dough rest for 20 minutes.

- Complete one round of stretch and folds: Wet your hands to prevent sticking, then grab an edge of the dough and pull it out and over the ball of dough. Turn the dough a quarter turn and pull and fold the next side. Do this two more times, then turn the dough folded side down and let rest, covered, for 20 minutes.
- Repeat the stretch and folds two more times, giving a 20-minute rest in between for a total of three sets.

- Cover the bowl with a shower cap or tightly with cling wrap and allow to bulk ferment in a warm spot for a minimum of 6 hours. (See notes about bulk fermenting for a longer period)
Shape the dough & final proof (4 pm)
- Once the dough has doubled, transfer it to a lightly floured surface, Pull and fold all four sides, then turn the dough, folded side down, and roll into a smooth ball.

- Place the dough in a proofing basket or bowl lined with a floured kitchen towel. Over with cling wrap and another kitchen towel and let the dough rise in a warm spot for about 1 ½ – 2 hours, or until doubled.

Bake the bread (6 pm)
- Towards the end of the rising time, preheat to 425°F (220°C).
- Carefully turn the dough out of the basket onto the counter. Dust the top of the loaf with flour, score with a razor blade or sharp, thin knife. Place the lid back on and bake for 20 minutes.

- Lower the oven temperature to 400°F (200°C), remove the lid of the Dutch oven, and continue to bake for another 25 minutes. The loaf should be golden brown and sound hollow when tapped.

- Let cool completely before slicing.
Gemma’s Pro Chef Tips
- In order to achieve the proper rise with minimal time, you will need a warm place to activate the starter and rise the dough. Some ovens have a proof setting, so if yours does, use that setting or follow the oven warming method that described in the steps.
- If you need to use your oven for other baking during the day, put your dough on a high shelf in the kitchen. Because heat rises, it will be the warmest part of your kitchen.
- If you have an electric heating pad, set it on the low setting and place your bowl of starter or dough on it to keep it warm.
- During the long starter activation and bulk ferment, check every now and then that it is still barely warm in the oven. If not, remove the dough, turn the oven on for 1 or 2 minutes again, turn it off, and return the dough to the oven.
- If you are not working with a mature starter, it may be sluggish, and your rising times might increase by an hour or two, so be sure to factor in this time.
- The bread must cool completely before it’s sliced, or the moisture and structure of the bread can be compromised.
- If you are new to sourdough, try our Sourdough for Beginners recipe, and be sure to read the article The Last Sourdough Starter Guide You’ll Ever Need and Sourdough Q & A.
- If you have the time to make this bread over two days, I recommend it. This extended time will benefit the bread in both flavor and texture. And some people find it easier to use this method when it’s split over two days.
- This loaf freezes beautifully. But before I freeze it, I slice it and put the whole lot in a bread bag in the freezer so I can just grab bread when I need it for toast or sandwich bread.
Make Ahead and Storage Instructions
Make ahead tips
- If you prefer, you can start this sourdough the night before. Mix the dough and let it rise at room temperature overnight.
- If you’d like to start it even earlier, you can prepare the dough up to the point of bulk fermentation (the first rise), and then store it in the refrigerator to slow down fermentation.
- Simply cover the dough with plastic wrap or a damp kitchen towel and let it rise in the fridge for up to 24 hours.
- When ready to bake, allow the dough to come to room temperature before shaping and continuing the recipe as instructed.
How to store leftovers
- Store covered at room temperature for up to three days.
- For longer storage, slice the bread and freeze.

FAQs
Does Same Day Sourdough have the same taste and texture as sourdough bread made the traditional way (with longer rise times)?
- Same Day Sourdough Bread IS sourdough bread, with the same chewy texture and distinctive “sour” flavor. However, it won’t have the same strong tang as sourdough made with a long, cold ferment.
- If it suits your schedule, you can feed the starter the night before and do the bulk fermentation overnight.
- If you have the time to make this bread over two days, then I recommend doing that as this extended time will benefit the bread in both flavor and texture, also will also make the method easier being split over two days.
How do I make sure that my Same Day Sourdough rises correctly?
- Use an active and bubbly starter, and feed the starter four hours before mixing the dough.
- Do the float test: Drop a teaspoon of bubbly starter in a jar of water; if it floats to the top, it’s ready to use.
- Be sure to do the stretch and folds with the dough. They are essential to strengthen the bread and give it the proper gluten development.
- Handle the dough gently. Don’t put too much surface tension on it to avoid degassing it excessively.
- Preheat the oven for a full 30 minutes (with a Dutch oven inside, if your recipe and method call for this) creates an evenly hot oven and provides sourdough bread with the initial burst of heat needed for optimal oven spring and crust formation.
- Scoring entails making shallow cuts on the surface of the dough before baking. It helps control the expansion of the dough during baking, preventing irregular tearing and promoting an aesthetically pleasing loaf.
- Use a clean razor blade or a very thin, sharp knife for scoring. You want to take care not to deflate the dough by attempting to score with a dull knife.
Can I make this Same Day Sourdough if I don’t have a Dutch oven?
- Yes, you can make this Same Day Sourdough if you don’t have a Dutch oven. A Dutch oven will give you the best results, but you can use one of the methods below.
-
Method 1
- Bake the bread on a preheated baking tray.
- Place a large stainless steel oven-proof bowl immediately over the dough. This bowl will create steam around your loaf. Carefully remove the metal bowl after 30 minutes and bake as normal for the remaining time. Tip: You must use a #304 or #430 grade stainless steel bowl or A 18/10 stainless steel pot with stainless steel handles will work well for this.
-
Method 2
- Place a cake pan or shallow baking tray in the oven with hot water to create steam for the bread, giving it a nice color and chewier crust.
- Carefully remove the cake pan of water after 30 minutes and bake as normal for the remaining time until a rich golden brown.
Does sourdough bread have less gluten than bread made with commercial yeast?
- Yes, sourdough bread has less gluten than bread made with commercial yeast. That’s because the wild yeast and the lactic acid bacteria in the starter break down the gluten proteins into more easily digestible substances.
- Note that the longer the fermentation time, the more the gluten breaks down and the more digestible the bread will be. Same Day Sourdough, with its quicker fermentation periods, may not be as easily digestible as sourdough made with a traditional two day sourdough recipe.
- It’s important to remember that sourdough bread is not gluten-free. Although it may be easier for people with gluten sensitivity to digest, it is not suitable for people with gluten intolerance or celiac disease.
More Sourdough Recipes
- Easy Sourdough Bread
- Whole Wheat Flour Sourdough Bread
- Soft Sourdough Dinner Rolls
- Sourdough English Muffins
- Sourdough Discard Crackers with Rosemary
IMPORTANT NOTE: This recipe was improved and updated on 7/31/2025, to include a NEW step-by-step tutorial video.
Try These Recipes!


Watch The Recipe Video!
Same Day Sourdough Bread

Ingredients
- ½ cup (4 oz/115 g) active sourdough starter
- 325 grams (less than 1 ⅓ cups/10 oz) lukewarm water
- 3 ⅓ cups (16 ½ oz/469 g) bread flour
- 1 ½ teaspoons salt
Instructions
6am: Feed your Starter
- Feed your starter as you normally would and put it in a warm place until doubled in size, about 4 hours.
10am: Make the Dough
- In a large bowl add the active starter, water, flour and salt and mix briefly to combine. Let rest for 20 minutes.
- Complete one round of stretch and folds: Wet your hands to prevent sticking, then grab an edge of the dough and pull it out and over the ball of dough. Turn the dough a quarter turn and pull and fold the next side. Do this two more times, then turn the dough folded side down and let rest, covered, for 20 minutes.
- Repeat the stretch and folds two more times, giving a 20-minute rest in between for a total of three sets.
- Cover the bowl with a shower cap or tightly with cling wrap and allow to bulk ferment in a warm spot for a minimum of 6 hours. (See notes about bulk fermenting for a longer period)
4pm: Shape the Dough
- Once the dough has doubled, transfer it to a lightly floured work surface, pull and fold all four sides, then turn the dough, folded side down and roll into a smooth ball.
- Place the dough in a proofing basket or bowl lined with a floured kitchen towel. Over with cling wrap and another kitchen towel and let the dough rise in a warm spot for about 1 ½ - 2 hours, or until doubled.
6pm: Bake the Bread
- Towards the end of the rising time, preheat to 425°F (220°C).
- Carefully turn the dough out of the basket onto the counter. Dust the top of the loaf with flour, score with a razor blade or sharp, thin knife. Place the lid back on and bake for 20 minutes.
- Lower the oven temperature to 400°F (200°C), remove the lid of the Dutch oven and continue to bake for another 25 minutes. The loaf should be golden brown and sound hollow when tapped.
- Let cool completely before slicing. Store covered at room temperature for up to 3 days. For longer storage, slice and freeze.
Recipe Notes
- In order to achieve the proper rise with minimal time, you will need a warm place to activate the starter and rise the dough. Some ovens have a proof setting, so if yours does, use that setting or follow the oven warming method that described in the steps.
- If you need to use your oven for other baking during the day, put your dough on a high shelf in the kitchen. Because heat rises, it will be the warmest part of your kitchen.
- If you have an electric heating pad, set it on the low setting and place your bowl of starter or dough on it to keep it warm.
- During the long starter activation and bulk ferment, check every now and then that it is still barely warm in the oven. If not, remove the dough, turn the oven on for 1 or 2 minutes again, turn it off, and return the dough to the oven.
- If you are not working with a mature starter, it may be sluggish, and your rising times might increase by an hour or two, so be sure to factor in this time.
- The bread must cool completely before it's sliced, or the moisture and structure of the bread can be compromised.
- If you are new to sourdough, try our Sourdough for Beginners recipe, and be sure to read the article The Last Sourdough Starter Guide You’ll Ever Need and Sourdough Q & A.
- If you have the time to make this bread over two days, I recommend it. This extended time will benefit the bread in both flavor and texture. And some people find it easier to use this method when it's split over two days.
- This loaf freezes beautifully. But before I freeze it, I slice it and put the whole lot in a bread bag in the freezer so I can just grab bread when I need it for toast or sandwich bread.
.


I have been baking sourdough bread for a couple of years but often struggle to fit it into my busy schedule so I read this recipe with great interest. You seem to have missed a step out. You talk about turning the dough out onto the bench after the bulk ferment, shaping it and scoring it then you say to put the lid on and bake it – you don’t say how to get the bread into the hot Dutch oven.
So quick and easy! Mine was out of the oven in just 7 hours, total! Still cooling so we haven’t tried it yet, but it looks and smells perfect. Another winner, thank you, Gemma!
I am pretty sure she is assuming you have made sourdough before. She is giving her way of making it a 1 day project instead of 2.
You should have some idea how the whole process works to understand it.
Gemma, Thanks for YOUR tips on how to shorten this process!
Step 2 under “bake the bread” says to turn my dough out onto the counter, and then, put the lid back on. What lid? Proofing basket? Not sure at what point it goes into the oven. Step 3 is lower temp and continue to bake.
This recipe is a keeper!
Thank you so much for the recipe and video! I have attempted to make sourdough bread a few times and this was my first edible loaf thanks to you! My husband, son, and brother loved it!
Please Address Cured Sourdough Bread!
Missing important steps
I use a scale to get precise measurements, but you don’t give any measured weights. If your the top in the social world; i don’t see how. A good teacher provides ALL necessary measurements.
I made your recipes from your sourdough starter to same day sourdough bread