This post may contain affiliate links. Please see my full disclosure for details.
Hi Bold Bakers!
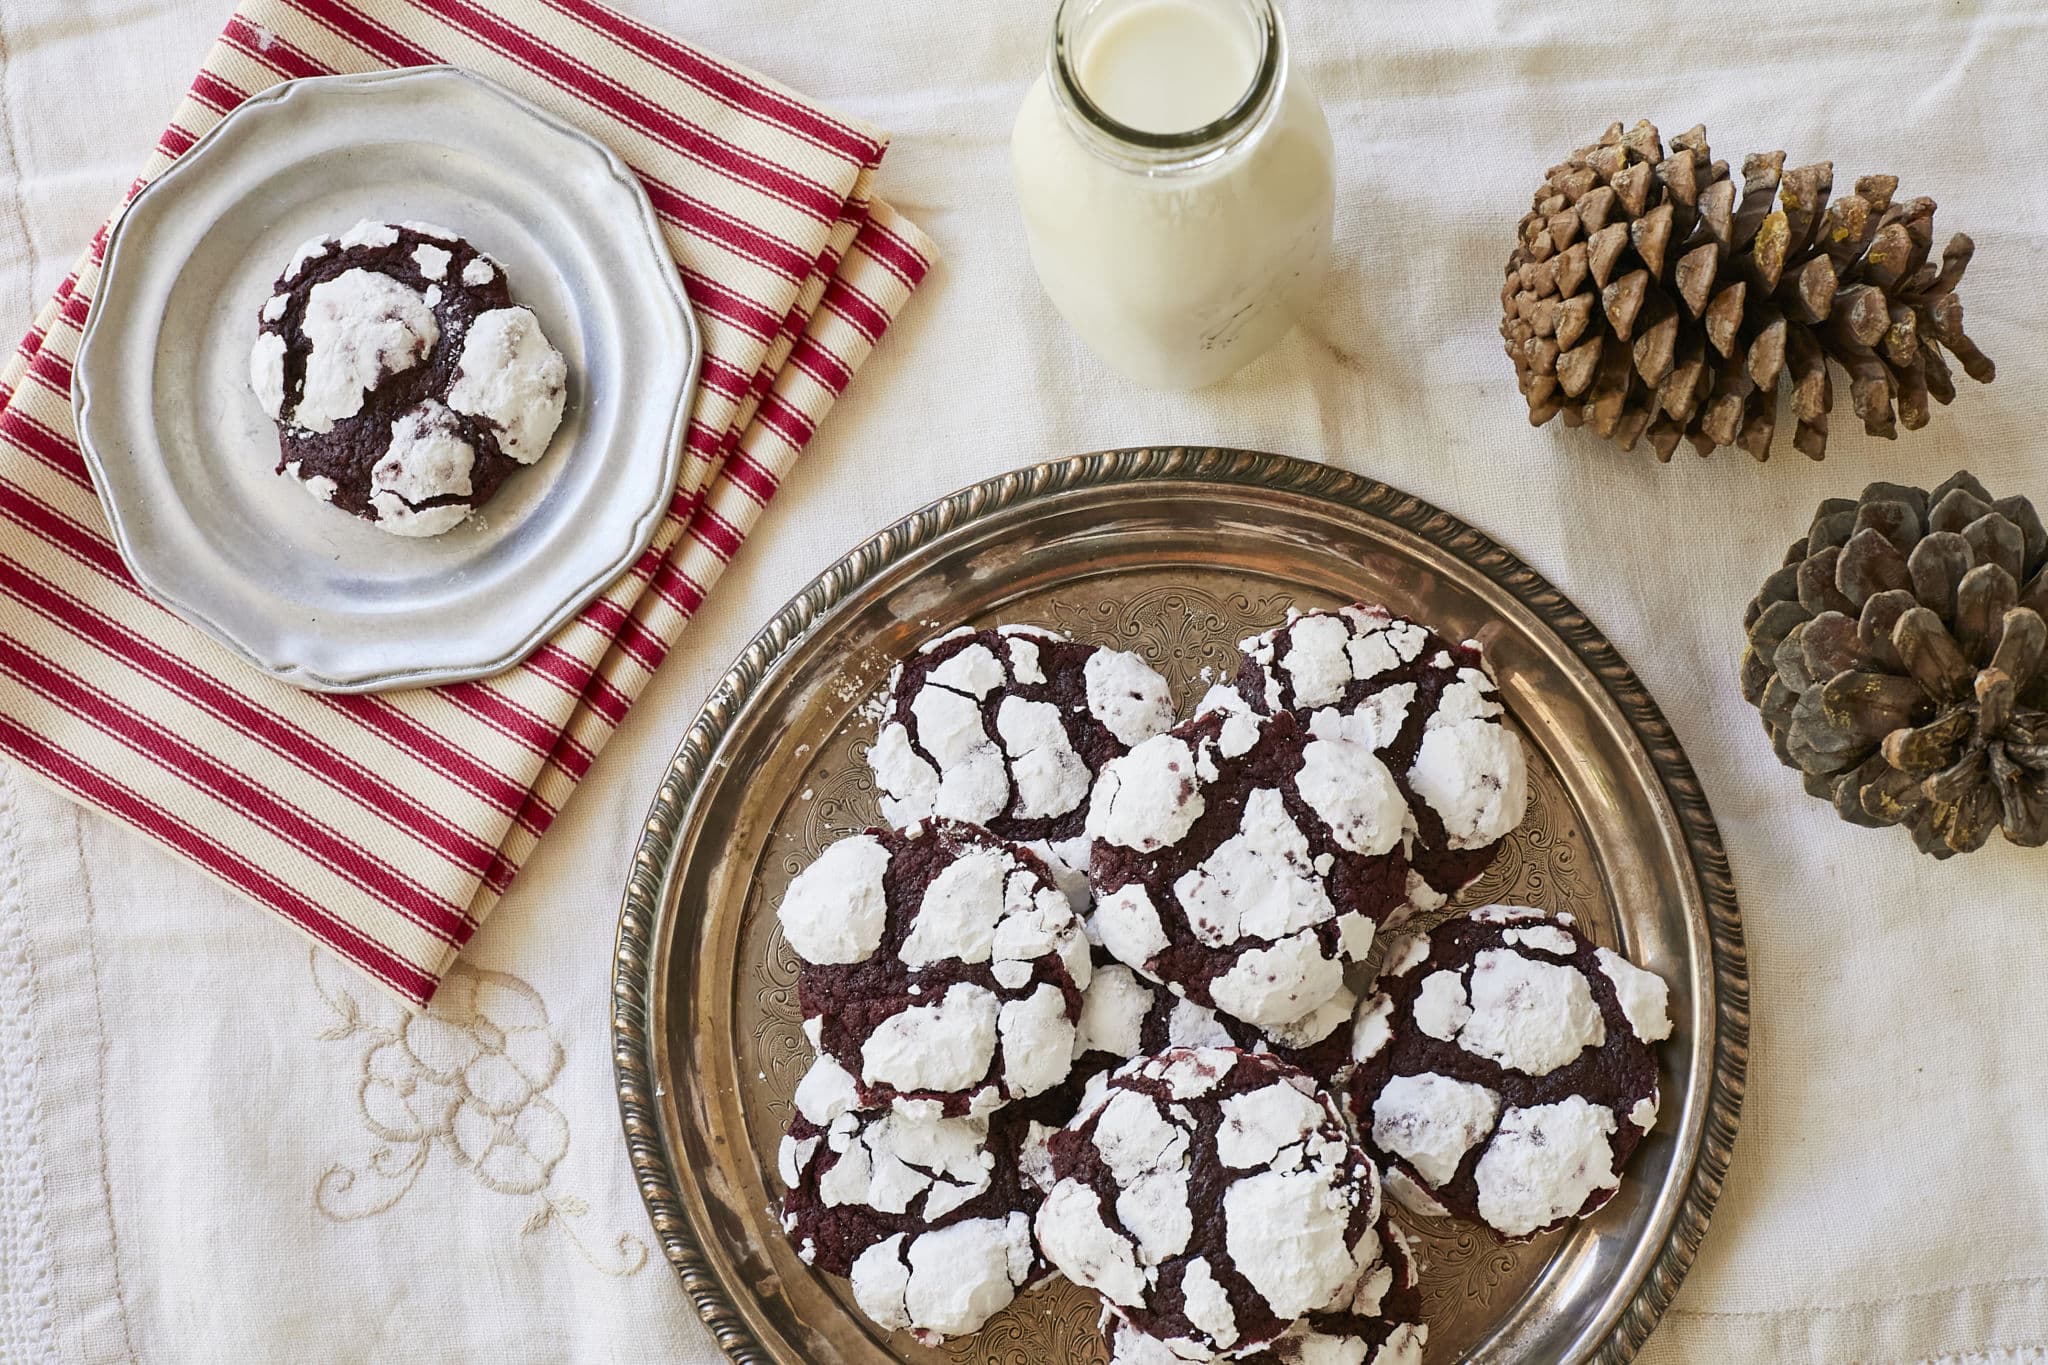
WHY YOU’LL LOVE THIS RECIPE: I turned one of my favorite cakes into a cookie! These Red Velvet Crinkle Cookies capture all the flavors of red velvet in a soft, chewy, powdered sugar-coated treat.
- All the Flavor: Classic red velvet taste with a hint of cocoa and tangy sweetness.
- So Easy to Make Ahead: Chill the dough, roll in powdered sugar, and bake whenever you need a fresh treat.
- Perfect Anytime: Great for holiday trays, birthday parties, or just a cozy snack.
- Soft & Chewy: Cake-like texture that melts in your mouth with every bite.
- Festive & Fun: Vibrant red color peeking through powdered sugar makes them as pretty as they are delicious.
If you plan to include these cookies in your holiday rotation, getting a head start makes everything easier. You can make, scoop, and freeze the dough for up to 6 weeks. When you’re ready to bake, simply let the dough thaw at room temperature for about 40 minutes, roll the balls in powdered sugar (I do it twice for extra coverage), and bake. This way, you’ll have fresh, festive cookies ready with minimal stress during the busy holiday season.
Bold Bakers Loved This!
“A new favorite of my husband’s. Thanks for a delicious, and pretty cookie.” -Susan
“These cookies came out beautifully—soft, chewy, and perfectly balanced in flavor. They were a hit at my holiday party, and I loved how simple they were to make.”
— Jenna K.
“I can’t get over how moist and tender these turned out! The powdered sugar gives them a gorgeous finish, and the red velvet flavor is spot on. Definitely a new favorite in my cookie rotation.”
— Marcus T.
IMPORTANT NOTE: This recipe was improved and updated on 11/5/2025, to include explanations and substitutes of key ingredients, make-ahead and storage instructions, answers to the most frequently asked questions, and Pro Chef Tips.
Table Of Contents
- What are Red Velvet Crinkle Cookie?
- Tools You Need
- Key Ingredients and Substitutes
- How to Make Red Velvet Crinkle Cookies
- Gemma’s Pro Chef Tips
- Make Ahead and Storage Instructions
- FAQs
- More Red Velvet Recipes

What Are Red Velvet Crinkle Cookies?
Red Velvet Crinkle Cookies are soft, cake-like cookies with a distinctive crackled top created by rolling the dough in powdered sugar. They combine the classic flavors of red velvet cake with a tender, chewy texture in every bite.
- Crackled & Beautiful: Powdered sugar coating creates the iconic crinkled appearance.
- Rich Red Velvet Flavor: Cocoa and tangy sweetness give them the classic red velvet taste.
- Soft & Chewy Texture: Cake-like but slightly dense for the perfect bite.
- Festive & Fun: Bright red color peeks through powdered sugar, making them perfect for holidays and special occasions.
- A Beloved Classic: Crinkle cookies date back to the early 1900s, credited to Helen Fredell of St. Paul, Minnesota, and gained fame in Betty Crocker’s “Cookie Carnival.” They’ve since become a holiday favorite in many flavors.
Tools You Need
- Measuring cups and spoons
- Stand mixer fitted with a paddle attachment (alternatively, a large bowl and a handheld electric mixer)
- Silicone spatula
- Mixing bowls
- Whisk
- Plastic wrap
- 2 baking sheets
- Parchment paper
- Wire cooling rack
Key Ingredients and Substitutes
Butter
- Adds richness, tenderness, and flavor to the cookies, as well as helps create a soft, chewy texture. I use salted butter for extra flavor but unsalted butter will also work.
- Substitutions: Use solid coconut oil for a dairy-free option, though texture and flavor may vary slightly.
Granulated Sugar
- Sweetens the dough and helps with browning, contributing to a slight crisp on the edges.
- Substitutions: Honey, stevia, or other sugar substitutes from my chart will work.
Dark Brown Sugar
- Adds moisture, chewiness, and a subtle molasses flavor that complements the red velvet taste.
- Substitutions: Light brown sugar will create a lighter flavor. Use maple syrup to have a similar caramel taste or make brown sugar at home.
Eggs
- Bind the ingredients together, add structure, and help create a soft, tender crumb.
- Substitutions: Flax eggs, chia eggs, or other egg substitutes of your choice from my chart for vegan options.
Milk
- Adds moisture to the dough and helps create a tender texture. Whole milk is preferred for richness.
- Substitutions: Any dairy-free milk such as coconut milk, almond milk, oat milk, or cashew milk can be used.
Red Gel Food Coloring
- Gives the iconic red velvet color without thinning the dough. Gel is preferred over liquid food coloring for intense color.
Vanilla Extract
- Enhances all the other flavors and adds depth to the cookie’s taste.
- Substitutions: You can use an equal amount of Vanilla Bean Paste.
White Vinegar
- Reacts with the cocoa and baking soda to create a slight lift and tenderness, enhancing the red velvet effect.
- Substitutions: Lemon juice can be used in equal amounts if vinegar isn’t available.
All-Purpose Flour
- Forms the structure of the cookie while keeping it tender and slightly dense, cake-like in texture.
- Substitutions: Gluten-free flour blends or my Easy Almond Flour Baking Mix will work well.
Unsweetened Cocoa Powder
- Adds the subtle chocolate flavor essential to red velvet cookies. Balances sweetness and deepens color.
- Substitutions: Natural cocoa powder is preferred; Dutch-processed cocoa can be used but may slightly alter acidity and color.
Baking Powder
- Helps the cookies rise and become soft and tender. Works alongside baking soda for proper leavening.
Baking Soda
- Reacts with the vinegar and brown sugar to create lift and slight chewiness.
Salt
- Enhances flavor and balances sweetness, bringing out the chocolate and red velvet notes.
Powdered Sugar
- Also know as “confectioners’ sugar”, creates the signature crinkled top and adds a delicate sweetness and slight texture contrast.
- Substitutions: Make it in no time with my recipe.

How to Make Red Velvet Crinkle Cookies
- Cream the butter and sugars: In the bowl of a stand mixer fitted with a paddle attachment (or in a large bowl using a handheld electric mixer), cream the butter and the sugar mixture of granulated sugar, and brown sugar on medium speed for about 3 minutes until light and fluffy.
- Mix in wet ingredients: With the mixer on low speed, add the eggs, milk, red food coloring, vanilla extract, and vinegar and mix until incorporated.
- Combine dry ingredients: In a medium bowl, whisk together the flour, cocoa powder, baking powder, bakingsoda, and salt. Gradually add this mixture into your wet ingredients and mix until just combined.
- Chill the dough: Cover and chill the dough in the refrigerator for at least 4 hours and up to 2 days so it is firm to scoop.
- Preheat oven: Preheat the oven to 350°F (180°C) and line 2 baking sheets with parchment paper.
- Shape and coat cookies: Scoop heaped tablespoons of the dough, shape into balls, and roll in the powdered sugar to generously coat (oil your hands lightly to make handling easier). Place the balls of dough 2 inches (5 cm) apart on the prepared baking sheets.
- Bake cookies: Bake for 12-13 minutes or until puffed and crackly on top.
- Cool cookies: Let the cookies cool for 10 minutes on the baking sheets before transferring them to a wire rack to cool completely.
- Serve and enjoy: Enjoy with a cup of hot chocolate! Store any leftover cookies in an airtight container at room temperature for up to 3 days.
FULL (PRINTABLE) RECIPE BELOW!
Gemma’s Pro Chef Tips
- Use red gel food coloring: Gel provides the most vibrant red color without watering down your dough.
- Chill the dough thoroughly: This dough is very soft and needs to be firm to scoop and roll. Chill for at least 4 hours or up to 2 days.
- Oil your hands lightly when rolling: Rolling the dough can be messy, and a bit of oil prevents sticking and red-stained hands.
- Double roll in sugar for extra coverage: For a more pronounced crackle and slight crunch, roll cookies first in granulated sugar, then in powdered sugar.
- Rotate baking sheets halfway through: This ensures even baking, especially if your oven has hot spots.
- Check for doneness early: Cookies should be puffed and crackly on top.
- Optional flavor twist: Add a pinch of espresso powder to enhance the cocoa flavor or a few drops of almond extract for a subtle nutty note.
- Turn into sandwich cookies: Spread cream cheese frosting between two cookies for a decadent treat.
Make Ahead and Storage Instructions
- Make-Ahead Dough: Scoop the dough into balls and freeze for up to 6 weeks. When ready to bake, thaw at room temperature for about 40 minutes, roll in powdered sugar (I do it twice), and bake as directed.
- Baked Cookie Storage: Cool cookies completely on a wire rack, then store in an airtight container at room temperature for up to 3 days.
- Freezing Baked Cookies: I do not recommend this as the freezing process will alter the texture.
- Holiday Tip: Preparing and freezing the dough ahead of time allows you to enjoy freshly baked cookies throughout the season with minimal effort.
FAQs
Why are my crinkle cookies flat?
An important step in making these cookies is chilling the dough for enough time. If you don’t chill it long enough, it won’t keep its shape in the oven.
How come my crinkle cookies don’t look crinkly?
- There are several reasons why your crinkle cookies do not have that cracked texture. It’s possible you didn’t include enough baking soda and baking powder in your dough, your oven isn’t hot enough, or your leaveners have gone past their shelf life.
- Check before baking that all of your ingredients are still fresh and your oven can operate at 350°F (180°C).
What do I do if I don’t have a stand mixer or electric hand mixer?
Though using a stand mixer or electric hand mixer will make your job a lot easier, there’s nothing a little elbow grease can’t fix. You can use a whisk to combine all wet and dry ingredients. Make sure to thoroughly combine.
More Red Velvet Recipes
- Gemma’s Best-Ever Red Velvet Cake
- Red Velvet Roulade Cake (Gluten Free)
- Red Velvet Pancakes
- Red Velvet Lava Cake
- Red Velvet Cake Cheesecake
IMPORTANT NOTE: This recipe was improved and updated on 11/5/2025, to include explanations and substitutes of key ingredients, make-ahead and storage instructions, answers to the most frequently asked questions, and Pro Chef Tips.
Try These Recipes!


Red Velvet Crinkle Cookies

Ingredients
- ½ cup (4 oz/115 g) butter , softened
- ¾ cup (6 oz/171 g) granulated sugar
- ½ cup (3 oz/85 g) dark brown sugar
- 2 large eggs , at room temperature
- 1½ tablespoons whole milk
- 2 teaspoons red gel food coloring
- 1 teaspoon vanilla extract
- 1 teaspoon white vinegar
- 2 cups (10 oz/284 g) all-purpose flour
- ⅓ cup (1⅓ oz/37 g) unsweetened cocoa powder
- 1 teaspoon baking powder
- ¼ teaspoon baking soda
- ½ teaspoon salt
- ½ cup (2 oz/57 g) powdered sugar (for rolling)
Instructions
- In the bowl of a stand mixer fitted with a paddle attachment (or in a large bowl using a handheld electric mixer), cream the butter, granulated sugar, and brown sugar on medium speed for about 3 minutes until light and fluffy.
- With the mixer on low speed, add the eggs, milk, red food coloring, vanilla extract, and vinegar and mix until incorporated.
- In a medium bowl, whisk together the flour, cocoa powder, baking powder, baking soda and salt. Gradually add this mixture into your wet ingredients and mix until just combined.
- Cover and chill the dough in the fridge for at least 4 hours and up to 2 days so it is firm to scoop.
- Preheat the oven to 350°F (180°C) and line 2 baking sheets.
- Scoop heaped tablespoons of the dough, shape into balls and roll in the powdered sugar to generously coat. (Oil your hands lightly to make handling the dough easier). Place the balls of dough 2 inches (5 cm) apart on the prepared baking sheets.
- Bake for 12-13 minutes or until puffed and crackly on top.
- Let the cookies cool for 10 minutes on the baking sheets before transferring them to a wire rack to cool completely.
- Enjoy with a cup of hot chocolate! Store any leftover cookies in an airtight container at room temperature for up to 3 days.
Recipe Notes
- Use red gel food coloring: Gel provides the most vibrant red color without watering down your dough.
- Chill the dough thoroughly: This dough is very soft and needs to be firm to scoop and roll. Chill for at least 4 hours or up to 2 days.
- Oil your hands lightly when rolling: Rolling the dough can be messy, and a bit of oil prevents sticking and red-stained hands.
- Double roll in sugar for extra coverage: For a more pronounced crackle and slight crunch, roll cookies first in granulated sugar, then in powdered sugar.
- Rotate baking sheets halfway through: This ensures even baking, especially if your oven has hot spots.
- Check for doneness early: Cookies should be puffed and crackly on top.
- Optional flavor twist: Add a pinch of espresso powder to enhance the cocoa flavor or a few drops of almond extract for a subtle nutty note.
- Turn into sandwich cookies: Spread cream cheese frosting between two cookies for a decadent treat.


A new favorite of my husband’s. Thanks for a delicious, and pretty cookie.
Hi Gemma,
Im just wondering, why my crinkles got a smaller amount of powdered sugar left when my cookies are cooked, even though when I rolled them into the powdered sugar before baking, I make sure it has covered all the cookies. thank you!
Hi Gemma, can I use 1 cup all purpose flour and 1 cup almond flour?
Hi Gemma, can I use oil instead of butter? If yes, how many ml/f.oz? Thanks!
I bet this could also be a green crinkle cookie using green colouring instead to get the real Christmas colours with both red and green. Thanks for the recipe. I haven’t made it yet.
Hi. Gemma. I tried this recipe. I wanted to ask are they supposed to taste cakey? Or gooey and moist like your chocolate ones? Also please would you be able to add a video to this recipe. Just would understand alittle bit more how light and fluffy to mix the sugar and butter mixture?
Is there a good substitution for white vinegar for this recipe? Is it needed?
Hi, Gemma, how can I make these lovely cookies Eggless?
Can I use a Red Velvet cake mix?