This post may contain affiliate links. Please see my full disclosure for details.
Hi Bold Bakers!
WHY YOU’LL LOVE THIS RECIPE: Calling all Pocky Sticks enthusiasts! Prepare to embark on a delicious and fun journey with this easy homemade recipe. Using simple pantry staples and following my step-by-step instructions, you’ll effortlessly recreate the beloved Japanese biscuit snack. Indulge in the classic chocolate coating to elevate these delightful cookies, or venture into the enticing flavors of earthy matcha or fruity strawberry for a taste sensation that’s sure to satisfy your cravings!
What we cherish most in this homemade version is the unbeatable freshness and precise quality control. Without unnecessary preservatives and artificial flavors, these thin treats offer a creative, cost-efficient, and personal touch when enjoyed by ourselves or shared with families and friends!
Table of Contents
- What are Pocky Sticks?
- Tools for Pocky Sticks
- Key Ingredients and Why
- How to Make Pocky Sticks
- How to Store Pocky Sticks
- Can I make Pocky sticks ahead of time?
- Can I freeze baked Pocky sticks?
- FAQs
- Gemma’s Pro Chef Tips
- More Homemade Store-Bought Snacks Recipes

What are Pocky Sticks?
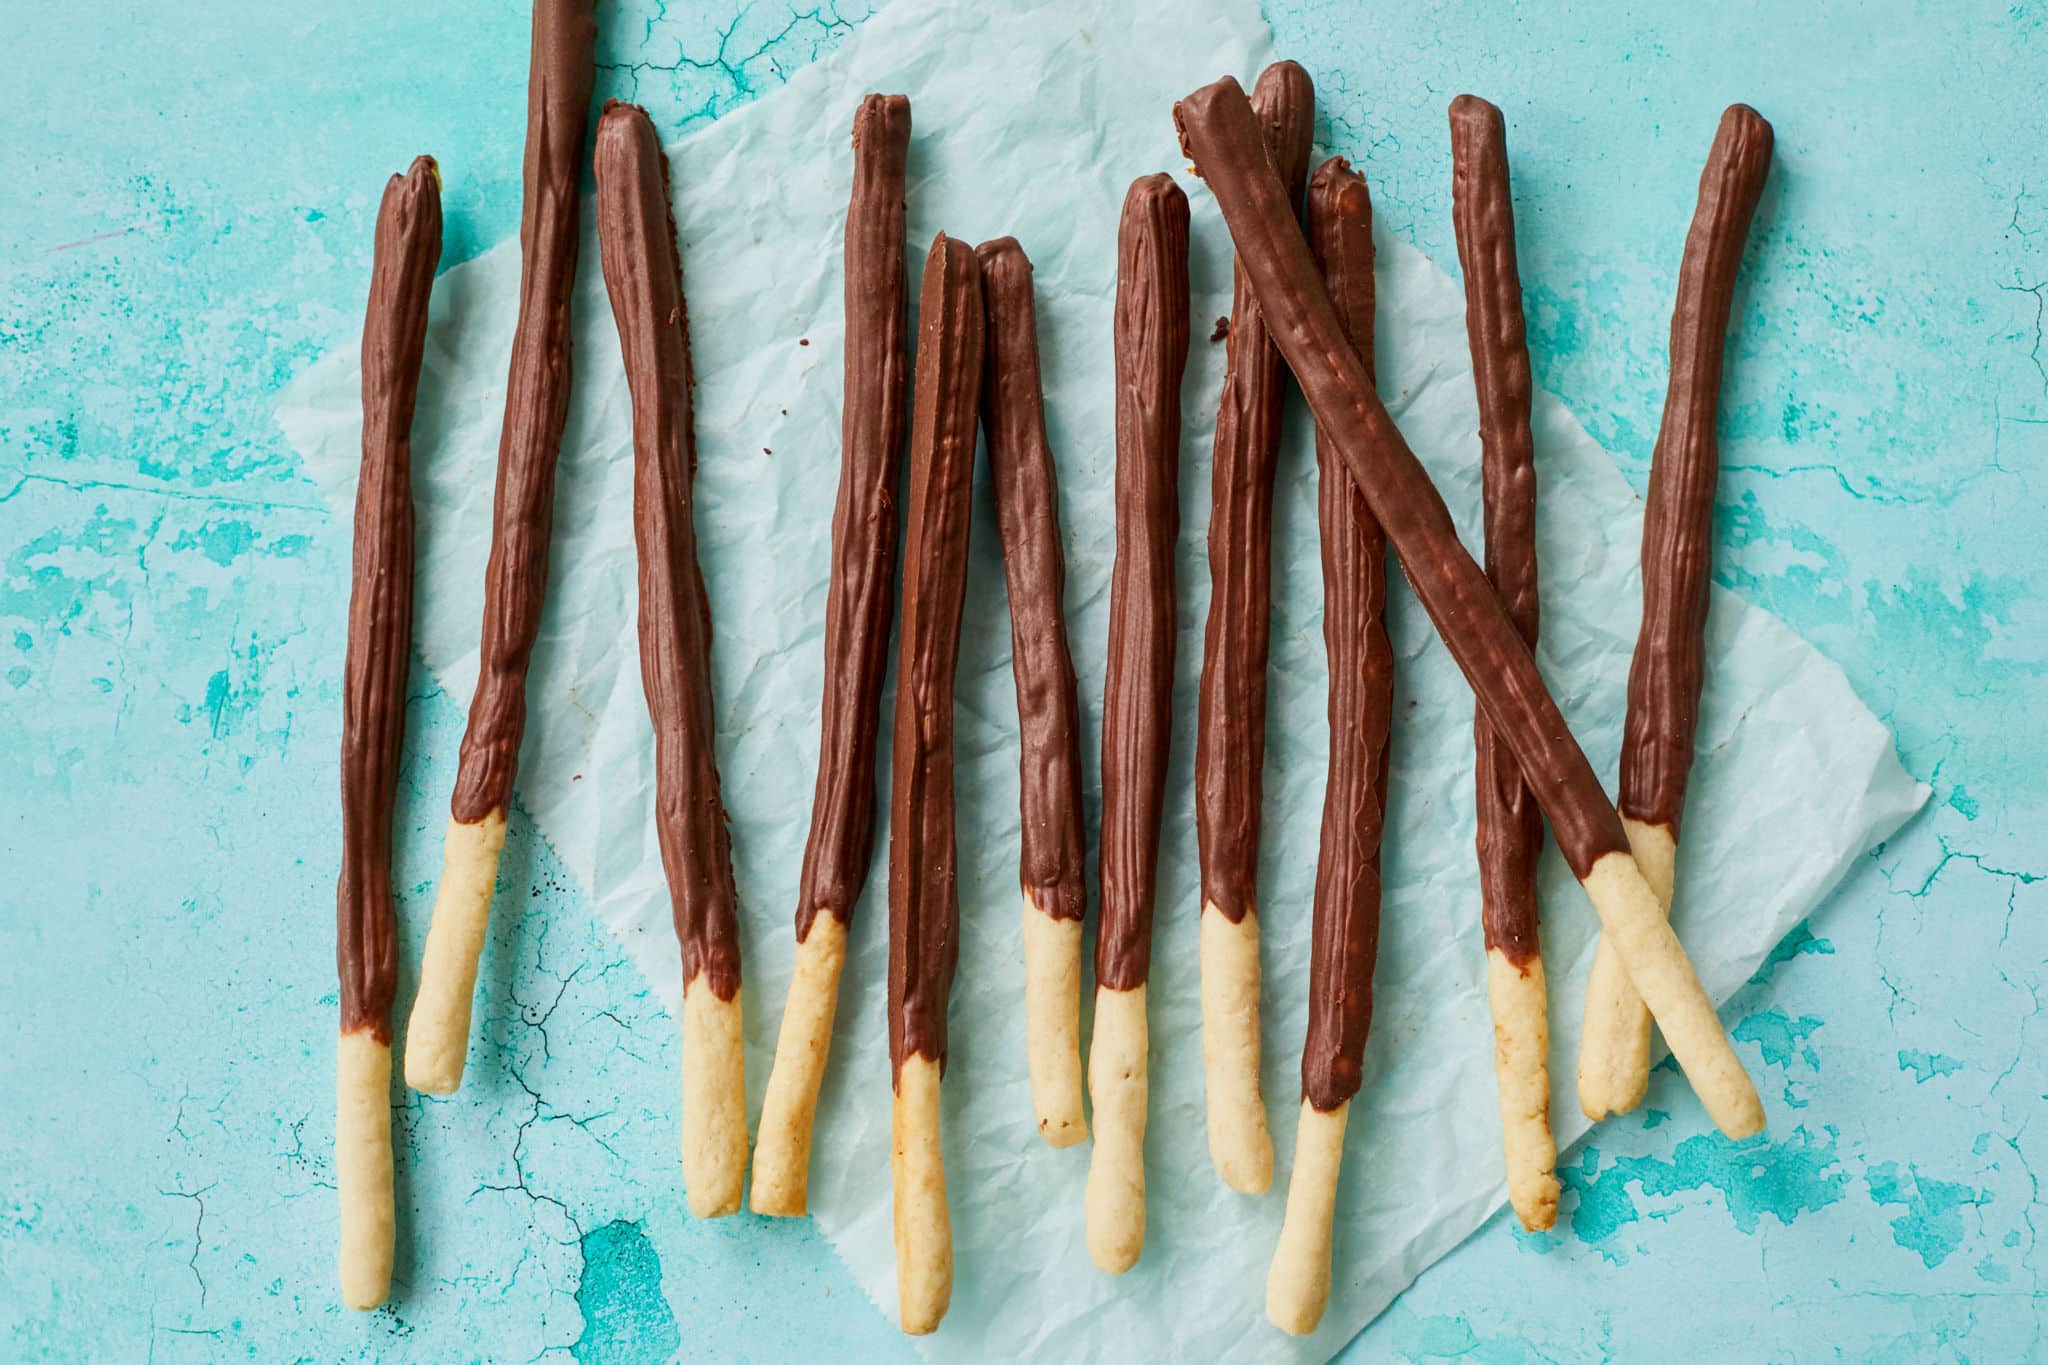
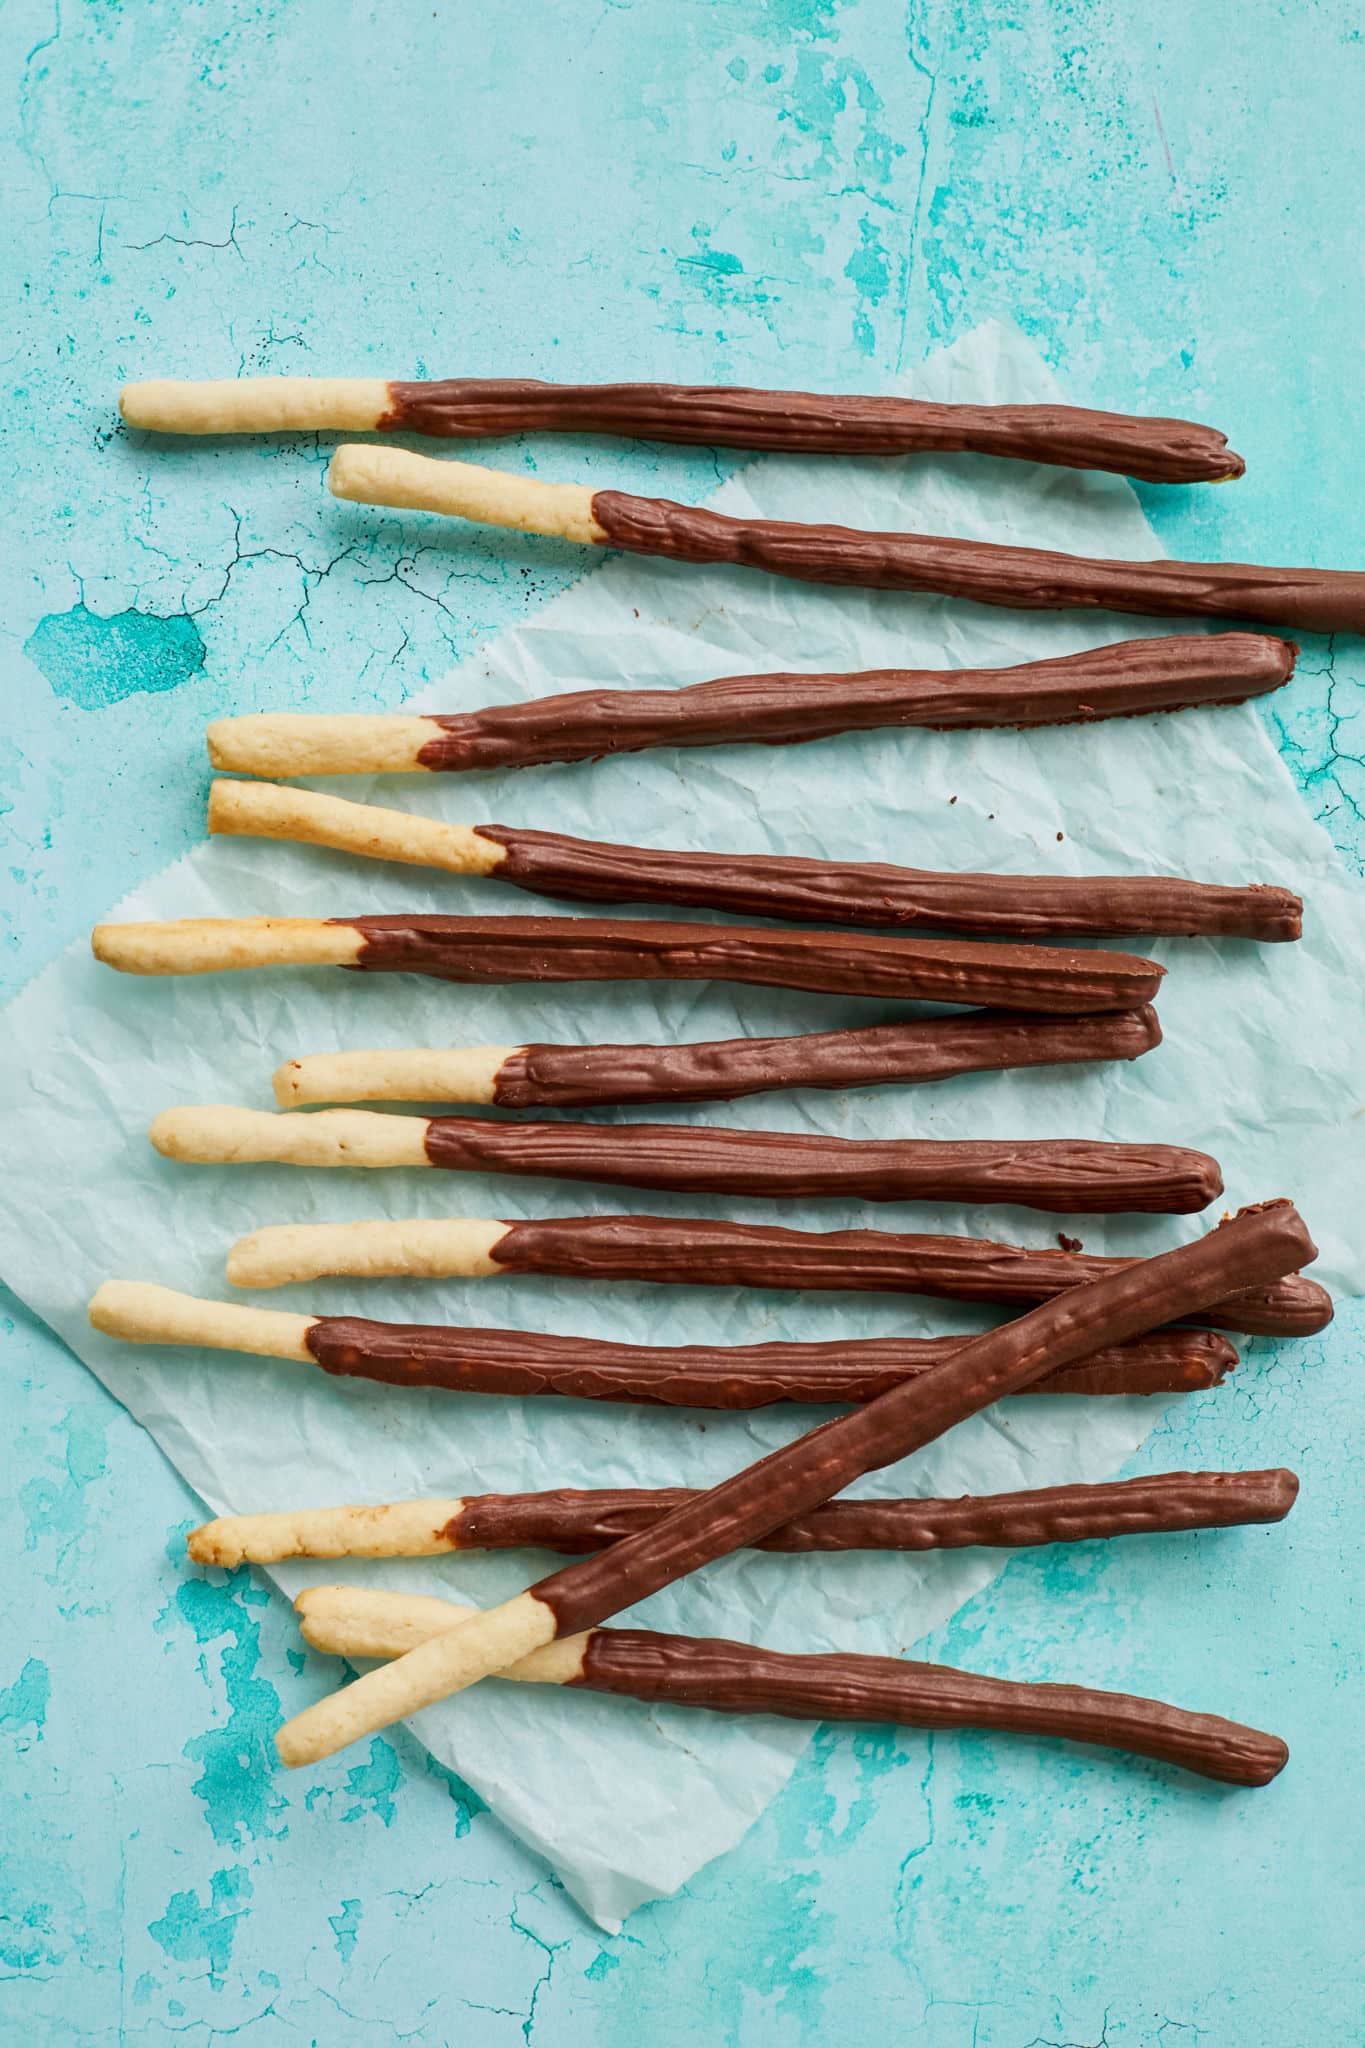
- Pocky Sticks are a popular Japanese snack consisting of slender, elongated biscuit sticks coated with various flavored coatings, typically chocolate.
- The name “Pocky” originated from a Japanese onomatopoeic word resembling the cracking sound. Pocky sticks were invented by Yoshiaki Koma and first sold by Ezaki Glico Co. Ltd. in 1966.
- These treats are known for their distinctive appearance, with most of the stick covered in a flavored coating while leaving a small section uncoated for easy handling.
- November 11 is marketed as “Pocky Day” to honor these sticks for their “Number One” shape.
Tools for Pocky Sticks
- Measuring cups and measuring spoons
- Mixing bowls
- Pastry blender
- Parchment paper
- Rolling pin
- Baking sheets
- Dough cutter or knife
- Double boiler or ban marine
Key Ingredients and Why
-
All-Purpose flour
- All-purpose flour (aka “plain flour”) has a protein content of 9-11% giving this sweet the characteristic crispy rather than chewy texture.
- The neutral flavor of all-purpose allows other ingredients to shine through without overwhelming the overall taste.
-
Granulated sugar
- Granulated sugar sweetens biscuits and aids in the browning for a lightly golden color.
- It also promotes tenderness producing a crunchy texture.
- In addition, sugar not only retains moisture preventing baked biscuits from becoming too dry, but also absorbs excess water content to preserve the snack.
- Alternate sweeteners from my Sugar Substitute Chart will work but the results can vary in taste, texture, and shelf life.
-
Baking powder
- Baking powder is the raising agent releasing gas when mixed with moisture and exposed to heat. This gives the biscuits a light and airy texture.
- Check out my recipe How to Make Baking Powder to make it if needed.
-
Butter
- Butter enriches Pocky sticks’ flavor. I prefer salted butter but unsalted butter will also work.
- As cold butter melts during baking, the resulting steam makes pockets that create a crispy, tender texture.
- Make your own butter using my easy recipe: How to Make Homemade Butter.
-
Milk
- Whole milk has more fat than reduced-fat milk, which adds more flavor and helps with a flakier texture.
- You can use milk of your choice. Full-fat coconut milk will work closest to whole milk.
-
Vanilla extract
- Vanilla extract enhances other flavors in these cookies.
- Make your own using my easy How to Make Vanilla Extract Recipe at a fraction of the store price.
-
Semi-sweet chocolate
- Semi-sweet chocolate (52-62% cocoa solids) complements the cookie part with a well-balanced bitterness and sweetness.
- You can also use milk chocolate, dark chocolate or check out my Ultimate Guide to the Different Types of Chocolate for more options.
-
Vegetable oil
- Vegetable oil helps the coating achieve a smooth and more fluid consistency, preventing coating from cracking.
- Coconut oil or any other neutral-flavor oil will work.
How to Make Pocky Sticks
-
To make the Pocky sticks cookies
-
Mix dry ingredients including flour, sugar, baking powder, and salt.
-
Cut the butter into flour using a pastry cutter or in a food processor until the mixture resembles coarse crumbs.
-
Mix in the wet ingredients including milk and vanilla then knead the mixture until it becomes a soft dough.
-
Chill the rolled-out dough (6×8-inch / 15×20-cm rectangle, about ¼ inch / 6 mm thick) wrapped with the parchment in the fridge for 1 hour, until firm.
-
Prepare for baking: Line each baking tray with parchment paper and preheat the oven to 350°F.
-
Shape the dough:
-
Slice the dough into 1/4-inch (6-mm) straight lines that are 6 inches (15 cm) in length.
-
On a lightly floured surface, roll each strip of dough into a thin snake that is about 7 inches (18 cm) long, as straight as possible.
-
-
Chill and relax the dough in the fridge for 20 minutes or the freezer for 10 minutes, until firm.
-
Bake the cookies for about 15 minutes until firm but still pale. Let cool completely on the baking sheets.
-
-
To Make the chocolate coating
-
-
Melt the chocolate and vegetable oil in the top of a double boiler over simmering water.
-
Coat cookies gently with the melted chocolate on all sides. Leave about 1 inch (2½ cm) at one end uncoated. Return to the parchment-lined baking sheet and repeat with the remaining cookies.
-
How to Store Pocky Sticks
Let the chocolate set before storing Pocky sticks in an airtight container at room temperature for up to 3 days.
Can I make Pocky sticks ahead of time?
Yes, you can make the dough and chill it for up to 3 days in advance.
Can I freeze baked Pocky sticks?
Yes, you can freeze baked Pocky sticks.
- Allow the baked Pocky sticks to cool completely and the coating to set at room temperature.
- Freeze cookies in an air-tight container or plastic bag for up to 2 to 3 months.
FAQs
Can I make gluten-free Pocky sticks using an alternative flour?
- Yes, you can use gluten-free flour blends to make gluten-free.
- Note to hold back some milk then adjust it accordingly until you get a soft dough.
Are there any vegan or dairy-free options for homemade Pocky sticks?
- Yes, you can make vegan Pocky sticks by substituting plant-based baking butter and dairy-free milk in the recipe and using dairy-free chocolate for the coating.
How much whole wheat flour can I use for a healthier version of homemade Pocky sticks?
- You can replace up to 50% of all-purpose flour with whole wheat flour so the result won’t be overly dense.
- Whole wheat Pocky sticks will have a nuttier flavor and more fiber.
Are there any tips for achieving uniform stick shapes?
- To ensure uniform stick shapes, use a ruler when slicing the dough into strips, and roll them evenly between your palms before baking.
How can I add a glossy finish to the chocolate coating?
- You can achieve a glossy finish on the chocolate coating by tempering the chocolate and make sure to not omit vegetable oil.
Can I add decorative elements like sprinkles or crushed candies to homemade Pocky sticks?
- Absolutely! You can decorate the coated Pocky sticks with homemade sprinkles, crushed candies, or chopped nuts before the chocolate coating sets.
How can I add flavor extracts like almond or orange to the dough for a unique twist?
- Absolutely! You can add a few drops of your favorite flavor extracts to the dough for a distinctive taste.
- Almond and orange extracts are excellent choices and make them using my recipe: How to Make Homemade Extracts.
Can I make savory Pocky sticks?
- Certainly! You can incorporate savory ingredients like grated cheese and herbs into the dough for a delicious twist on Pocky sticks.
- Refer to my Homemade Cheez-Its With Real Cheddar recipe for more details.
Can I make Pocky sticks in different sizes and shapes?
- Yes, you can create Pocky sticks in various shapes by using cookie cutters or shaping the dough by hand before baking.
- Take care to monitor the baking time and bake them until firm but still pale.
Gemma’s Pro Chef Tips
- This dough is very soft and easier to handle when chilled, so be sure to factor in that time if planning to make these cookies.
- The dough can be made and chilled for up to 3 days in advance.
- These cookies are very delicate once they are baked and can break easily. Be sure to handle and paint the chocolate or dip cookies in the chocolate very gently.
- For a matcha coating, melt 1 cup (6 oz/170 g) of good quality white chocolate in a double boiler and then stir in 1 or 2 teaspoons of matcha powder until smooth.
- For a strawberry coating, grind freeze-dried strawberries to make a strawberry powder. Then stir 2-3 teaspoons into 1 cup (6 oz/170 g) of melted white chocolate until smooth.
- Enjoy this recipe with my Homemade Vanilla Ice Cream!
More Homemade Store-Bought Snacks Recipes
-
3 Homemade Cracker Recipes for Your Favorite Store-bought Cheez-Its, Wheat Thins, and Ritz Crackers
-
3 Homemade Cookie Recipes for Your Favorite Store-Bought OREO, Nilla Wafers, and Chips Ahoy!
Try These Recipes!

Easy Homemade Pocky Sticks Recipe

Ingredients
Cookies
- 1¼ cups (6¼ oz/177 g) all-purpose flour
- ¼ cup (2 oz/57 g) granulated sugar
- ½ teaspoon baking powder
- ¼ teaspoon salt
- ¼ cup (2 oz/57 g) butter, cold and diced
- 3 tablespoons whole milk
- ½ teaspoon vanilla extract
Chocolate Coating
- 1 cup (6 oz/170 g) semisweet chocolate, finely chopped
- ¼ teaspoon vegetable oil
Instructions
To Make the Cookie Sticks
- In a medium bowl, combine the flour, sugar, baking powder, and salt.
- Cut in the butter with a pastry blender until the mixture resembles coarse crumbs, then knead in the milk and vanilla just until the mixture becomes a soft dough.
- On a piece of lightly floured parchment paper, roll the dough into a 6x8-inch (15x20-cm) rectangle that is about ¼ inch (6 mm) thick. Wrap the dough in the parchment and refrigerate for 1 hour, until firm.
- Line 2 baking sheets with parchment paper and preheat the oven to 350°F.
- Cut the dough into 1/4-inch (6-mm) strips that are 6 inches (15 cm) in length.
- On a lightly floured surface, roll each strip of dough into a thin snake that is about 7 inches (18 cm) long and place on the prepared sheet. Adjust the dough so that it is as straight as possible.
- Place the cookies 1 inch (2½ cm) apart on the prepared sheets. Once one sheet is filled, refrigerate for 20 minutes or freeze for 10 minutes, until firm.
- Bake the sheets, one at a time, for about 15 minutes, until the cookies are firm but still pale. Let cool completely on the baking sheets.
To Make the Chocolate Coating
- Combine the chocolate and vegetable oil in the top of a double boiler over simmering water and warm until melted.
- Carefully lift a cookie, and, using a pastry brush, gently coat the cookie with the chocolate on all sides. Leave about 1 inch (2½ cm) at one end uncoated. Return to the parchment-lined baking sheet and repeat with the remaining cookies.
- Let the chocolate set before storing in an airtight container at room temperature for up to 3 days.


Why there are no more videos with recipes? That helps so much for when making them. Will do this recipe.