
This post may contain affiliate links. Please see my full disclosure for details.
Hi Bold Bakers!
WHY YOU’LL LOVE THIS RECIPE: My fluffy Sally Lunn Buns are soft, enriched yeast buns that are a timeless British classic that you’ll make again and again. So easy to make, you’ll want to bake up an extra batch for the freezer!
- Buttery with a hint of citrus: Orange zest is a delightful contrast to the rich dough.
- Simple ingredients: Kitchen staples are all you need for these elegant buns.
- Pillowy texture: A soft, high-hydration dough creates an irresistibly light, fluffy crumb.
- Perfect for beginner bread makers: Straightforward techniques make these impressive homemade buns easy to master.
- Perfect for every occasion: Enjoy at breakfast (with butter or jam!), brunch, as a homey snack with tea or coffee, or as a welcome accompaniment to dinner,
As a professional baker, I know how satisfying it is to pull a pan of warm, aromatic rolls from the oven. This classic Sally Lunn Buns recipe is a no-fuss, foolproof way to a batch of delicious homemade buns. Sally Lunn Buns are one of those go-to recipes that look so impressive but use simple techniques and common kitchen basics to create something so special.
My top tip for this recipe is to remember that the dough is supposed to be sticky! This high-hydration dough is the secret to the light, fluffy texture of buns. It’s important not to add extra flour. Instead, use damp or lightly oiled hands when shaping the dough. It will make handling much easier without changing the texture. For more irresistible rolls, be sure to try my Baps (Scottish Morning Rolls), Soft Sourdough Dinner Rolls, and Waterford Blaas (Authentic Irish Rolls).
Table of Contents
- What are Sally Lunn Buns?
- Tools You Need
- Key Ingredients and Substitutes
- How to Make Sally Lunn Buns
- Gemma’s Pro Chef Tips
- Make Ahead and Storage Instructions
- How to Serve Sally Lunn Buns
- FAQs
- More Roll and Bun Recipes
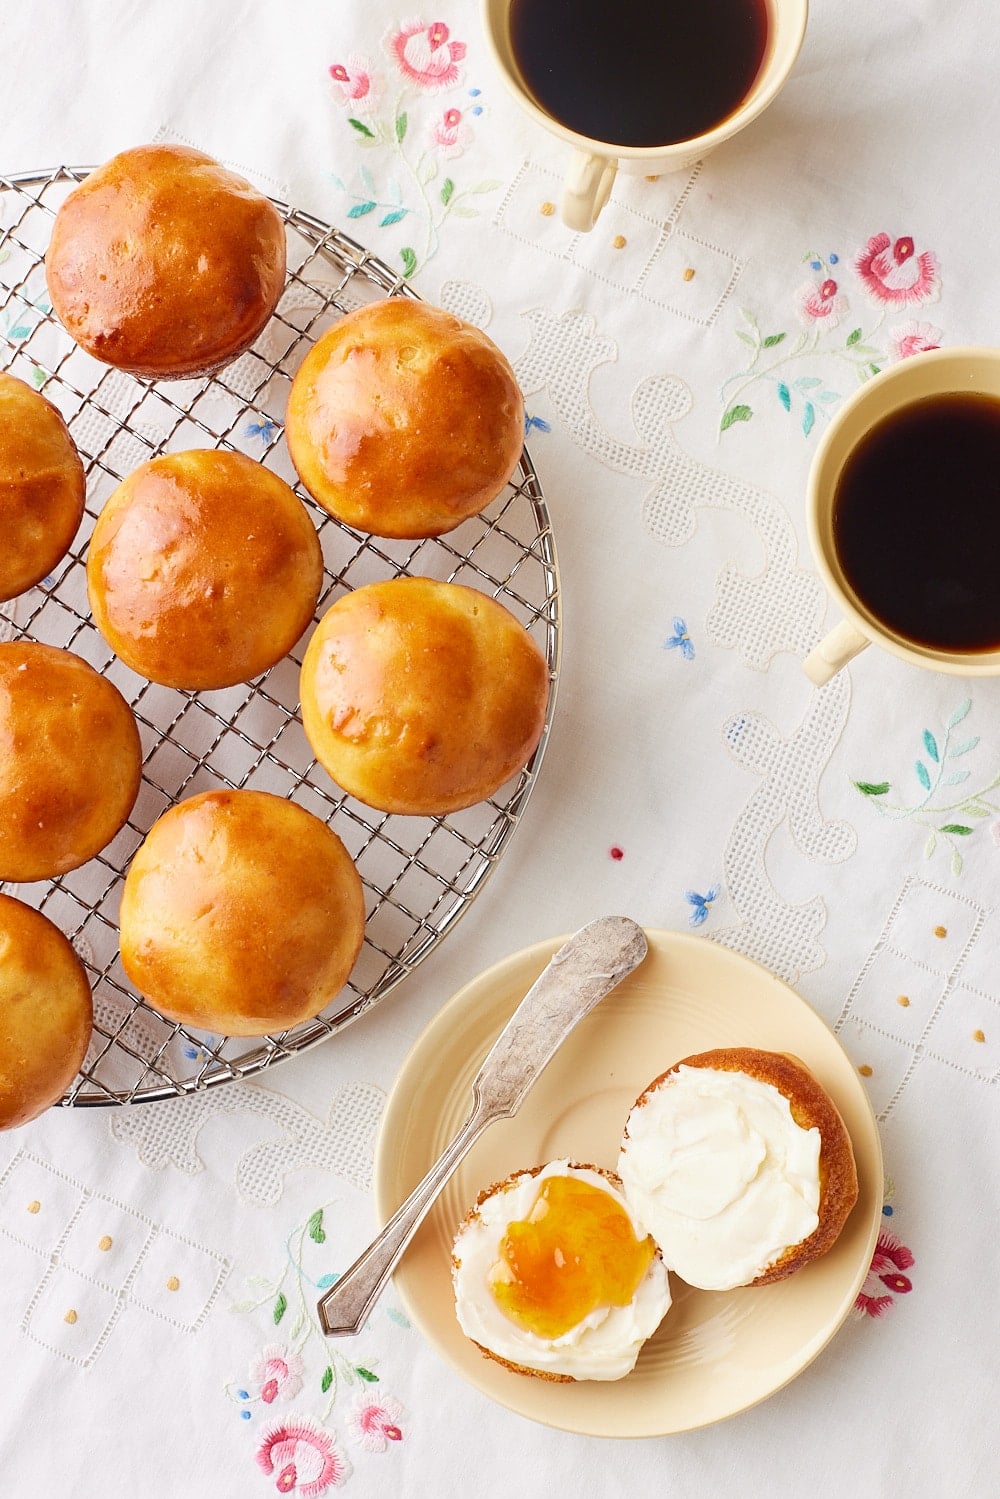
What are Sally Lunn Buns?
Sally Lunn Buns are enriched yeast rolls with a soft, fluffy crumb that’s somewhere between a dinner roll and a French brioche loaf. The traditional bun is one large, round shape that is sliced—my recipe portions the rich dough into individual dome top buns baked in muffin tins, making them easier to share and serve. Sally Lunn Buns (sometimes referred to as Solilemmes), along with the sweet Bath Buns, come from Bath, England, where they became a local specialty in the 18th century. According to one popular legend, French refugee Solange Luyon brought the recipe from her homeland, and the flavorful buns quickly gained devoted fans (including Jane Austen!). They remain beloved in Britain, either from the bakery or made at home, for their light texture and rich flavor.
Tools You Need
- Mixing bowls
- Measuring spoons
- Measuring cups
- Glass measuring jug
- Kitchen scale (optional)
- Whisk
- Stand mixer (optional)
- Standard muffin pans
- Cling film
- Pastry brush
- Wire cooling rack
Key Ingredients and Substitutes
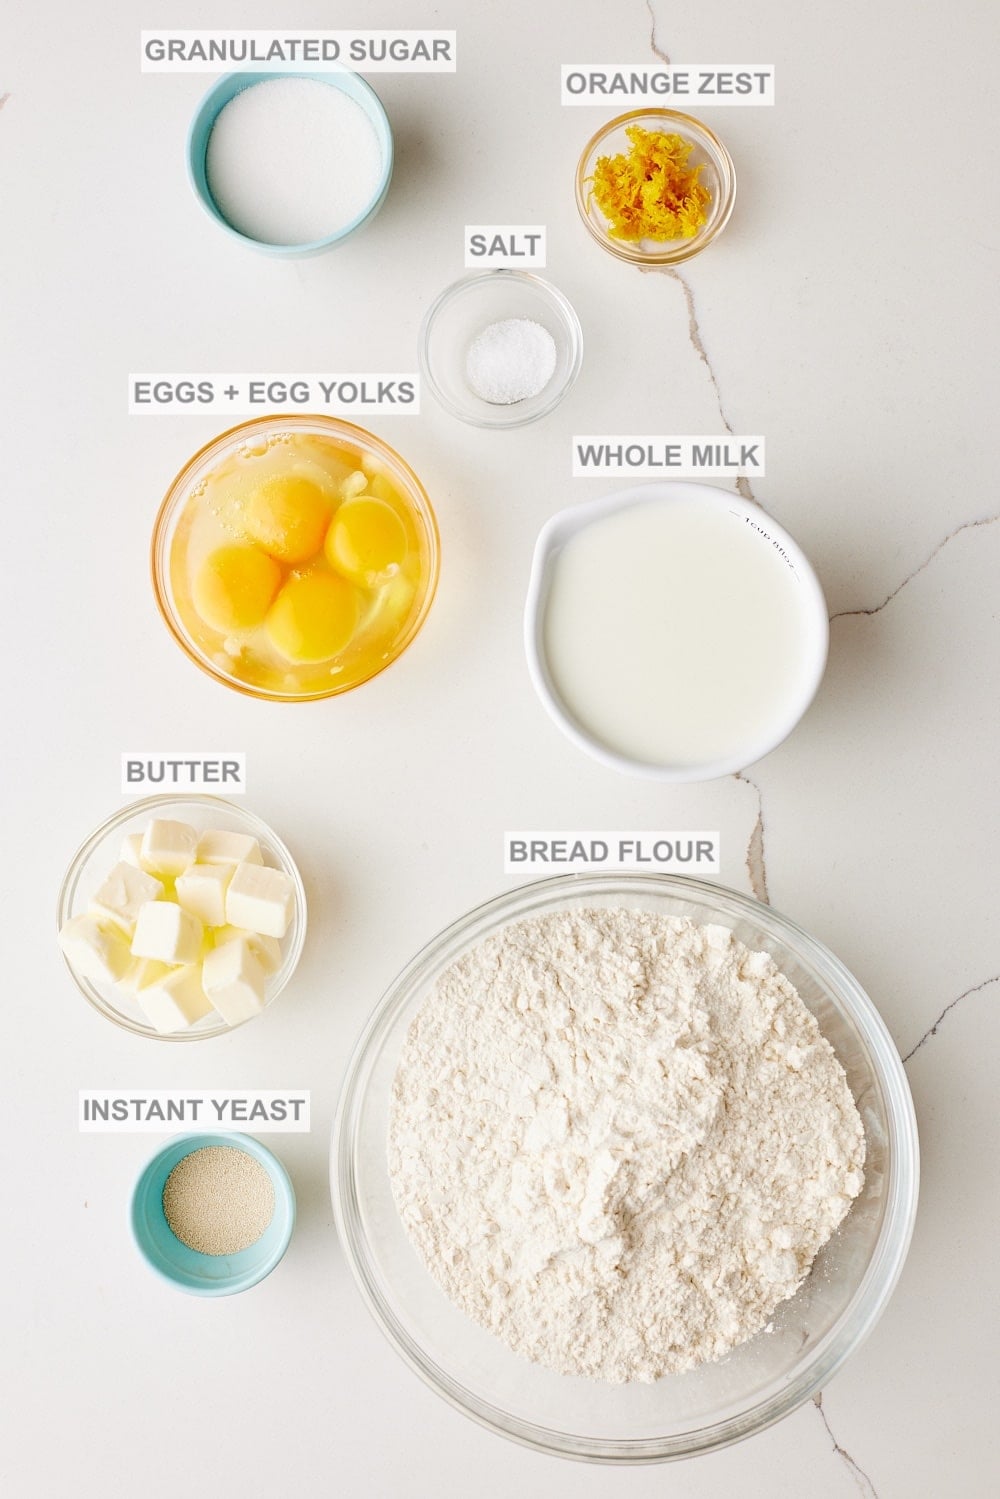
Whole milk
- Milk contributes to the soft, tender crumb, flavor, and browning.
Substitute: Use the same amount of any full-fat unsweetened dairy-free milk.
Butter
- Butter contributes richness and helps create a tender, pillowy texture.
- Additionally, butter brushed on the warm baked buns creates a flavorful, soft crust.
- I recommend using butter, and not a substitute, for the most traditional flavor and texture.
Eggs
- Eggs emulsify the dough, making it smooth and cohesive.
- Importantly, the eggs provide structure and stability.
- They also add richness and color, contributing to the soft, tender crumb.
- I don’t recommend using substitutes for the eggs or yolks, as they’re essential to creating the proper flavor and texture.
Egg yolk
- Extra egg yolks add richness, contribute to a velvety texture, and create a deeper golden color.
Orange zest
- Orange zest adds brightness, floral sweetness, and a tantalizing aroma.
- Substitute: Use lemon zest if you prefer.
Salt
- Salt enhances flavor and strengthens dough for a better texture.
Bread flour
- Bread flour, with a protein content of 12-14%, creates the best balance of structure and tenderness for these buns.
- Substitute:
- You can use the same amount of all-purpose flour instead.
- Note that if you use AP flour, the buns won’t have the same texture, and will not rise as high as those made with bread flour.
- I don’t recommend using gluten-free flour in this recipe. Sally Lunn Buns rely on the strength of bread flour to create their special texture, and gluten-free flour won’t produce the same results.
- For a gluten-free option, please try my 3-Ingredient Breadsticks Recipe (No Yeast).
- You can use the same amount of all-purpose flour instead.
Granulated sugar
- Granulated sugar adds a subtle sweetness.
- Additionally, the sugar feeds the yeast and promotes a beautifully golden brown crust.
- For the most authentic taste and texture, I don’t recommend using a substitute for granulated sugar.
Instant yeast
- Instant yeast gives the enriched buns a predictable rise and a fluffy texture.
- Importantly, instant yeast doesn’t need sponging, so you can mix it with the dry ingredients.
- If you only have active dry yeast, add an extra ¾ teaspoon of yeast.
- Proof the yeast in the milk and butter mixture once it cools to lukewarm.
- Once foamy (in about 10 minutes), combine with the rest of the recipe.
How to Make Sally Lunn Buns
Make the Sally Lunn Bun Dough
- Heat milk. Microwave the milk in a glass jug for 60-90 seconds, or until simmering. (You can also use a small saucepan.)
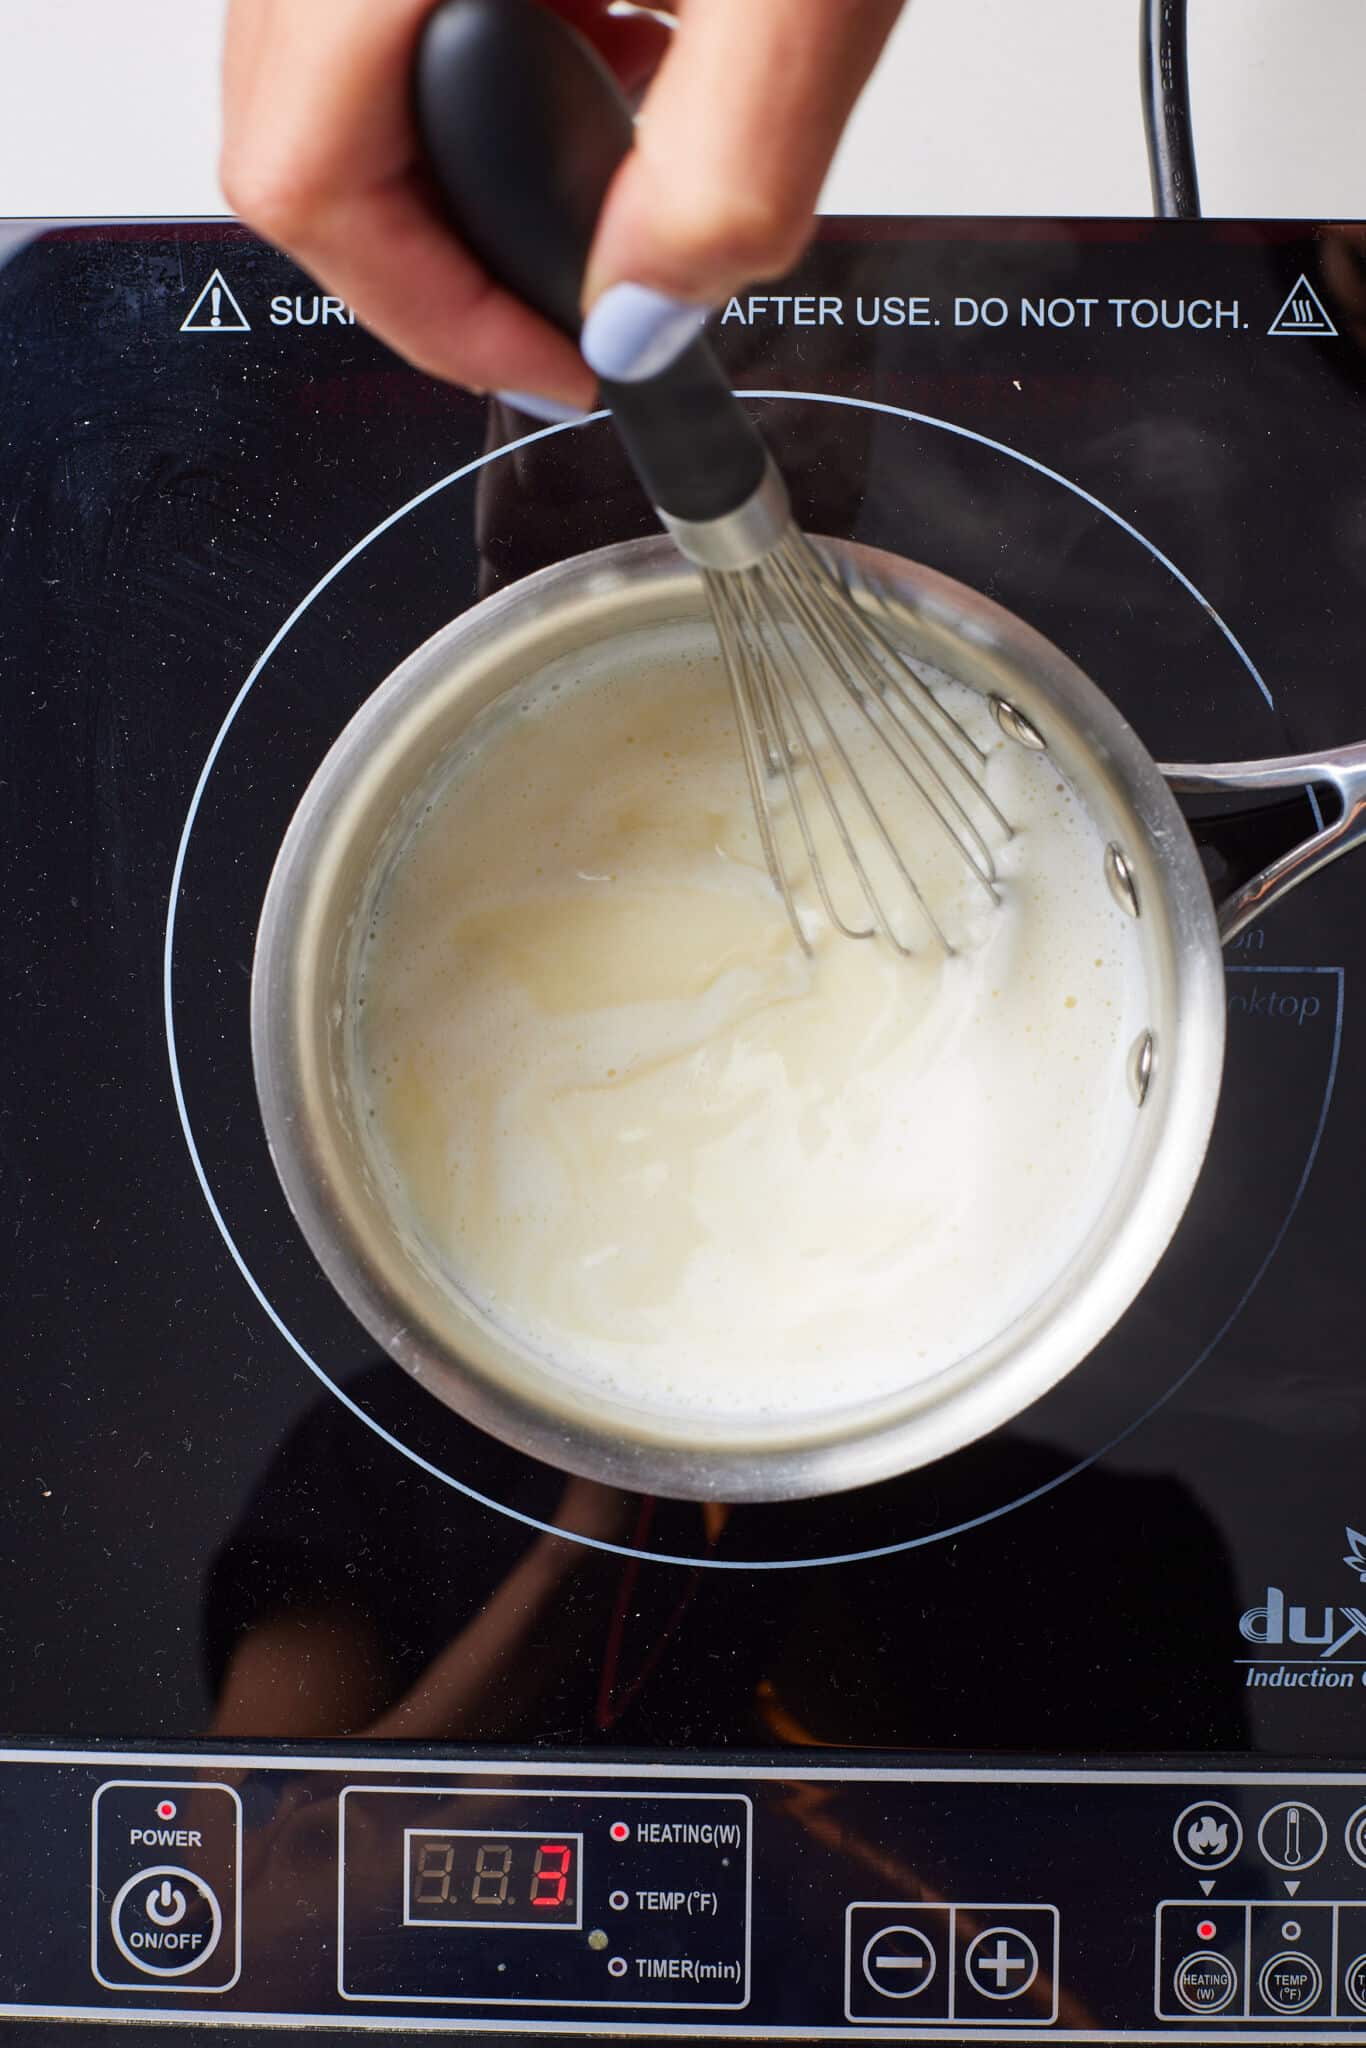
- Add butter. Add 6 tablespoons (3 oz/85 g) of butter, and let cool until lukewarm, about 5 minutes.
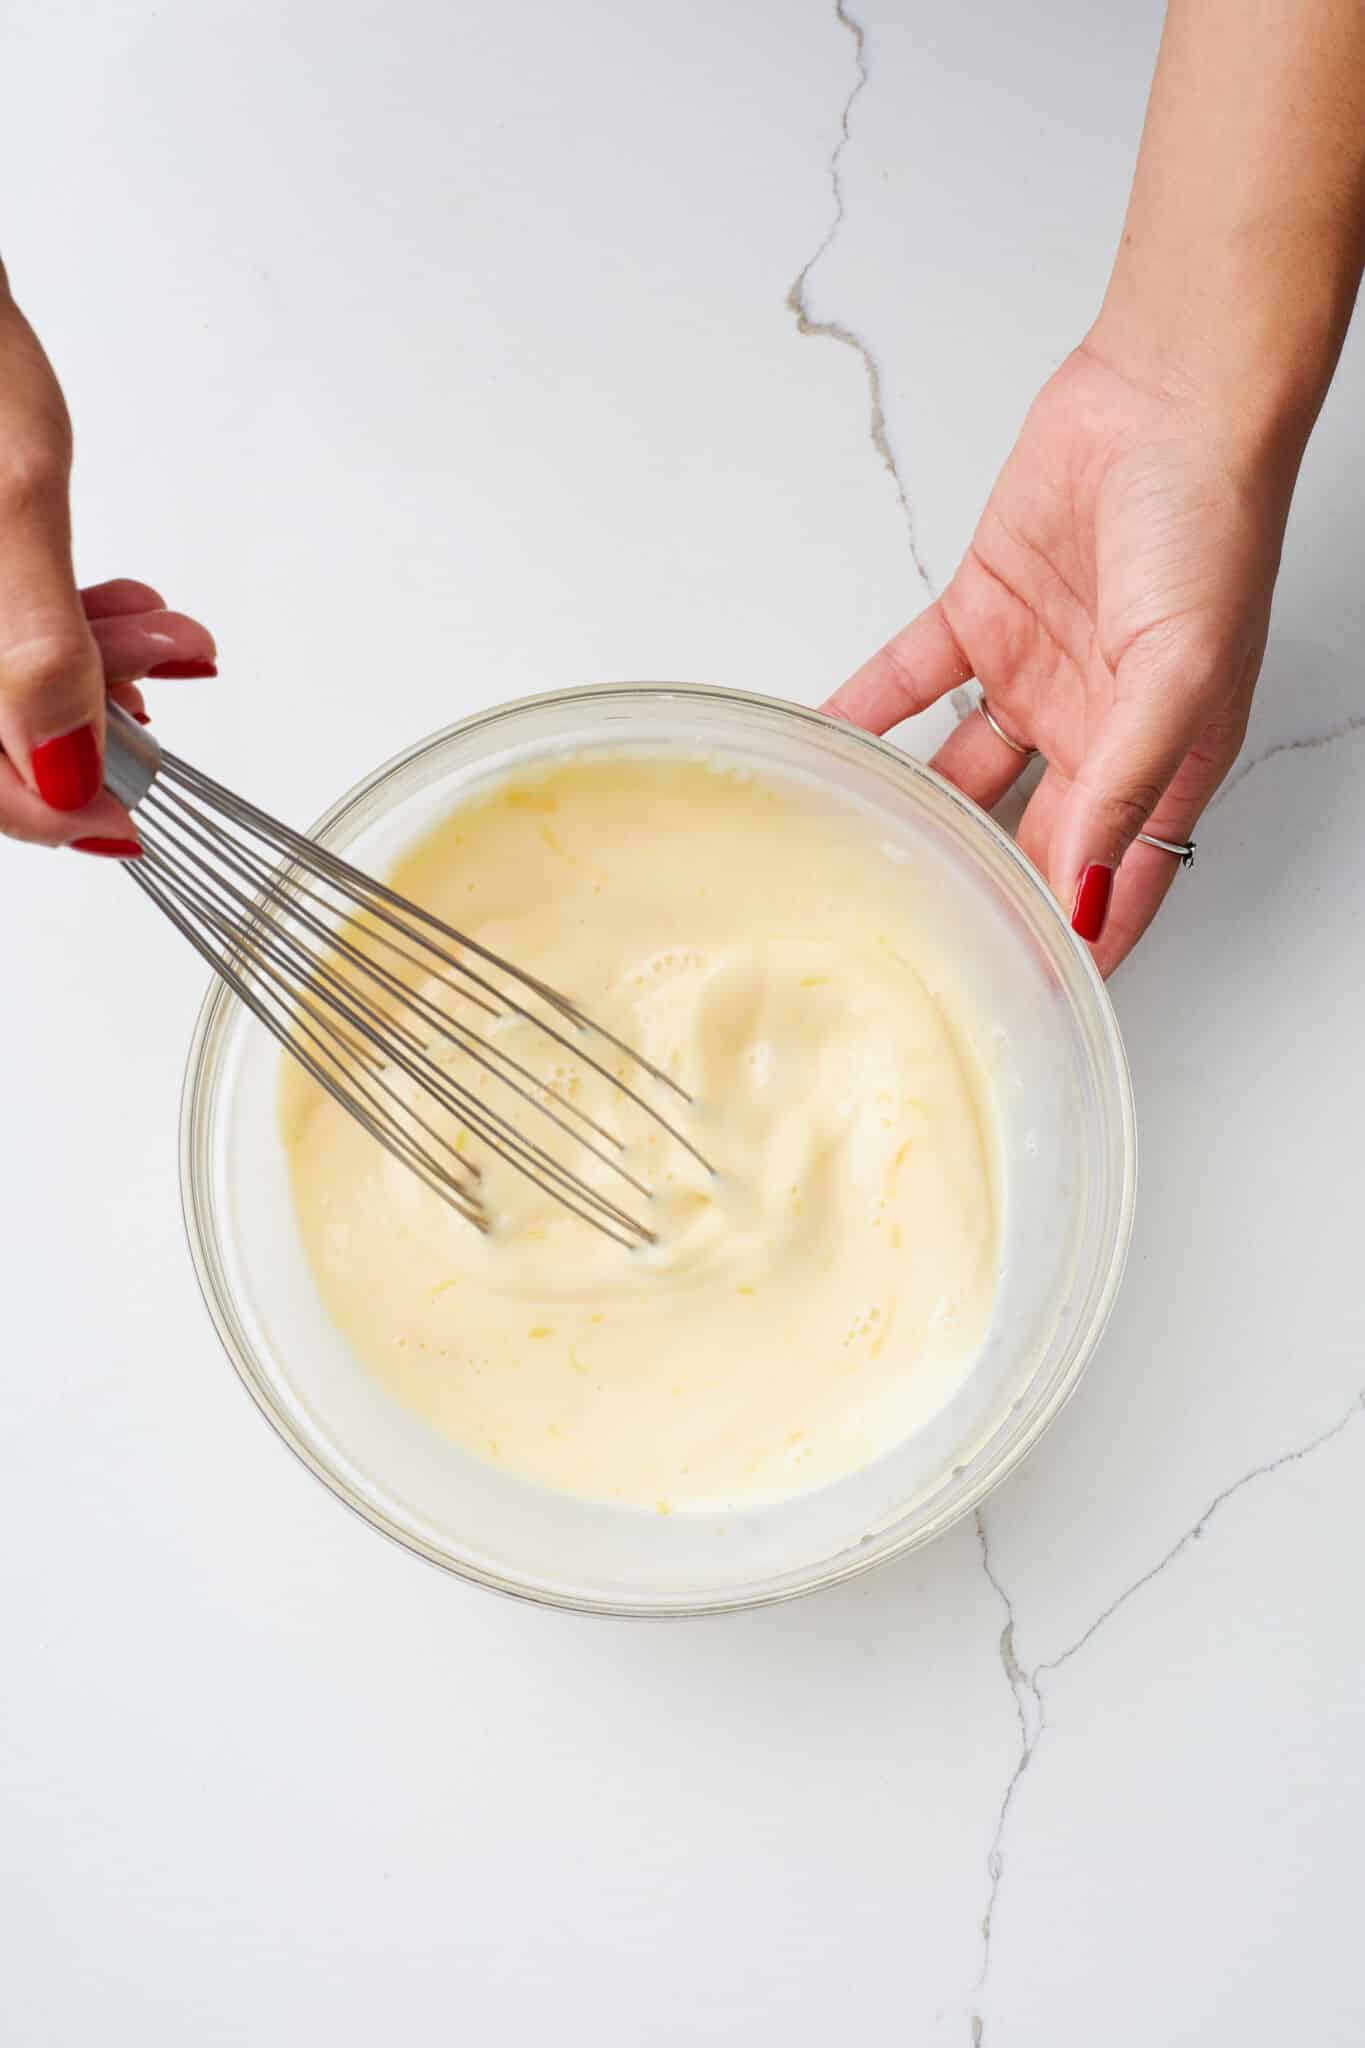
- Add eggs and flavoring. Whisk in the eggs, yolks, orange zest (if using), and salt.
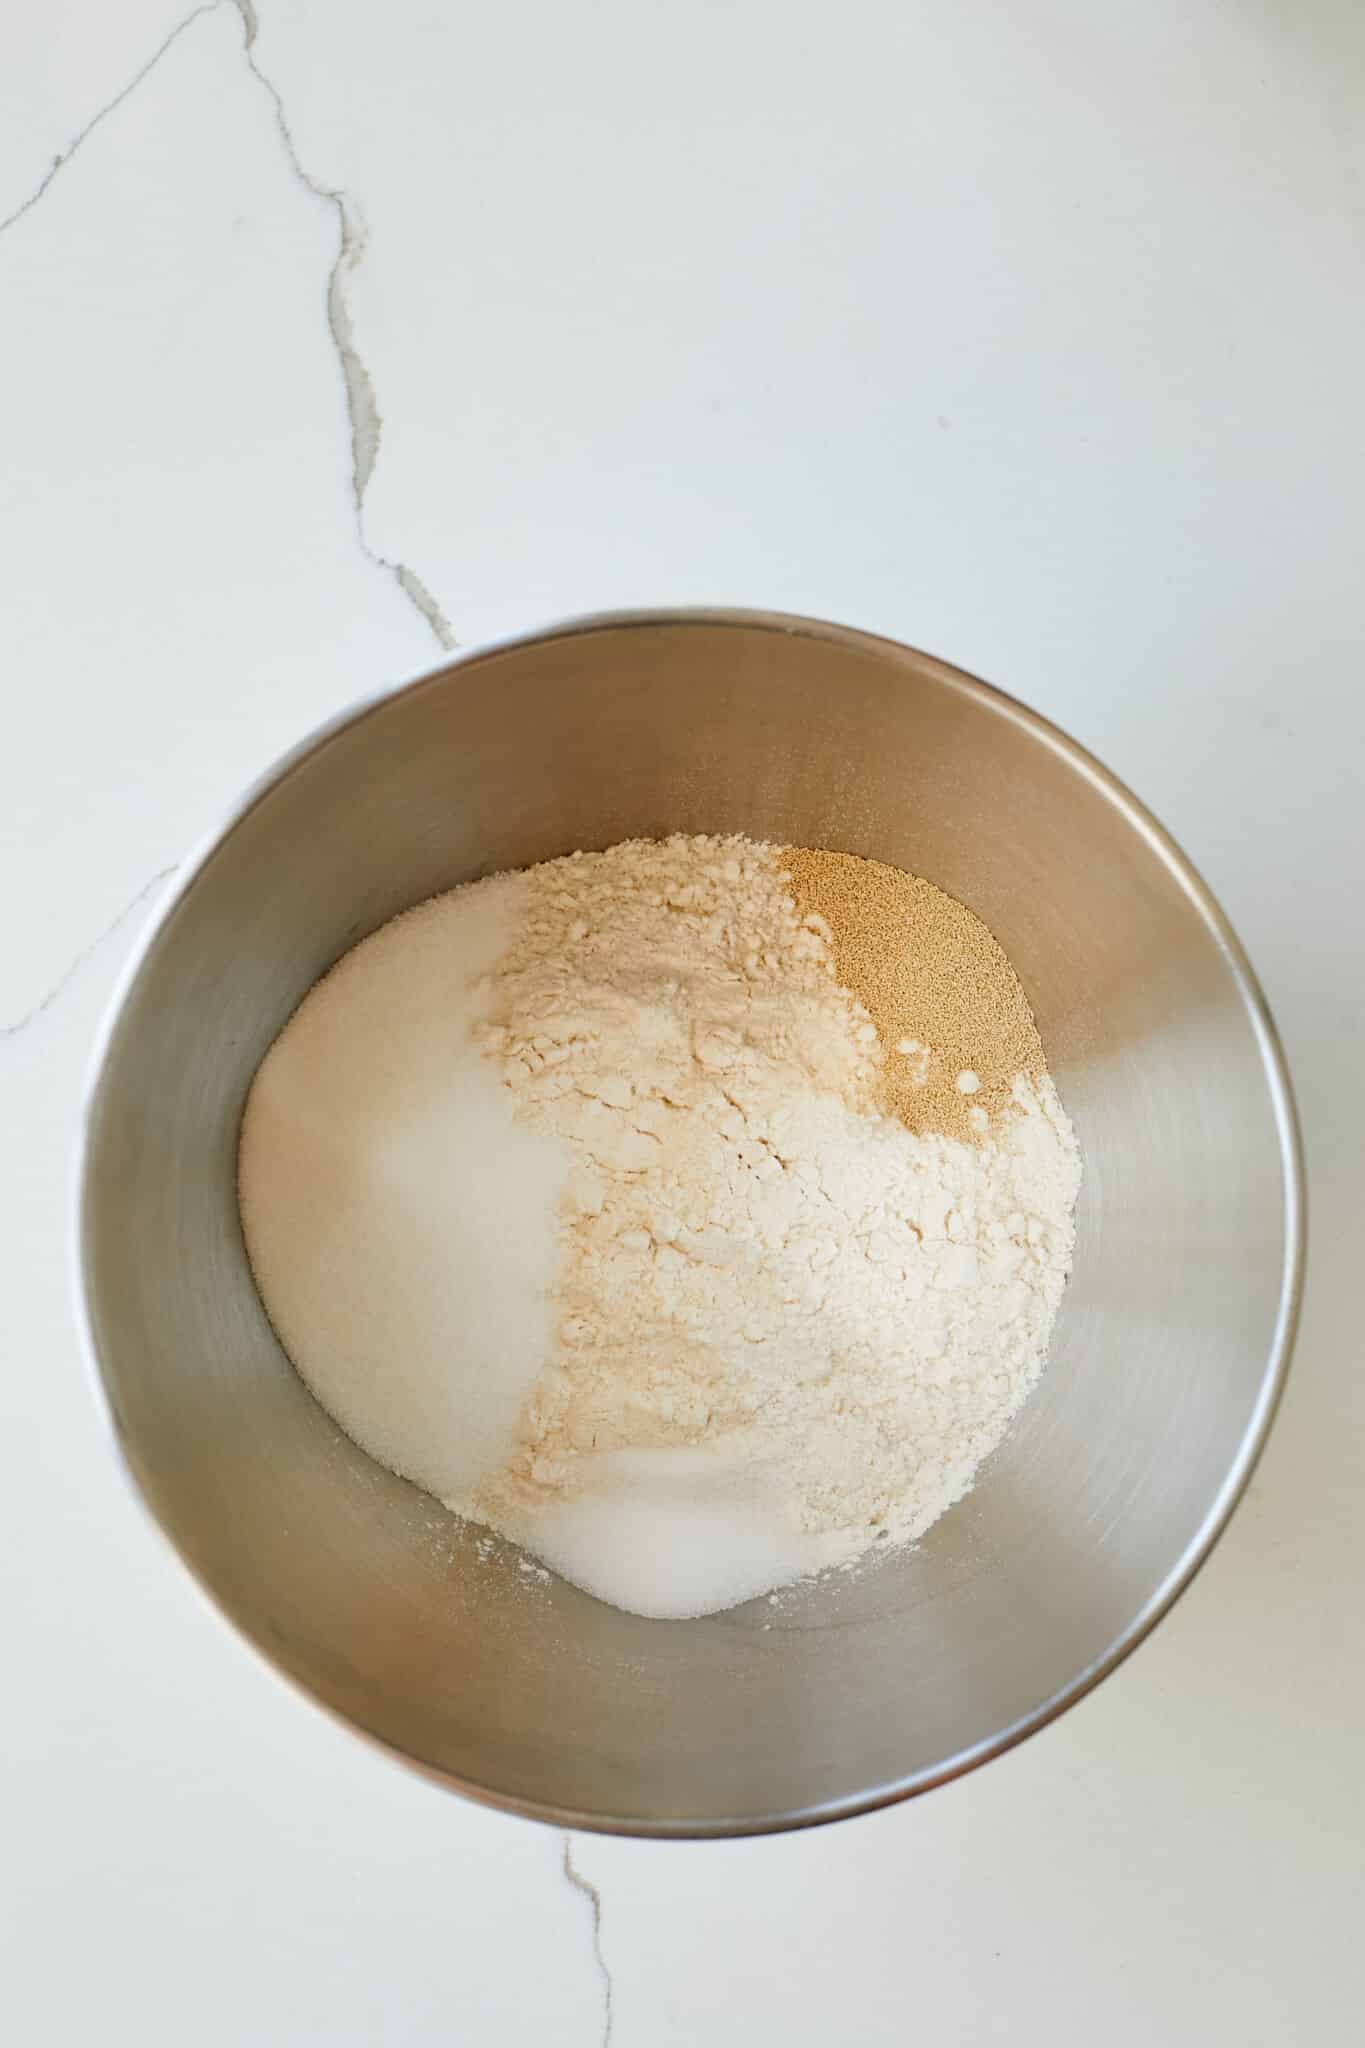
- Mix dry ingredients. In the bowl of a stand mixer fitted with a dough hook attachment, combine the flour, sugar, and yeast. Stir briefly to combine.
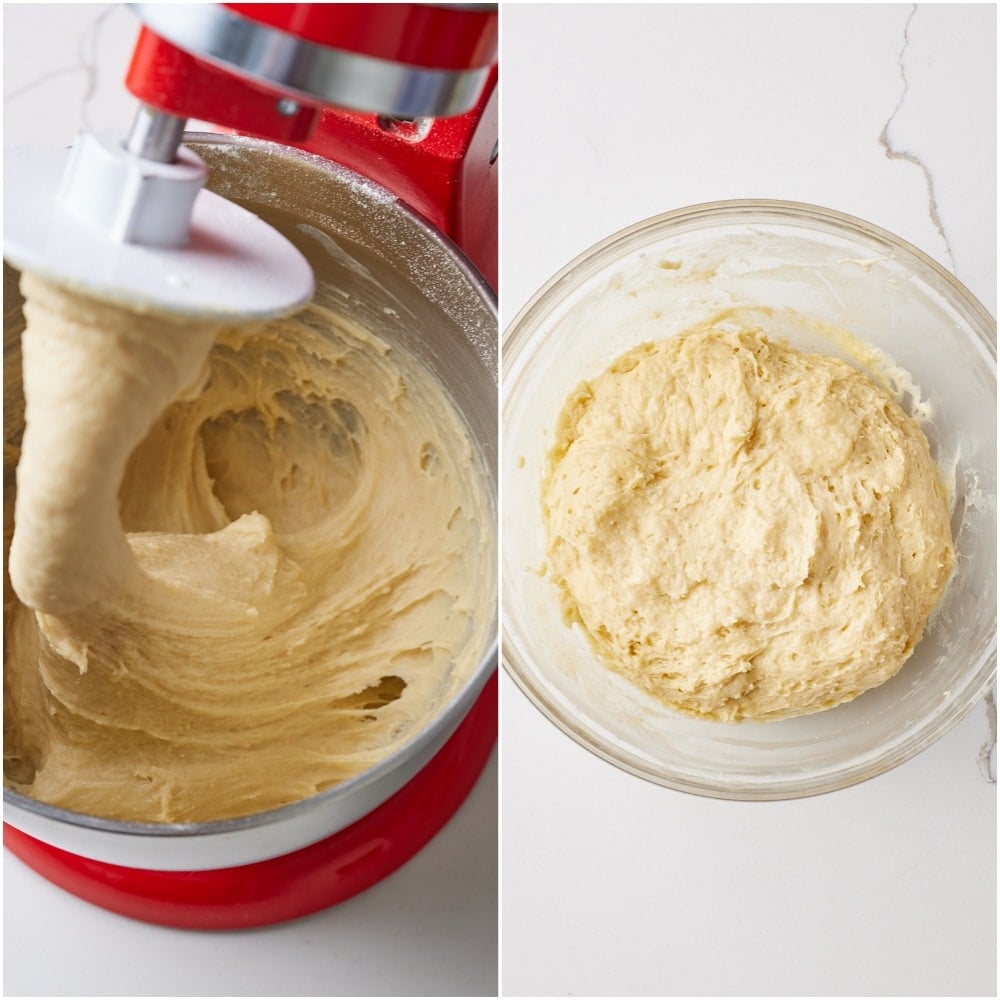
- Combine wet and dry ingredients. Pour in the wet ingredients and mix on medium speed for about 6 minutes, until a very soft, sticky, and stretchy dough forms.
Bulk Ferment the Dough
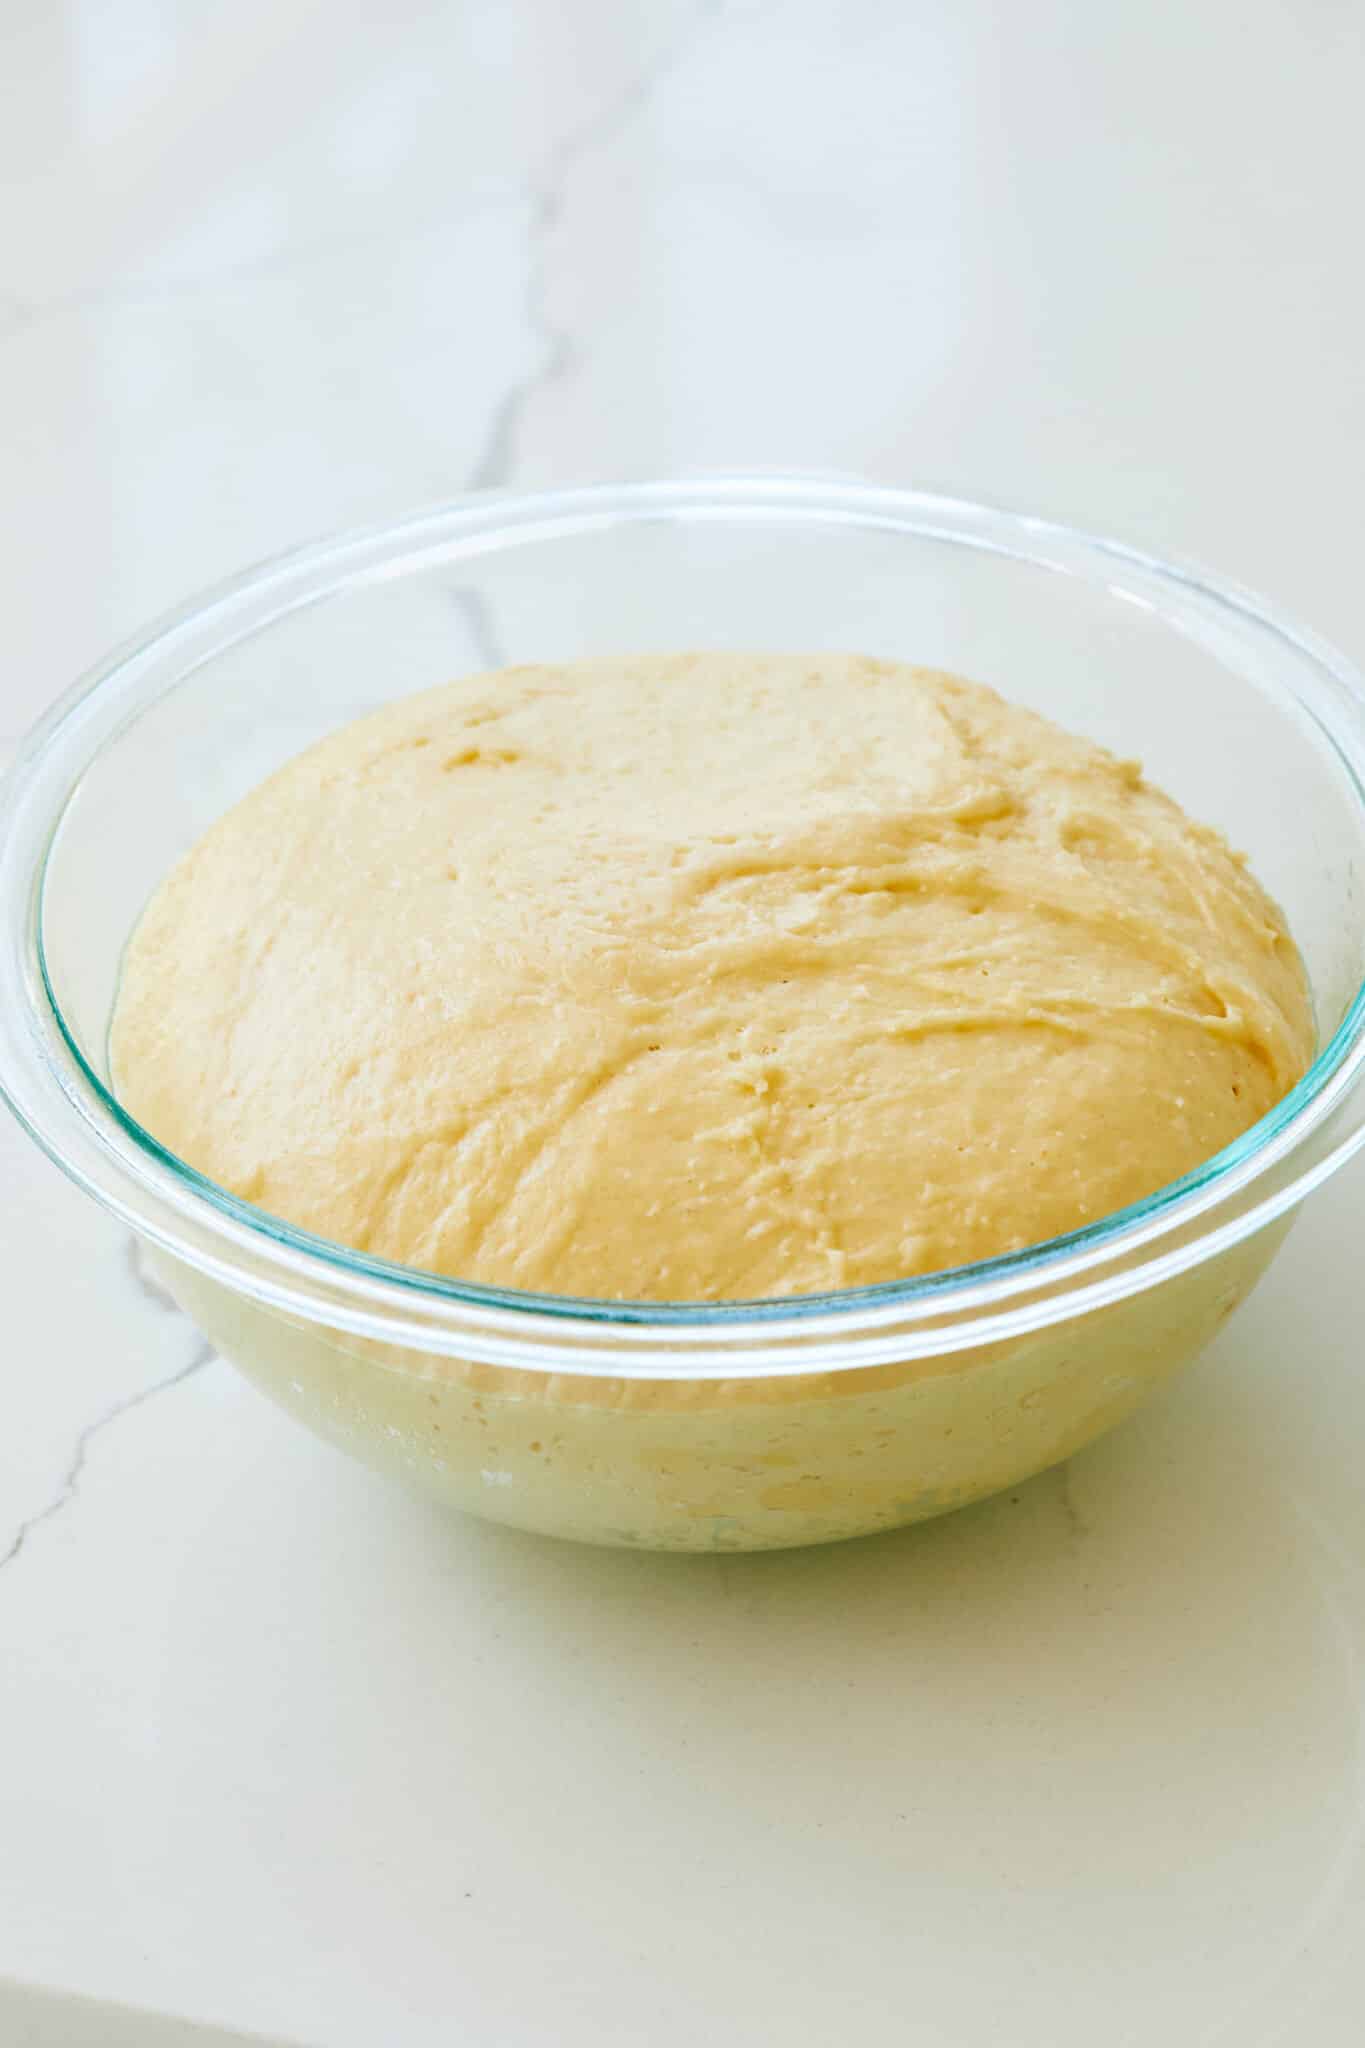
- Let dough rise. Transfer to a lightly oiled bowl, cover, and let rise in a warm place until doubled, about 90 minutes.
Shape and Proof the Sally Lunn Buns
- Butter muffin tins. Butter 18 standard-size muffin cups (one 12-cup pan plus one 6-cup pan, or two 12-cup pans with six cups left empty).
- Divide dough. With damp hands, divide the dough into 18 pieces (about 2 oz/57g each) and place them in the muffin cups.
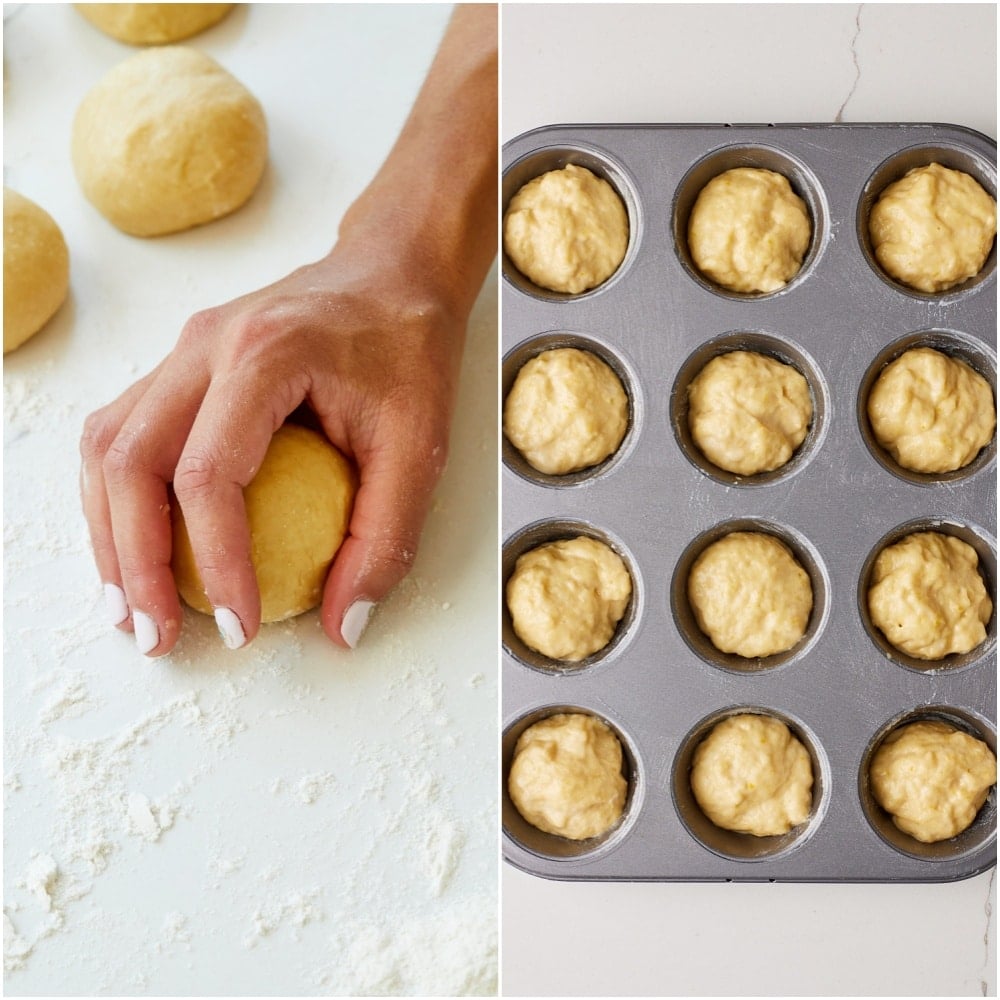
- Let rise. Cover loosely with greased plastic wrap and let rise until puffy and nearly doubled, about 30 minutes.
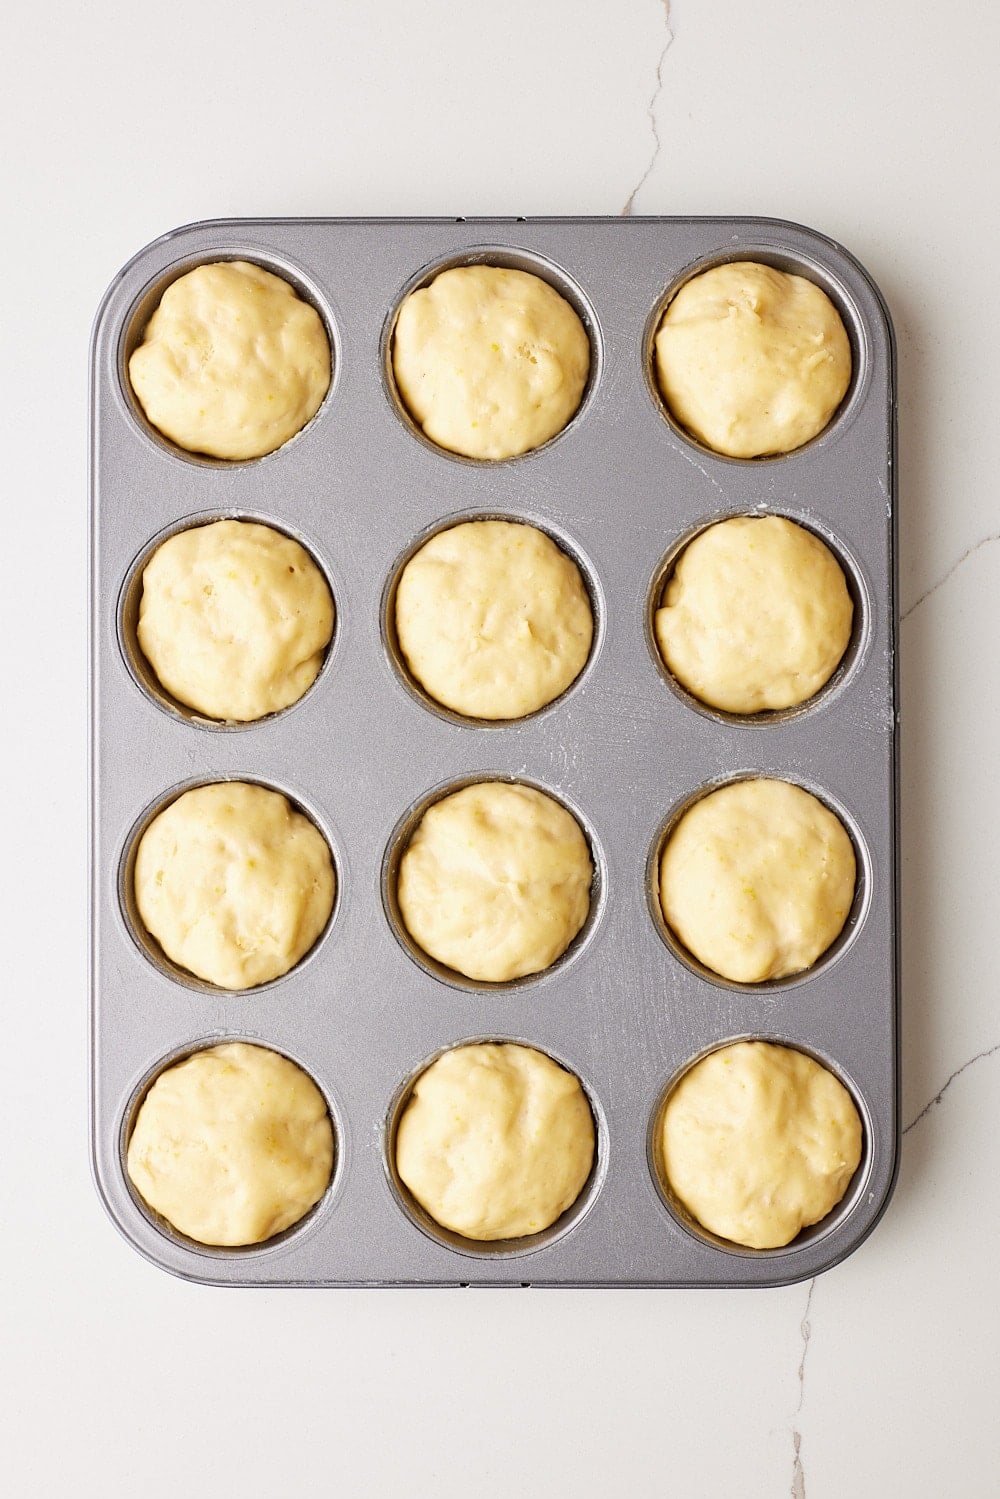
- Prepare to bake. In the meantime, preheat the oven to 375°F (190°C).
Bake and Serve the Buns
- Bake buns. Bake for 15-18 minutes, or until lightly golden.
- Brush with butter. Melt the remaining 2 tablespoons (1 oz/28 g) of butter and brush the tops while still warm.
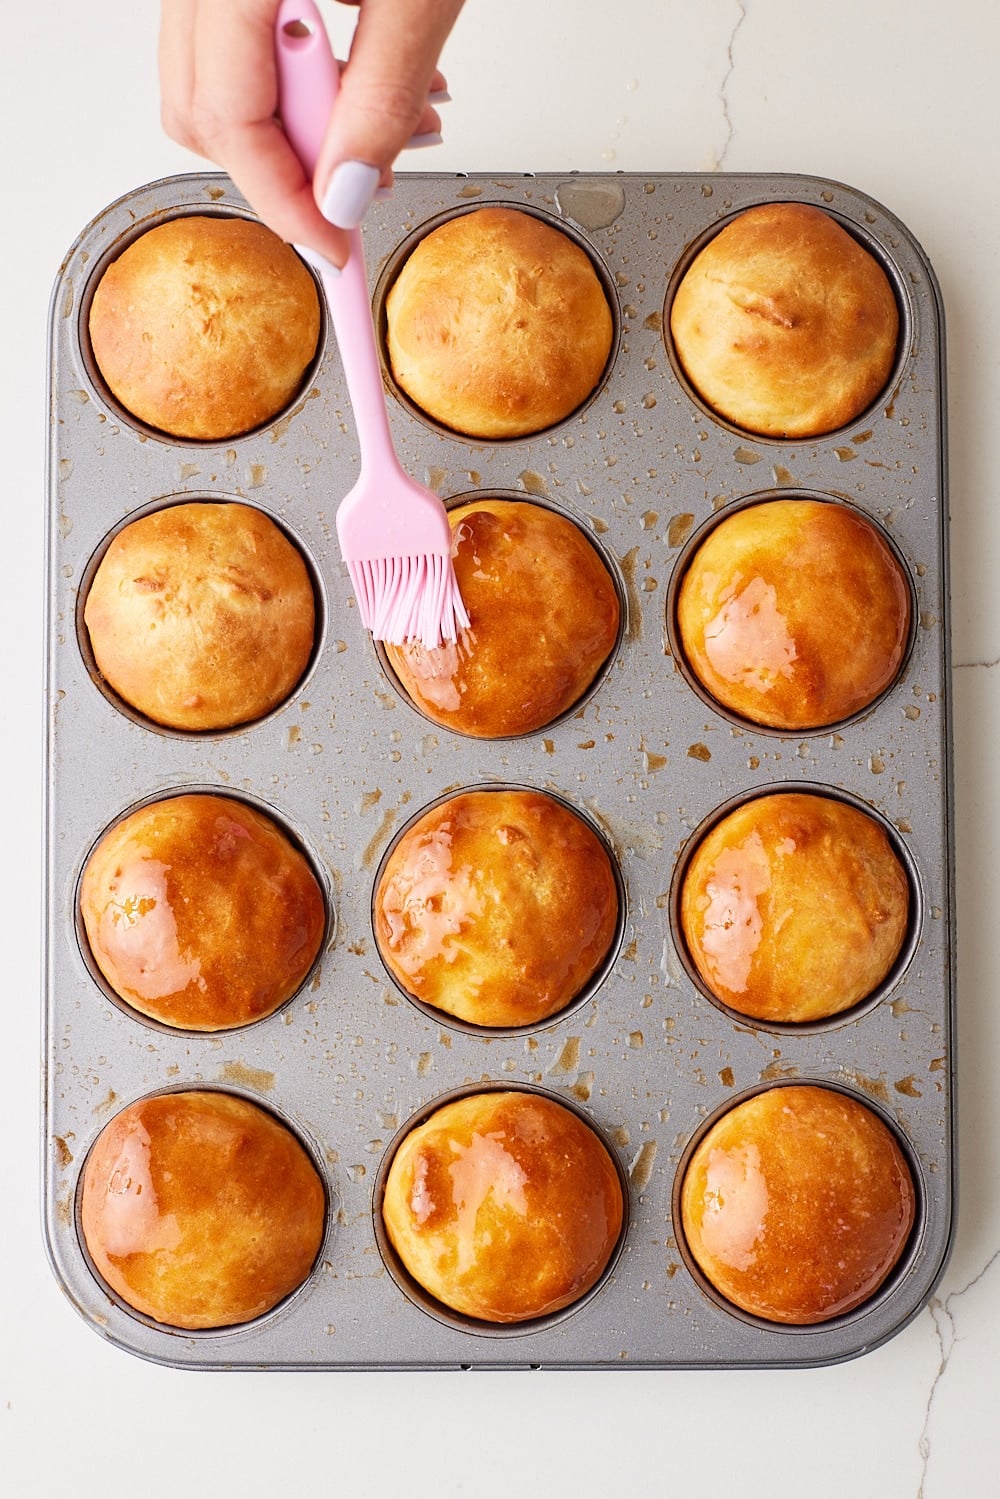
- Cool buns. Cool in the pan for 5 minutes, then transfer to a wire rack.
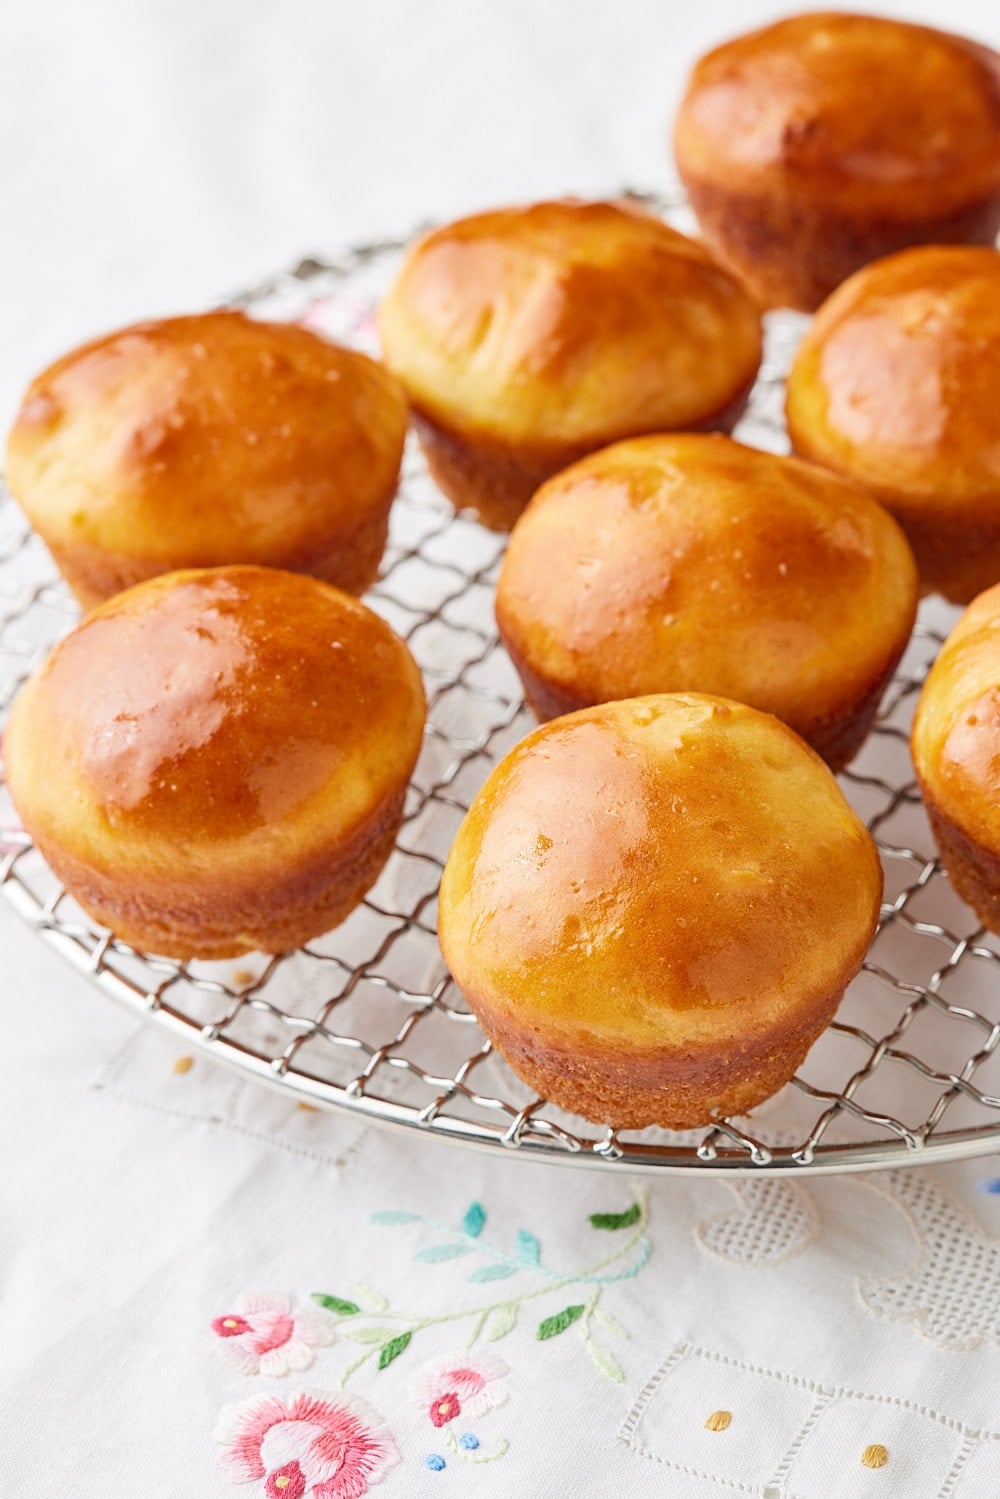
- Serve and enjoy. Enjoy warm with butter and jam.
FULL (PRINTABLE) RECIPE BELOW!
Gemma’s Pro Chef Tips
- You can use instant yeast or active dry yeast.
- This recipe uses instant yeast, which doesn’t need to be proofed.
- If you only have active dry yeast, add an extra ¾ teaspoon of yeast.
- Proof the yeast in the milk and butter mixture once it cools to lukewarm.
- Once foamy (in about 10 minutes), combine with the rest of the recipe.
- This recipe uses instant yeast, which doesn’t need to be proofed.
- My recipe uses muffin tins for individual Sally Lunn Buns. Some recipes bake large buns in a cake pan.
- The dough should be very soft and very sticky. This is key to the buns’ light texture.
- Be sure to use damp or lightly oiled hands to handle the dough easily. Do not add extra flour, as this will affect the texture.
- Add additional texture or flavor.
- Mix in 1/2 cup (3 oz/85 g) of raisins or currants, or 1/2 cup (2 oz/57 grams) of chopped, toasted walnuts into the dough.
- If adding raisins, currants, or nuts, knead them into the dough after it has mixed for 6 minutes and has become soft and stretchy. Mix just until evenly distributed.
- You can also flavor the dough with 1 teaspoon of cinnamon or 1/2 teaspoon of mixed spice.
- Add when mixing the dry ingredients.
- Mix in 1/2 cup (3 oz/85 g) of raisins or currants, or 1/2 cup (2 oz/57 grams) of chopped, toasted walnuts into the dough.
- Use two muffin tins. Generously butter 18 standard-size muffin cups (one 12-cup pan plus one 6-cup pan, or two 12-cup pans with six cups left empty).
- Let the buns rise until puffy. They should be puffy, and not just doubled, for the best texture.
- Pull these buns out of the oven once they are evenly golden. They can dry out if they get too dark.
- Brush with butter while the baked buns are still warm. This keeps the crust soft and adds flavor.
Make Ahead and Storage Instructions
Make-ahead tips
- You can shape and proof the buns, cover, and let them proof in the fridge overnight.
- The next day, let them sit at room temperature until puffy and nearly doubled in size, and then bake.
- You can also put the Sally Lunn Buns in a freezer container or bag and freeze them for up to two months.
- Before serving, defrost at room temperature for 30 minutes, or microwave for about 10 seconds.
How to serve leftovers
- Store leftover buns in an airtight container at room temperature for up to two days.
- For longer storage, freeze in an airtight container for up to two months.
- Defrost at room temperature for 30 minutes or microwave for about 10 seconds.
FAQs
Can I make Sally Lund Buns by hand?
- Yes! A stand mixer makes the soft dough easier to handle, but Sally Lunn Buns can absolutely be made by hand.
- Mix the ingredients together in a large bowl, then knead the dough on a lightly oiled work surface for about 10–12 minutes, or until it’s smooth, streaky, and still soft and sticky.
Can I make these rolls gluten-free?
- I don’t recommend making Sally Lunn Buns with gluten-free flour. These buns need the strength of bread flour for their signature texture, and gluten-free flour won’t produce the same results.
- For a gluten-free option, please try my 3-Ingredient Breadsticks Recipe (No Yeast).
Is it possible to make Sally Lunn Buns without eggs?
- I don’t recommend making Sally Lunn Buns with an egg substitute, because eggs are essential to the texture and flavor.
- For delicious egg-free roll options, try my Waterford Blaas (Authentic Irish Rolls) or my quick Dinner Rolls Recipe.
What are some good ways to serve Sally Lunn Buns?
- Serve Sally Lunn Buns warm at breakfast with butter, jam, or marmalade, and honey.
- Put these traditional buns out for a brunch spread with eggs, breakfast potatoes, and sausage.
- Use cut up stale buns for a strata.
- Have a tea party with Sally Lunn Buns, Lemon Curd, and Compound Butter or Clotted Cream.
- Serve as a tempting side to soup or chili, or in the bread basket at dinner.
- Top Sally Lunn Buns with berries and whipped cream for a delightful dessert.
More Bun and Roll Recipes
Try These Recipes!



Sally Lunn Buns


Ingredients
- 1 cup plus 2 tablespoons (9 fl oz/280 ml) whole milk
- 6 tablespoons (3 oz/85 g) plus 2 tablespoons (1 oz/28 g) butter , softened
- 2 large eggs , at room temperature
- 2 large egg yolks , at room temperature
- 1 ½ teaspoons orange zest (optional)
- 1 teaspoon salt
- 3 ¼ cups (1 lb ¼ oz/461 g) bread flour
- ¼ cup (2 oz/57 g) granulated sugar
- 1 tablespoon instant yeast
Instructions
To Make the Sally Lunn Buns Dough
- Microwave the milk in a glass jug for 60-90 seconds, or until simmering. (You can also use a small saucepan).
- Add 6 tablespoons (3 oz/85 g) of butter, and let cool until lukewarm, about 5 minutes.
- Whisk in the eggs, yolks, orange zest (if using), and salt.
- In the bowl of a stand mixer fitted with a dough hook attachment, combine the flour, sugar, and yeast. Stir briefly to combine.
- Pour in the wet ingredients and mix on medium speed for about 6 minutes, until a very soft, sticky, and stretchy dough forms.
To Bulk Ferment the Sally Lunn Buns Dough
- Transfer to a lightly oiled bowl, cover, and let rise in a warm place until doubled, about 90 minutes.
To Shape and Proof the Sally Lunn Buns
- Butter 18 muffin cups.
- With damp hands, divide the dough into 18 pieces (about 2 oz/57g each) and place them in the muffin cups.
- Cover loosely with greased cling film and let rise until puffy and nearly doubled, about 30 minutes.
- In the meantime, preheat the oven to 375°F (190°C).
To Bake the Sally Lunn Buns
- Bake for 15-18 minutes, or until lightly golden.
- Melt the remaining 2 tablespoons (1 oz/28 g) of butter and brush the tops while still warm.
- Cool in the pan for 5 minutes, then transfer to a wire rack.
To Serve and Store the Sally Lunn Buns
- Enjoy warm with butter and jam! Store leftovers in an airtight container at room temperature for up to 2 days.
Recipe Notes
- You can use instant yeast or active dry yeast.
- This recipe uses instant yeast, which doesn’t need to be proofed.
- If you only have active dry yeast, add an extra ¾ teaspoon of yeast.
- Proof the yeast in the milk and butter mixture once it cools to lukewarm.
- Once foamy (in about 10 minutes), combine with the rest of the recipe.
- This recipe uses instant yeast, which doesn’t need to be proofed.
- My recipe uses muffin tins for individual Sally Lunn Buns. Some recipes bake large buns in a cake pan.
- The dough should be very soft and very sticky. This is key to the buns' light texture.
- Be sure to use damp or lightly oiled hands to handle the dough easily. Do not add extra flour, as this will affect the texture.
- Add additional texture or flavor.
- Mix in 1/2 cup (3 oz/85 g) of raisins or currants, or 1/2 cup (2 oz/57 grams) of chopped, toasted walnuts into the dough.
- If adding raisins, currants, or nuts, knead them into the dough after it has mixed for 6 minutes and has become soft and stretchy. Mix just until evenly distributed.
- You can also flavor the dough with 1 teaspoon of cinnamon or 1/2 teaspoon of mixed spice.
- Add when mixing the dry ingredients.
- Mix in 1/2 cup (3 oz/85 g) of raisins or currants, or 1/2 cup (2 oz/57 grams) of chopped, toasted walnuts into the dough.
- Use two muffin tins. Generously butter 18 standard-size muffin cups (one 12-cup pan plus one 6-cup pan, or two 12-cup pans with six cups left empty).
- Let the buns rise until puffy. They should be puffy, and not just doubled, for the best texture.
- Pull these buns out of the oven once they are evenly golden. They can dry out if they get too dark.
- Brush with butter while the baked buns are still warm. This keeps the crust soft and adds flavor.








Delicious and simple to make.
can you freeze the dough and bake later?
Here in Colonial Williamsburg the King’s Arms Tavern serves delicious Sally Lunn bread so buns sound good & I’ll be trying this recipe. The bread is very good & easy to make also.
Thank you for the recipe! If Anyone goes to Bath it is 100% worth it to go to Sally Lunns!
I haven’t tried the recipe yet, but I noticed that in your list of ingredients, you have:
6 tablespoons (3 oz/85 g) plus 2 tablespoons (1 oz/14 g) butter , softened
The “2 tablespoons” should be followed by “(1 oz/28g) butter, softened”
That change would be consistent with later instructions about buttering the tops of the baked buns. It’s obvious that the change will make little difference, unless 14g just isn’t enough.
How can I make this as a loaf? Type of pan, cooking time, etc.
Hi Gemma , NOW your talking 😂
My daughter’s going away meeting friends for the weekend , before her friend moves out of the country . She started “The List” this morning and said “And something yum for Saturday morning breakfast mum”
THIS is the YUM I’ll be doing Friday morning . Will they be ok to maybe pop in the oven for a bit while she cooks the eggs Gemma ?
Might keep a few for meself . . . Who am I kidding 🙄 i know I will 😂 Thanks Gemma , have a lovely day 🤗
This recipe looks very good. I have had great luck with your recipes. Do you have a recipe for Cornish Saffron Buns?